We are passionate about succulents and satisfying food...
slice & sizzle summer

it's all here...
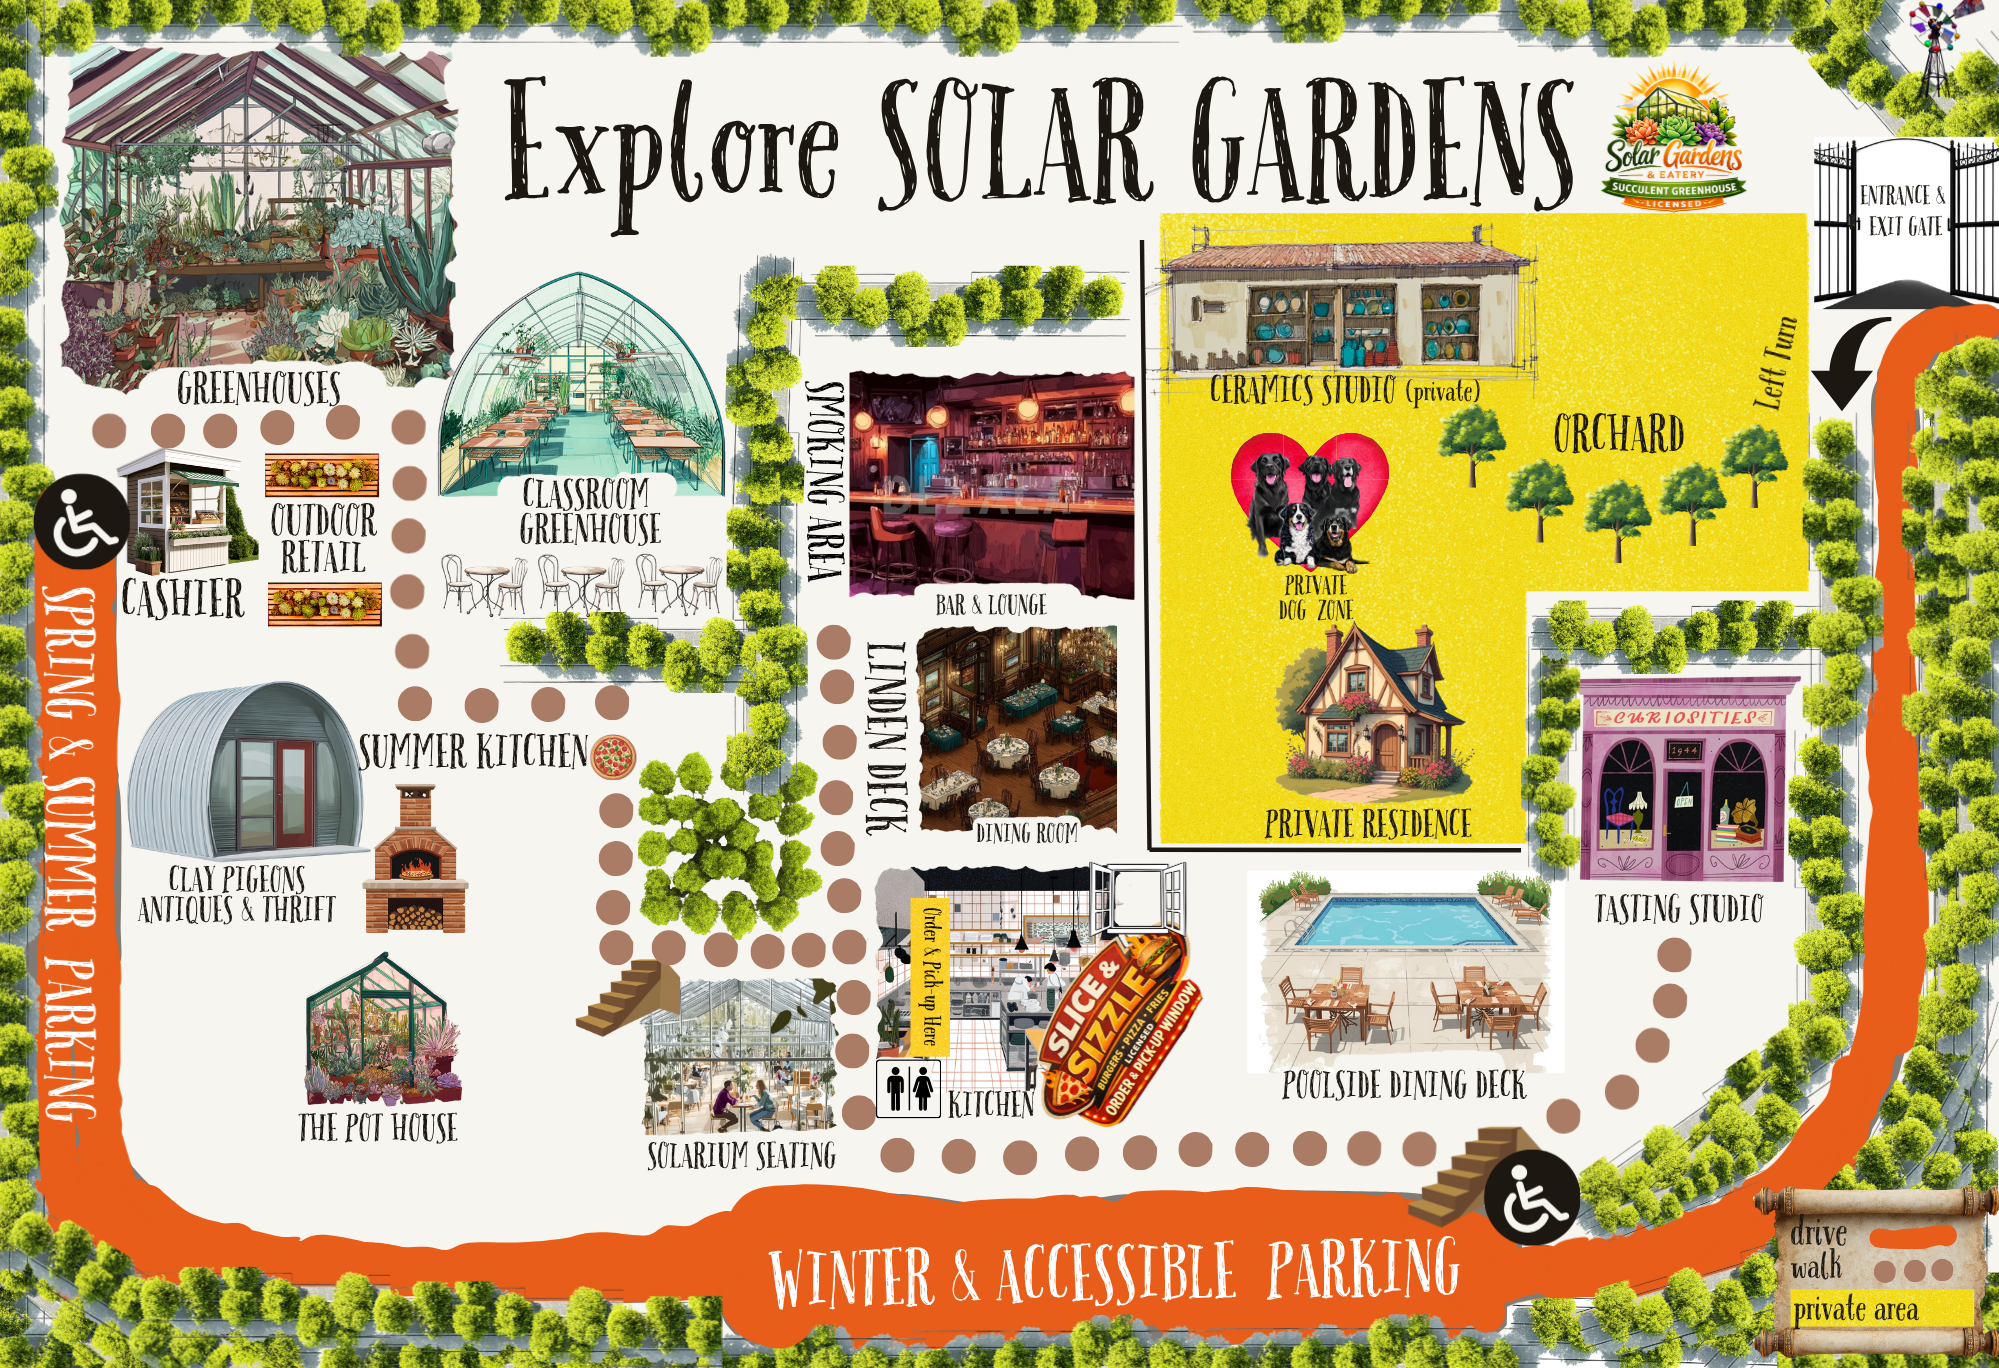
visit our little solar gardens village
experience solar gardens video

the calendar info
Explore our current classes and upcoming events within the calendar below. Click on the photos to get more info about the class.
Check back often. as we update this section as soon as we've set class dates and scheduled special events.
Some of the classes listed in this calendar (currently scheduled or already completed) may be repeated in the future.
Current and past classes listed in our calendar can easily be booked for private classes as long as you have 5 or more people who want to take the class together.
We book all of our events, classes and private parties by email: solargardenclasses@gmail.com.
During our peak seasons our response may take up 48 hours.
All of our classes are located on our acreage and are held rain or shine as we have a variety of spaces to accommodate different weather conditions.
Please try to arrive 15 to 20 minutes early for class. This allows time for payment, as well as time to select your seat and choose your pot & plants.
We are licensed and so you are able to order beverages to enjoy during your class. For most classes we don't require pre-payment or a deposit. However, we do for a few of our classes which take a great deal of preparation time pre-class.
Similarly, for special events like our multi-course dinners we always require a deposit.
We also can arrange private MYOPs (Make-Your-Own-Pizza) parties. https://www.solargardens.ca/make-your-own-pizza-myop-parties-1. These can be combined with a private class for added fun. Or you can just book a group MYOP on it's own for a fun get-together.
Use this calendar for current prices. Prices may have changed since previous years' print ads, our old website or outside sources. Make note of the prices listed here as they will be the prices charged. Prices do not include taxes.
current & past classes/events
about our classes
Take a Class!
We offer a variety of fun and diverse classes here at Solar Gardens. From succulent classes, to baking or craft classes, we have a lot that you can choose from.
Public Classes:
Scroll below to see available classes and dates.
Did you find one you would like to attend? Go ahead and register.
Private Classes:
Almost all of our classes can be offered in private groups.
If you have a group of 5 or more who want to do a private group together, contact us at solargardenclasses@gmail.com
Private groups are perfect to arrange with family, friends or coworkers.
They are a fun shared experience for reunions, showers, birthdays, team building or other special events.
Consider combining your private group with Make-Your-Own-Pizzas (MYOP) or appetizers.
make-your-own-pizza myop parties

baking classes

hours, map & contact
- Physical address: 18898 SK-60, RM of Vanscoy No. 345, SK, Canada
- email for mailing address
- +1-3062802762 - Roger
- +1-3062802761 - Slice & Sizzle Eatery
- solargardenclasses@gmail.com
- Greenhouse & Tasting Studio Saturdays & Sundays 10 to 5 Slice & Sizzle Eatery Saturday & Sundays 11 to 5 *All other days reserved for private classes, pizza parties, multi-course dinners and events Closed all stat holidays - Victoria Day, Canada Day, Labour Day, Remembrance Day
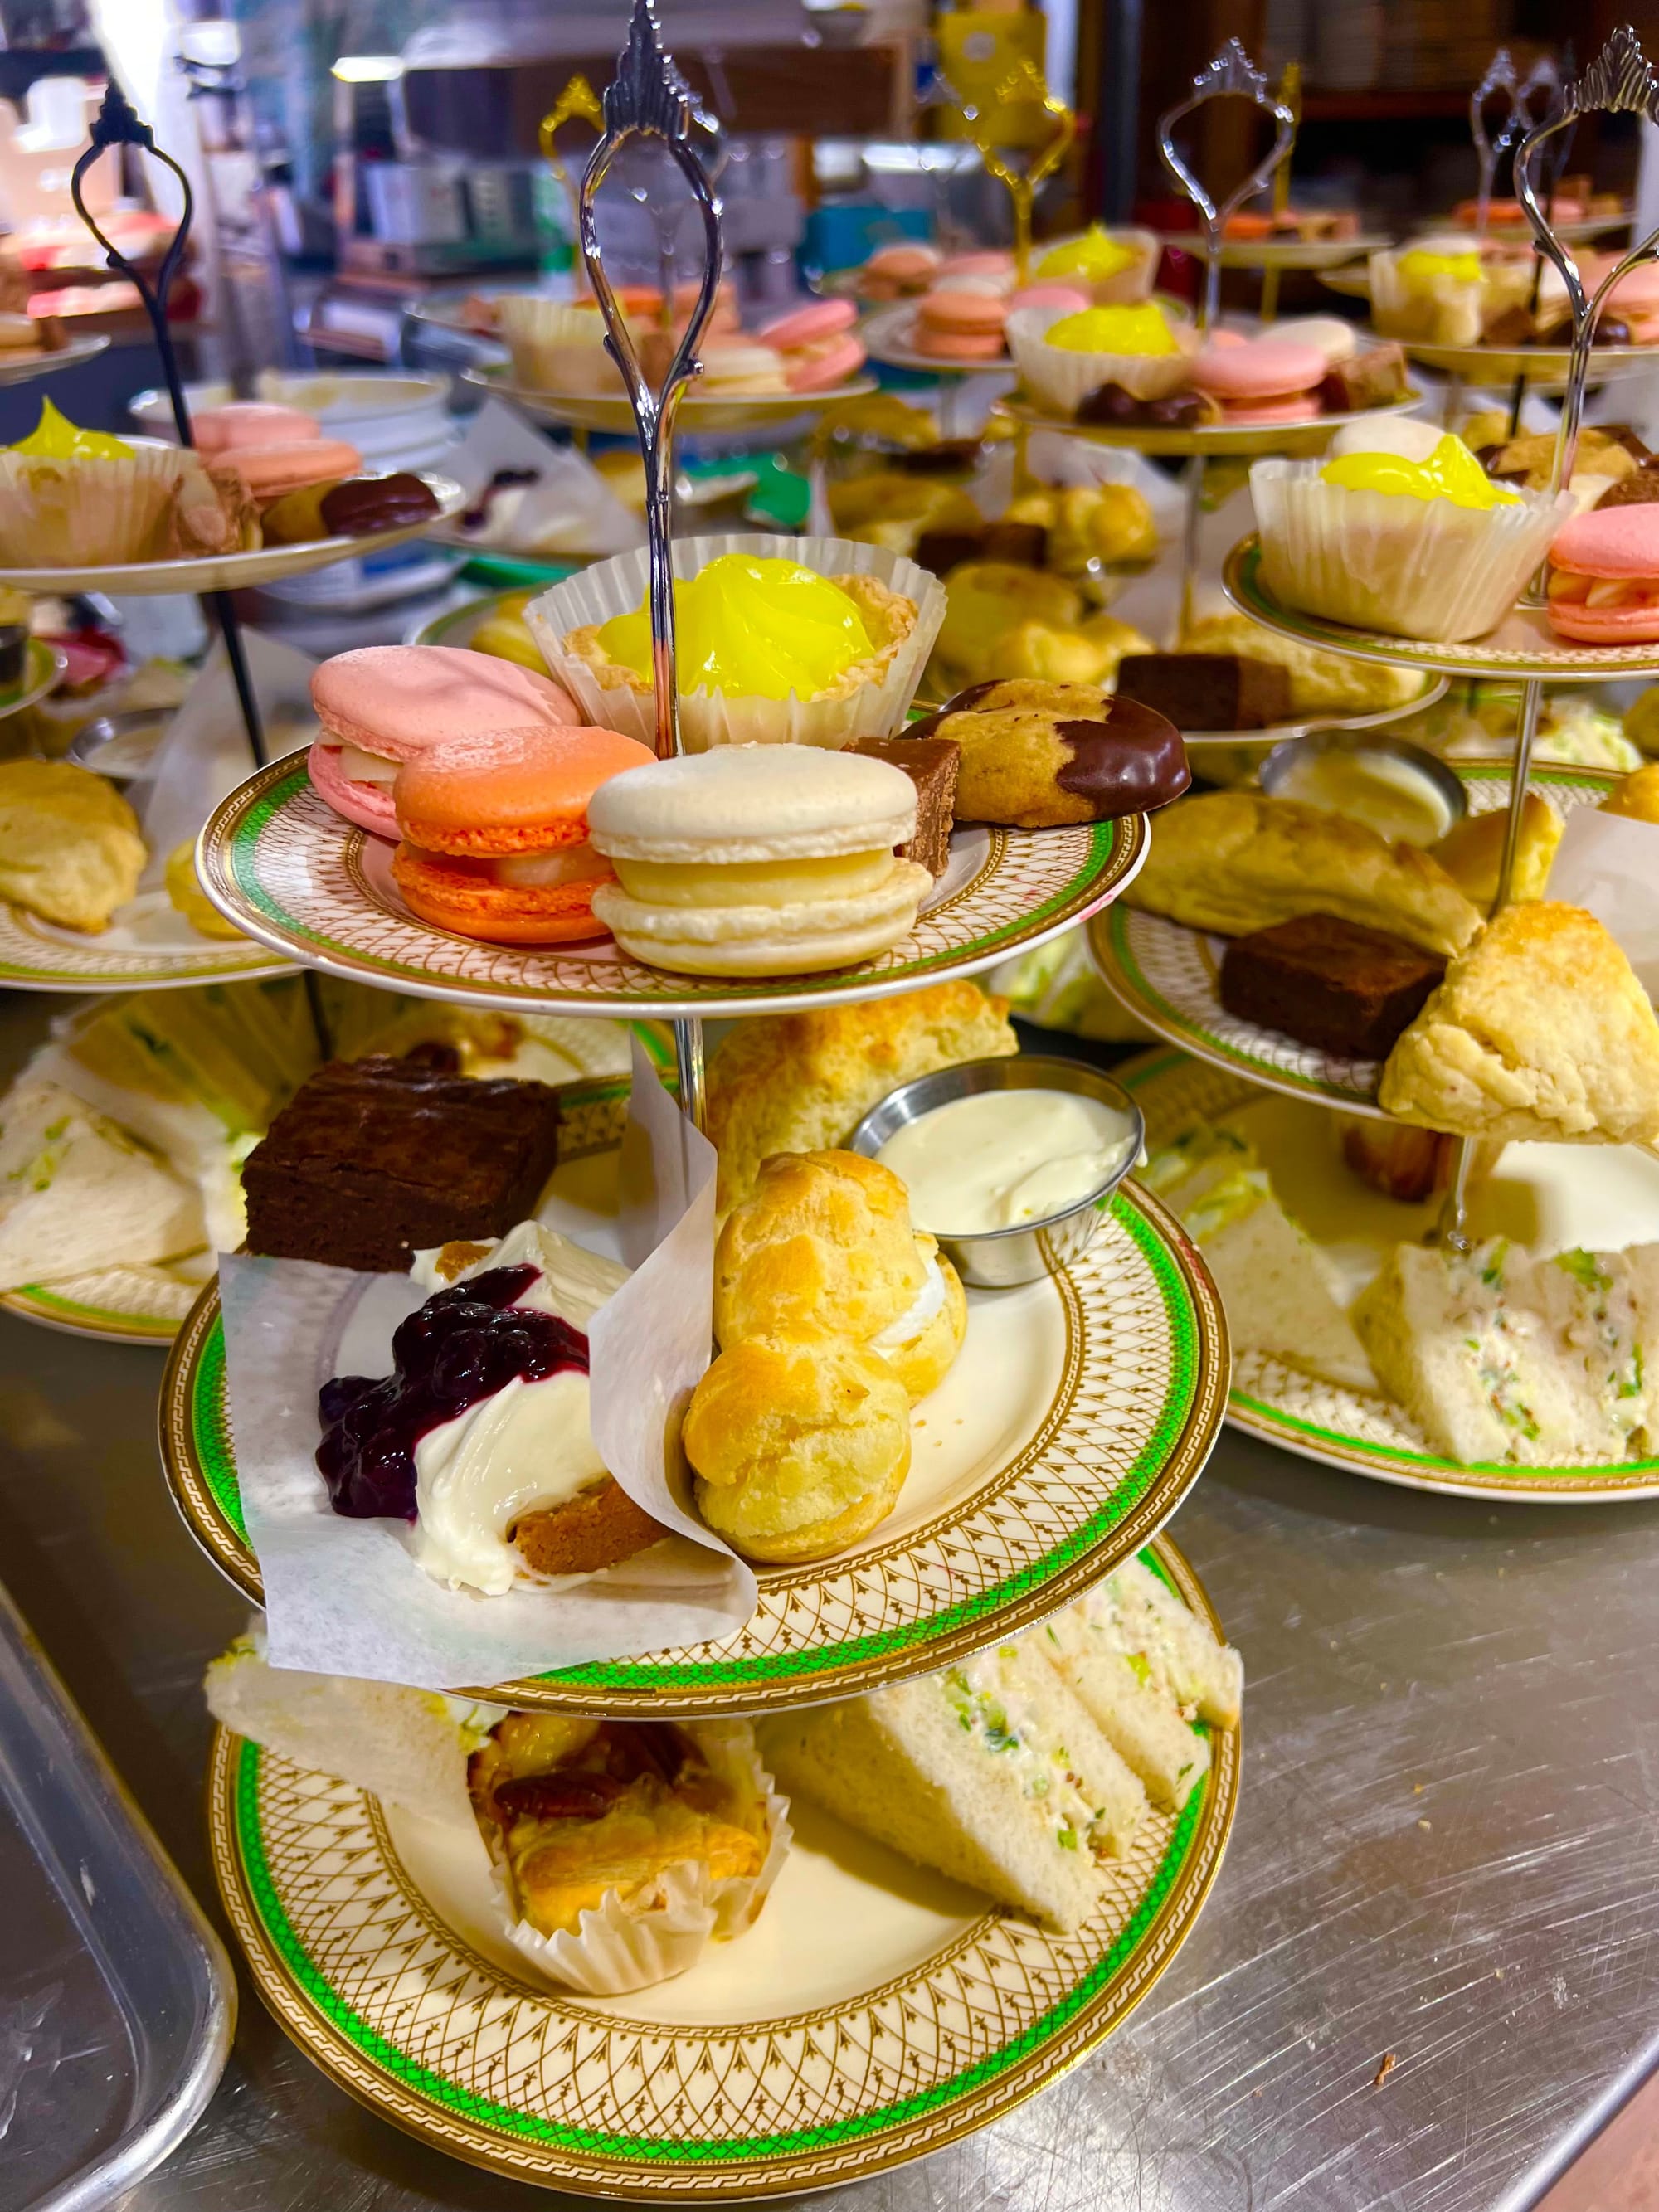
slice & sizzle menu


Whether you want to take a private cooking, baking or succulent class, hold a special dinner in our elegant dining room, or relax with a Make-Your-Own-Pizza and appetizer party on the pool deck, we are a great place for you to create new memories with your group.
We offer private classes and events year-round, have a variety of rooms that will accommodate your group regardless of the weather, and we are licensed.
where good food just happens
On weekends during the gardening season, this is where our chef prepares tasty fare for order at the Slice and Sizzle Grill.
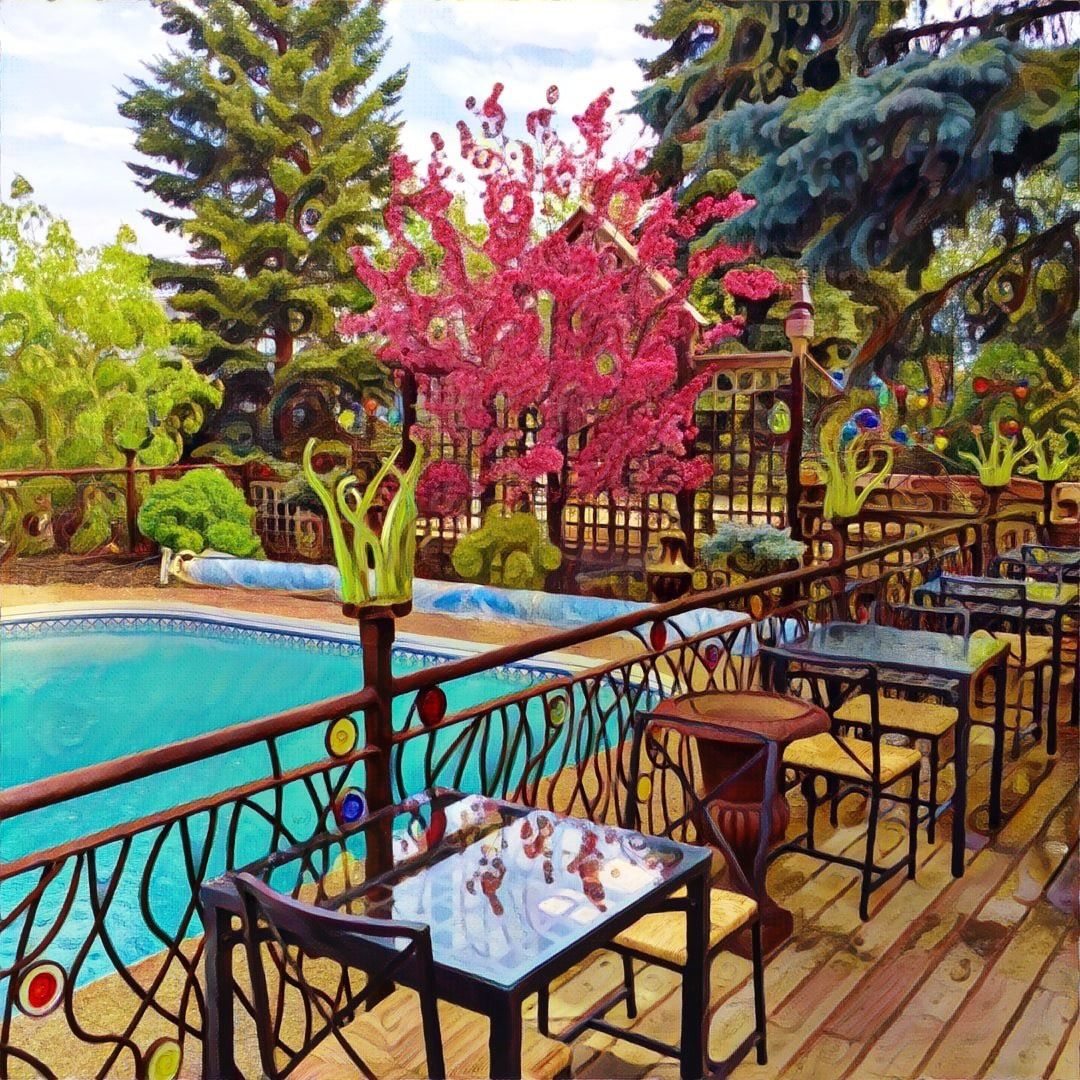
We are fully licensed. Order a burger and beer or a frozen margarita, and relax in one of our surrounding eating areas (Poolside Deck, Glass Conservatory or Linden Deck).
Artisan Breads are baked in this kitchen for use in our menu, and are also sold in our tasting studio along with other baked treats.
This kitchen is where we prepare food for private parties, ticketed multicourse dinners and Make-Your-Own-Pizza (MYOP) parties.
It is also our breadmaking and cooking classroom.
We look forward to offering small-group "Chef-led Demo and Dine Dinners" in this kitchen in 2026.
Plus, the Bistro Kitchen is home of our Candy Cave. Look through our Cave window and you may see a new batch of Copper Kettle Fudge being made, cookies being decorated or other candies being created.
You may hear our dogs barking while you are here, but they spend weekends in our private residence or relaxing in their dog zone with their human weekend companions.
We do ask that you not open any closed gates or doors marked as no-entry areas.
We thank you for respecting signage about our dog zone and other staff-only areas.
Even though our dogs are well separated from the public, we ask that you do not bring other dogs onto the property. If our dogs sense another dog's presence they get upset so we try to avoid that.
Of course, we welcome service dogs..
gallery of photos


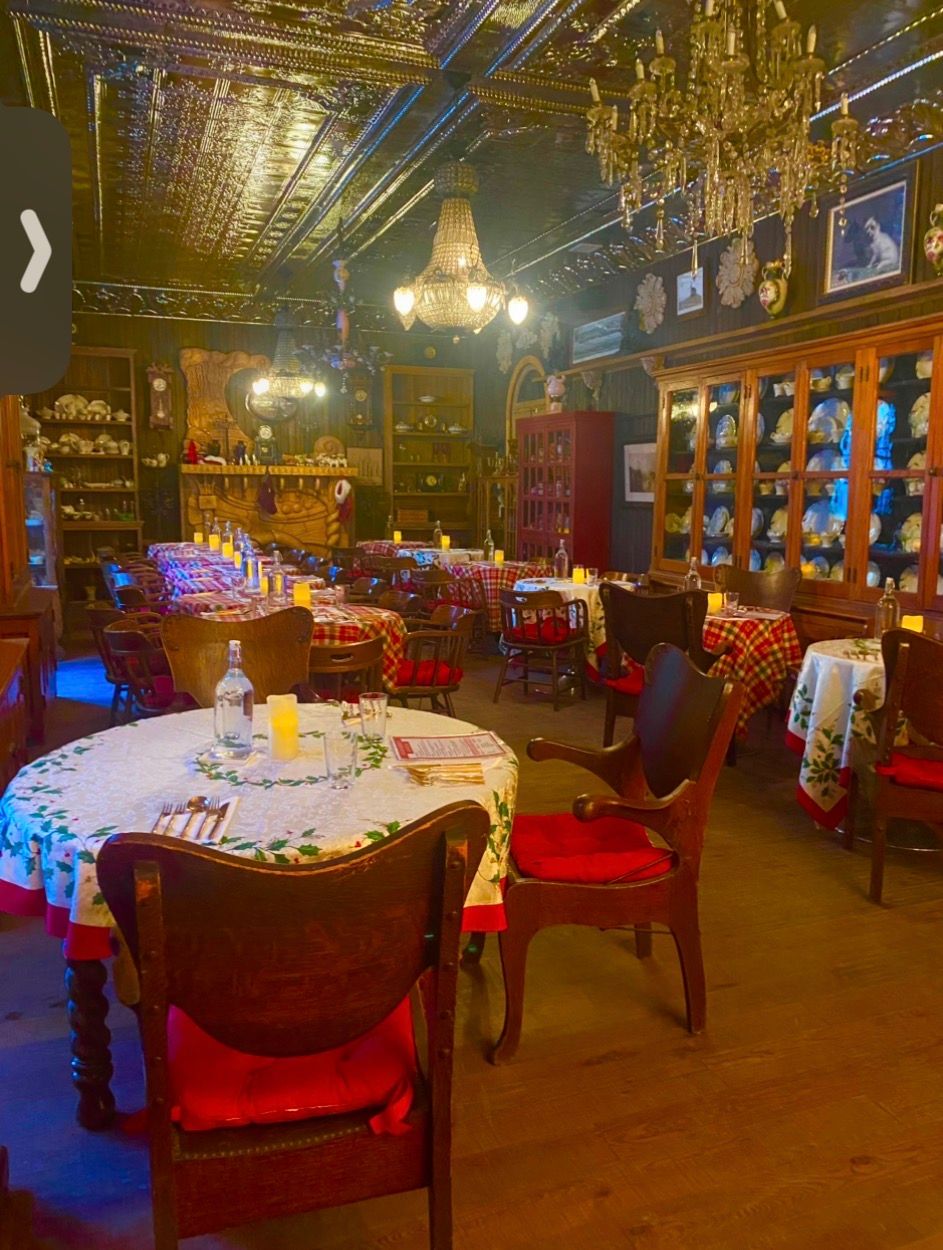
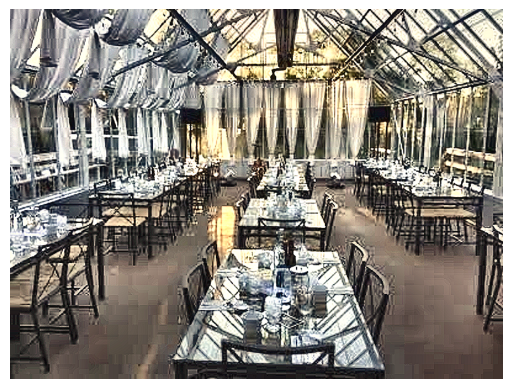


We reserve these rooms for booked events and private parties.
Perfect for classes and eating on rainy or overcast days, it is also used as a party and event space during evenings.
This is a truly unique and relaxing area.
Weather permitting, this deck can also be booked for private groups on evenings and weekdays. Think groovy wine and appetizer party by the pool. Just a thought.
Sorry. . . swimming in the pool is not allowed.
This area is simply gorgeous and absolutely amazing, especially in the summer when the linden trees are in bloom.
That glorious scent!
We use the summer kitchen during the spring and summer when we offer wood-fired pizza days, or when doing outdoor wood-fired bread- baking for sampling and sale.
This area can also be used for large groups that desire an outdoor sandwich buffet or pizza party.
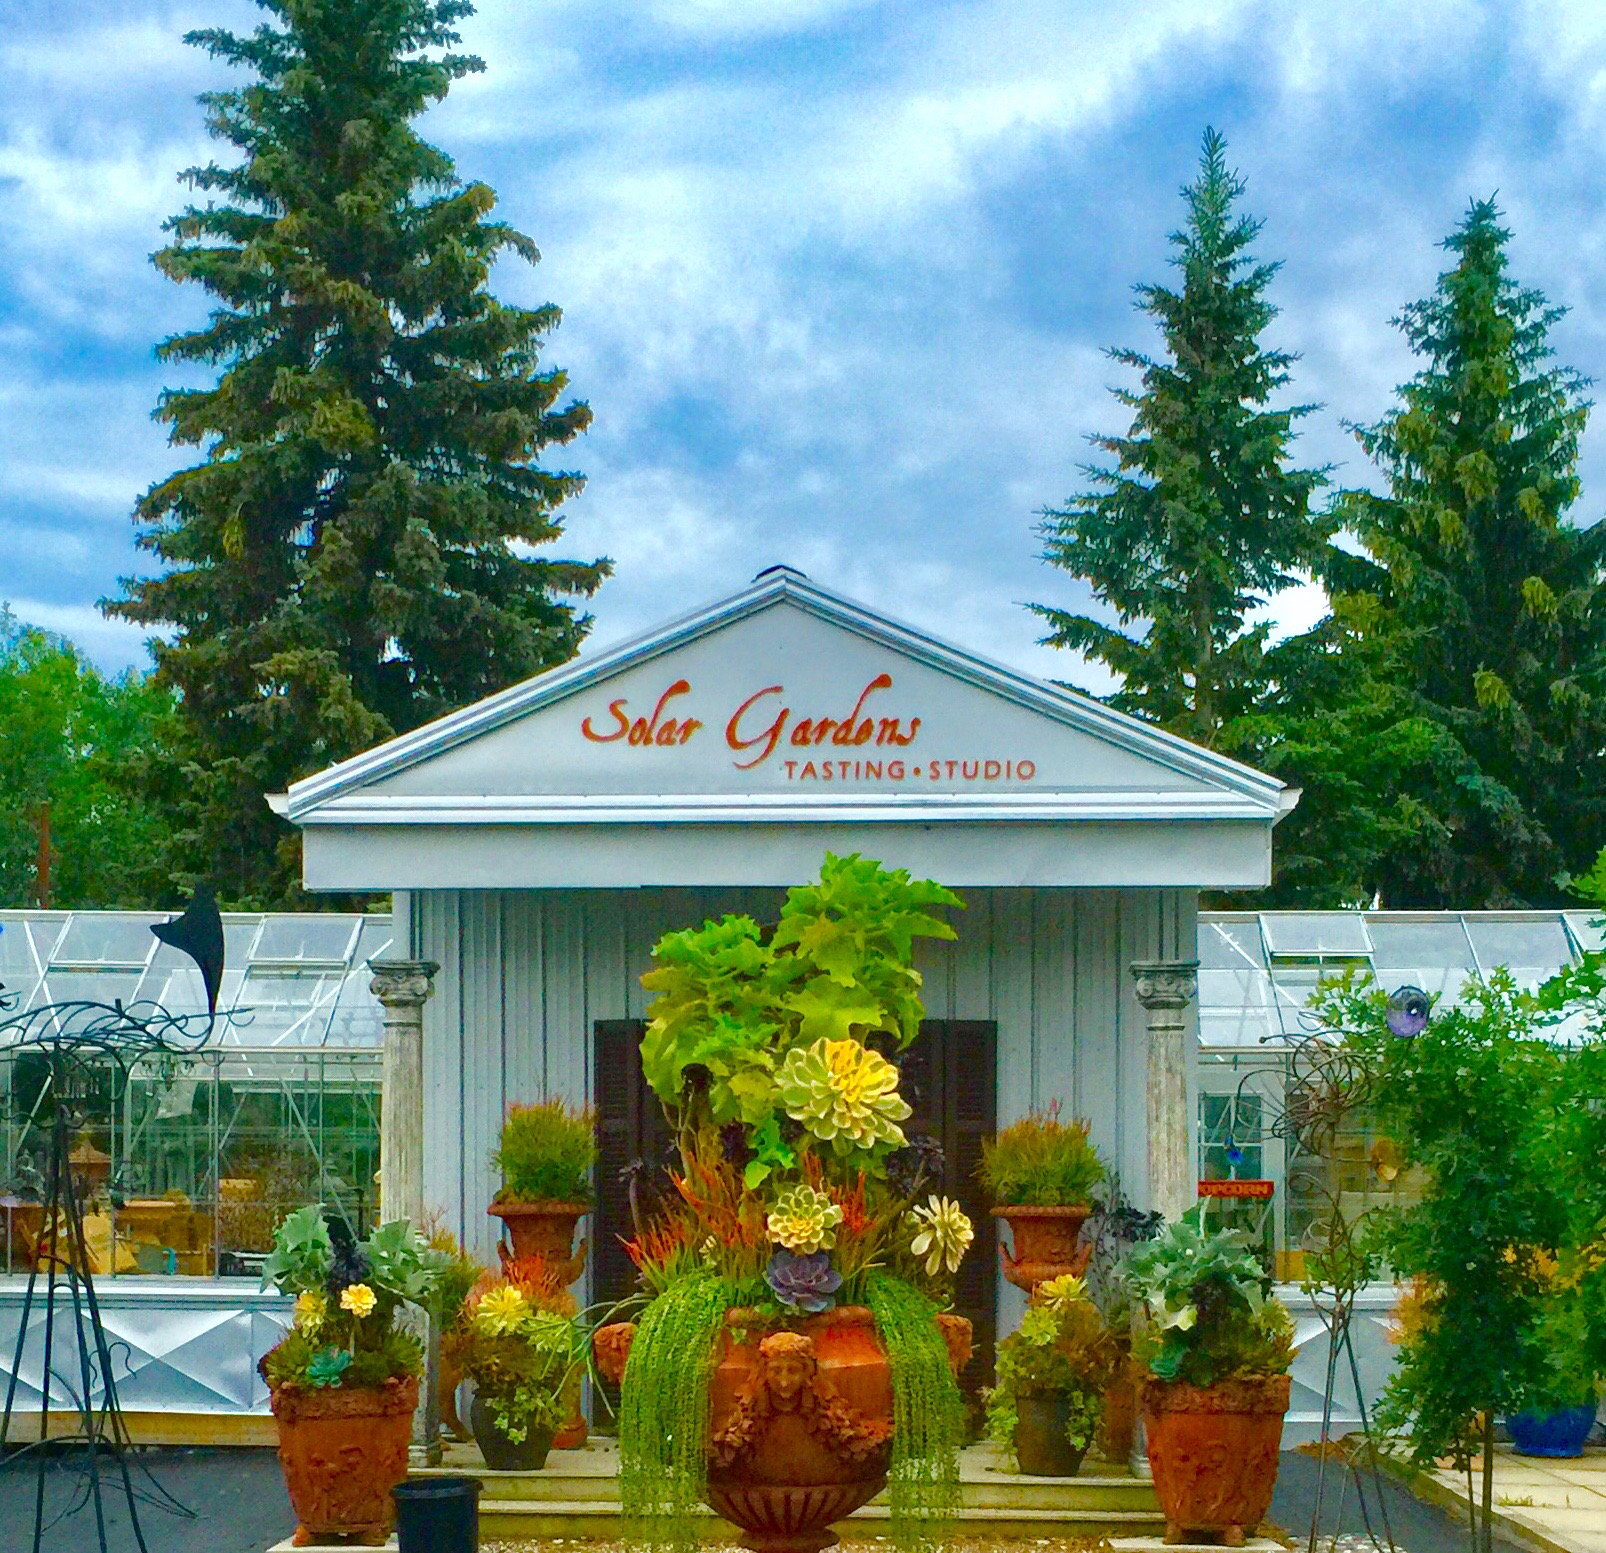
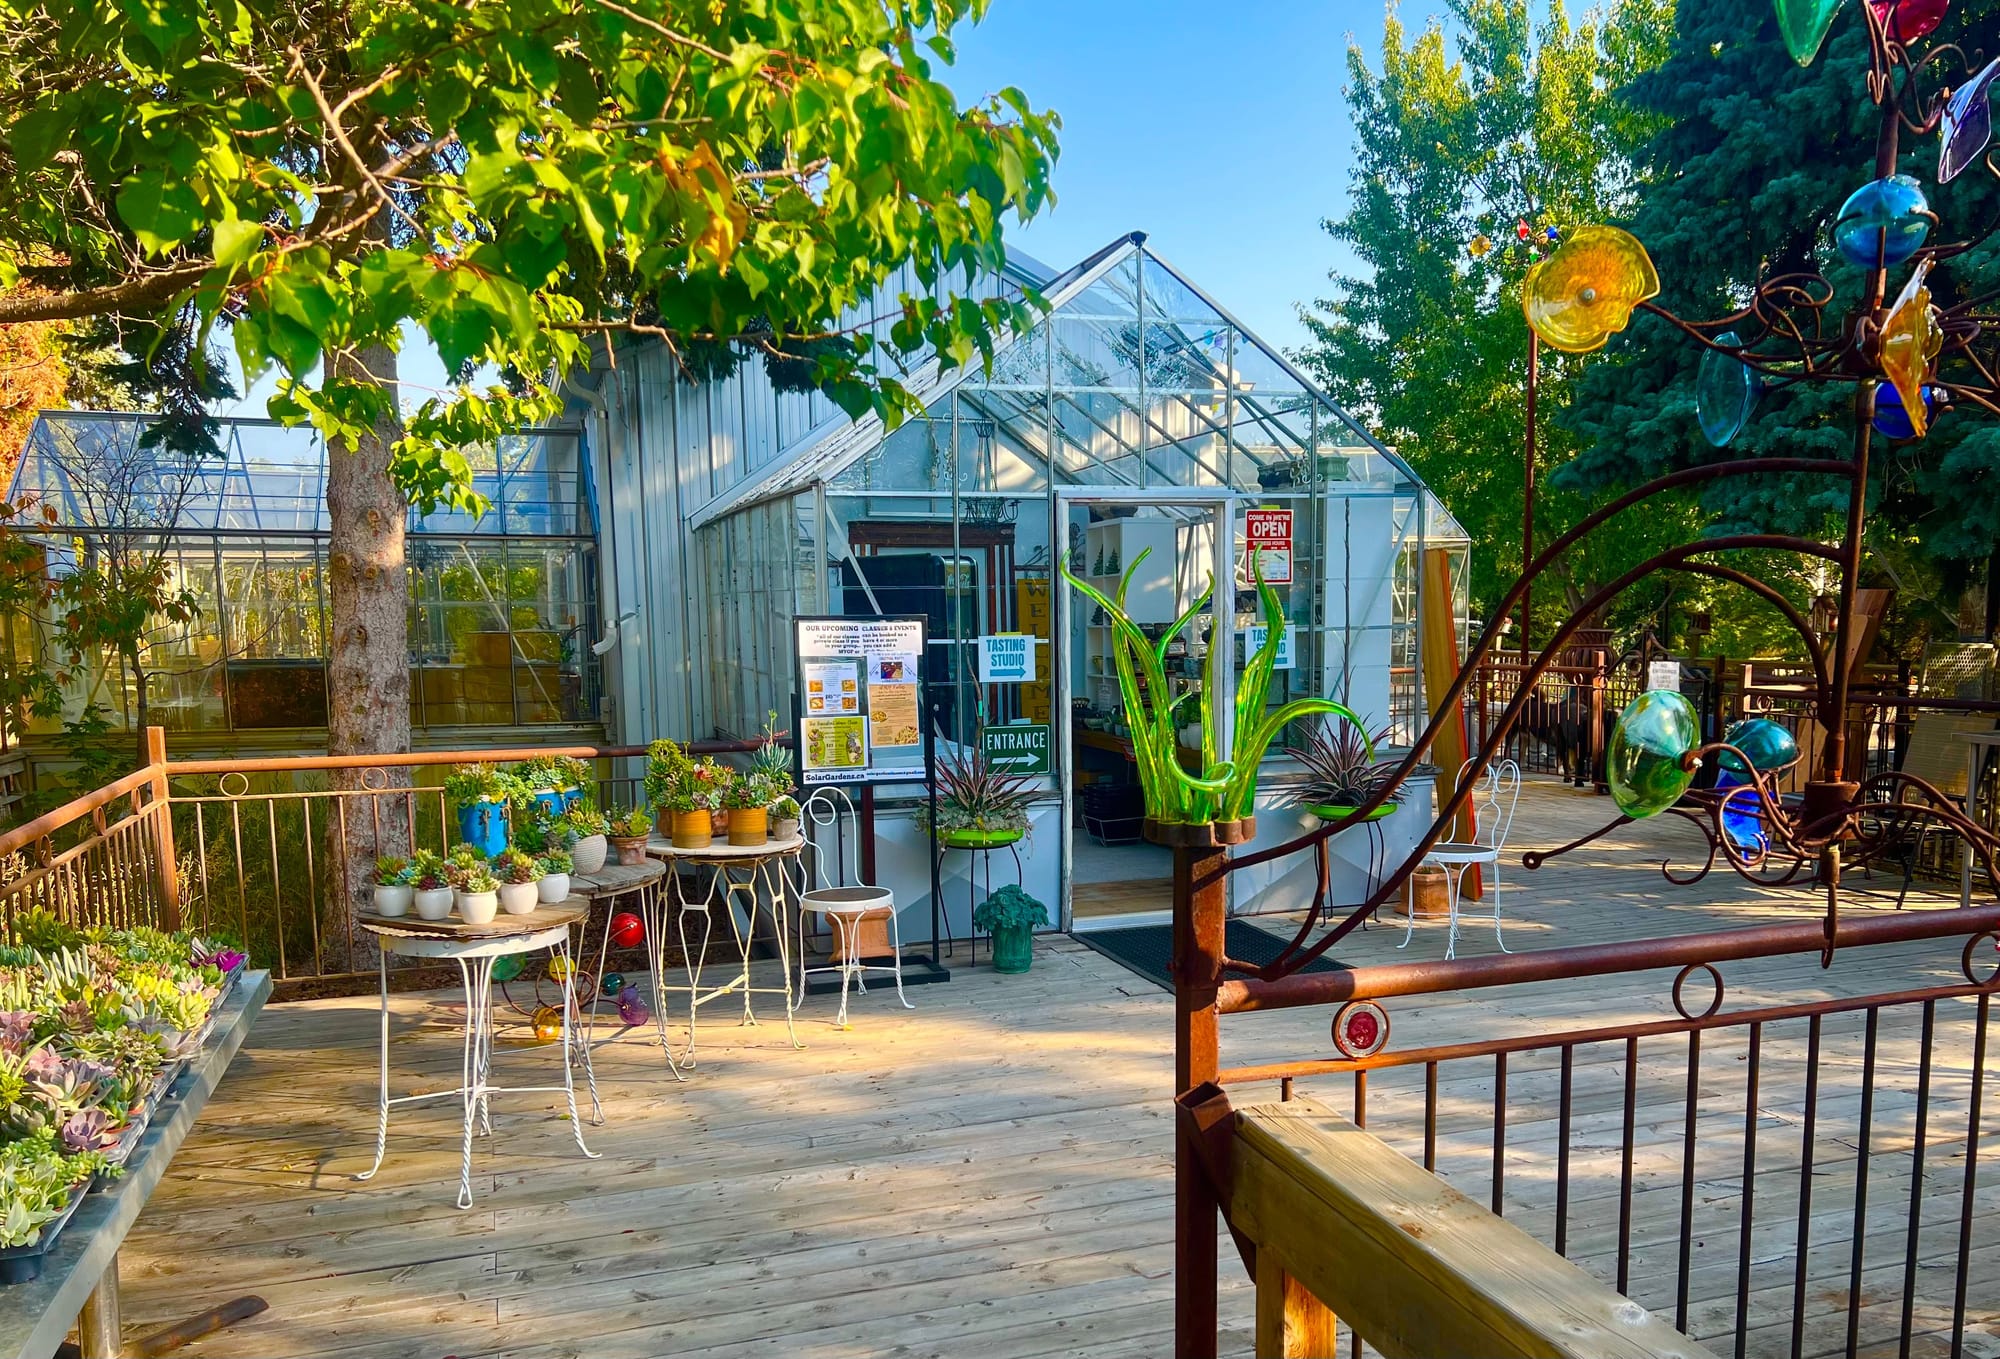
We named it "The Tasting Studio" because we encourage people to sample goodies like our Copper Kettle Fudge, balsamic vinegars and olive oils.
This shop is filled with candies, teas, spices, special vintage items, art, ceramics, baked treats, puzzles, artisan breads and so much more.
Open weekends during the spring and summer, we also open it for groups during private parties.
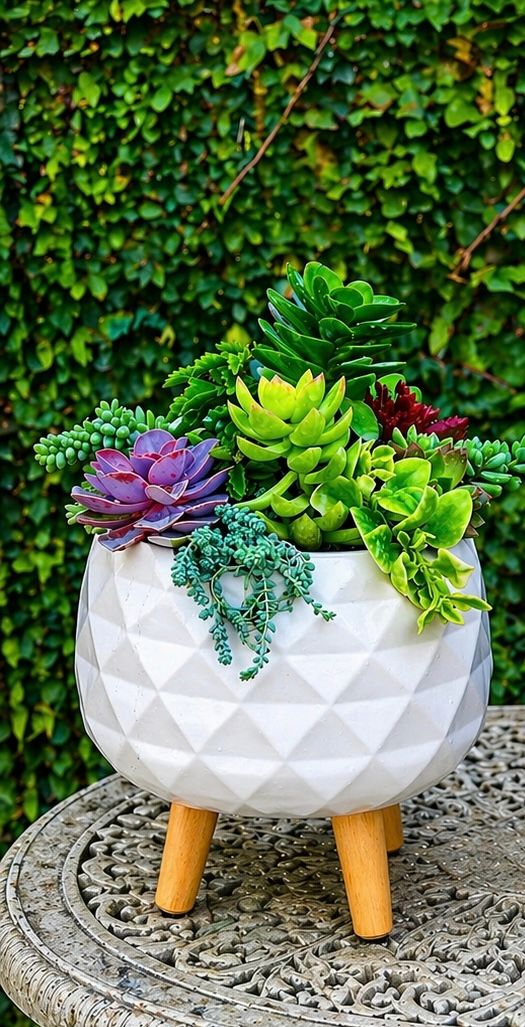
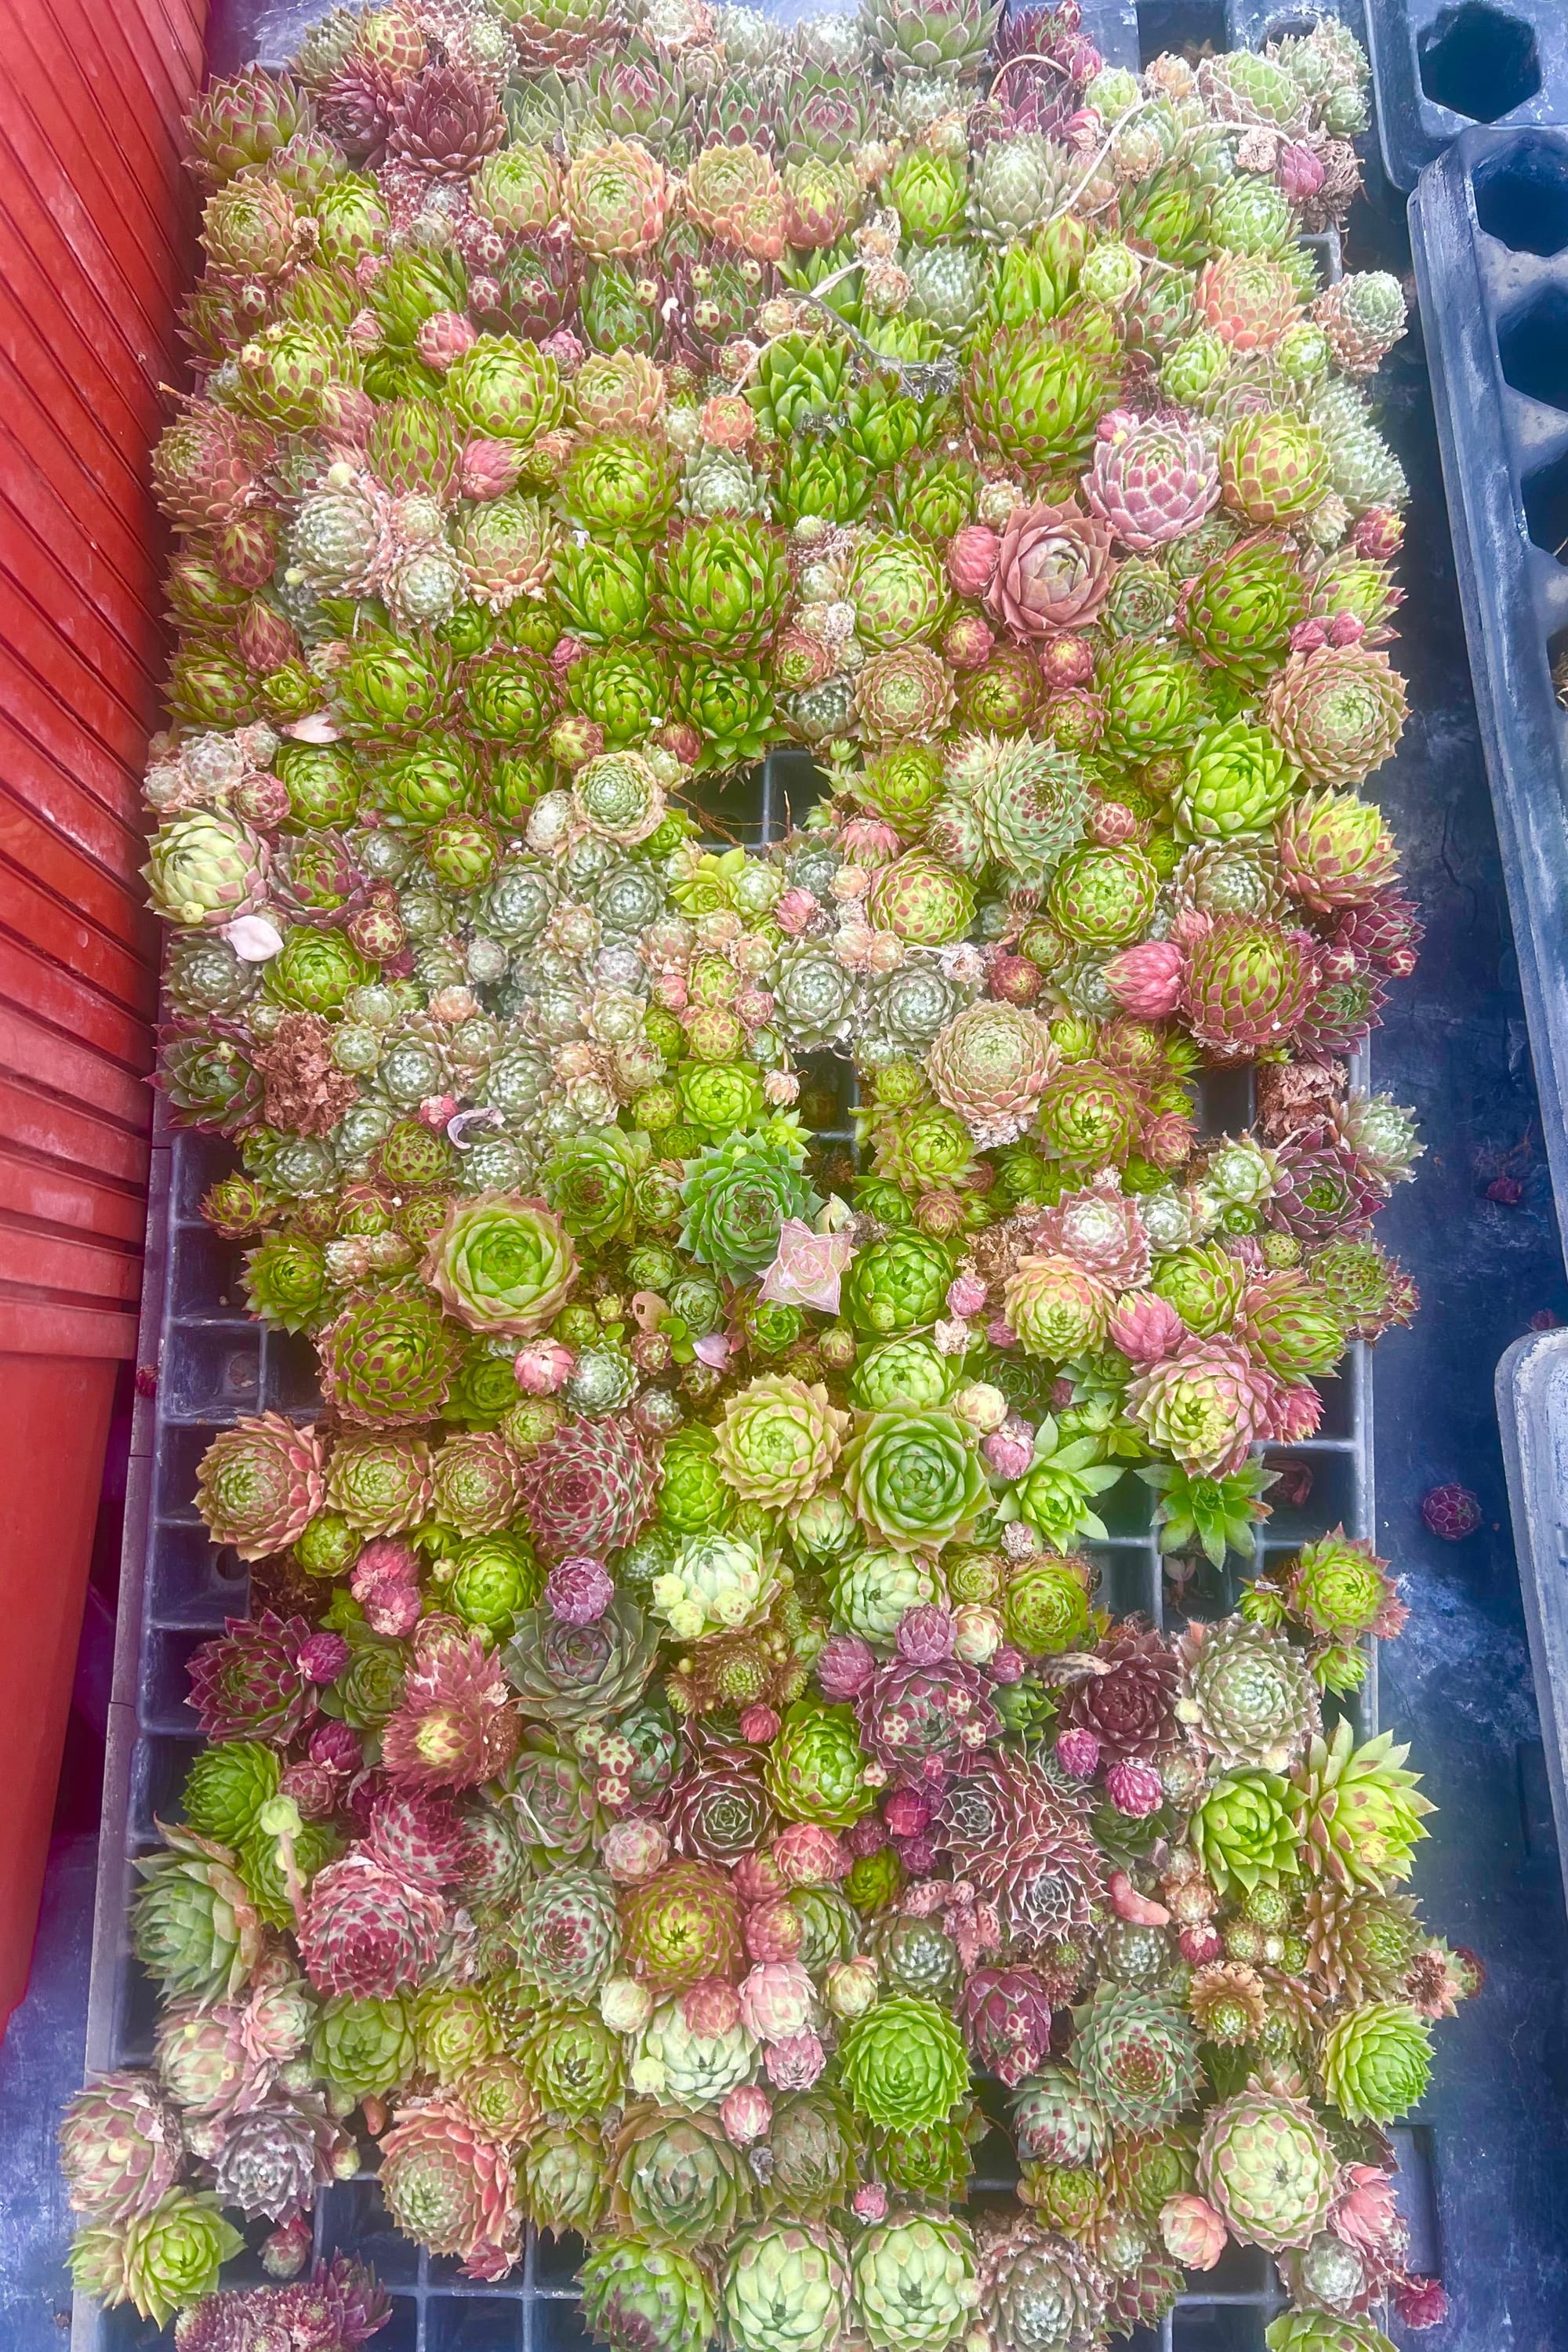
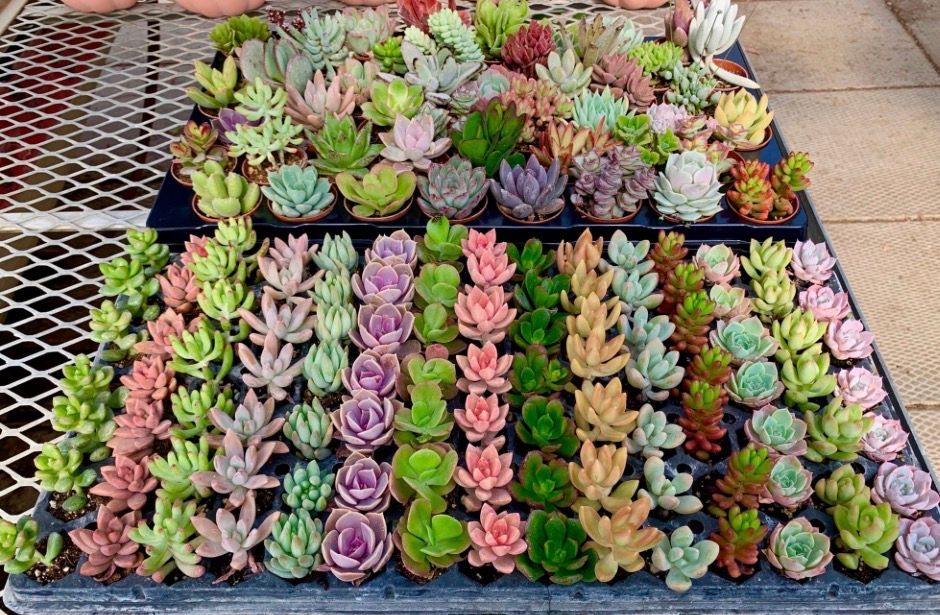
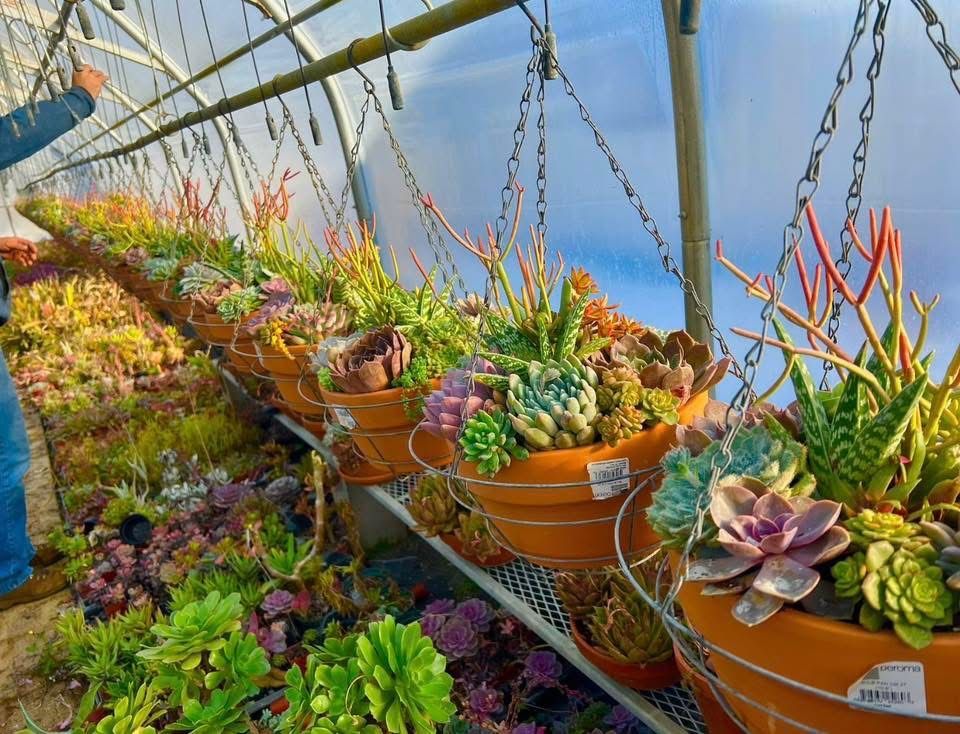
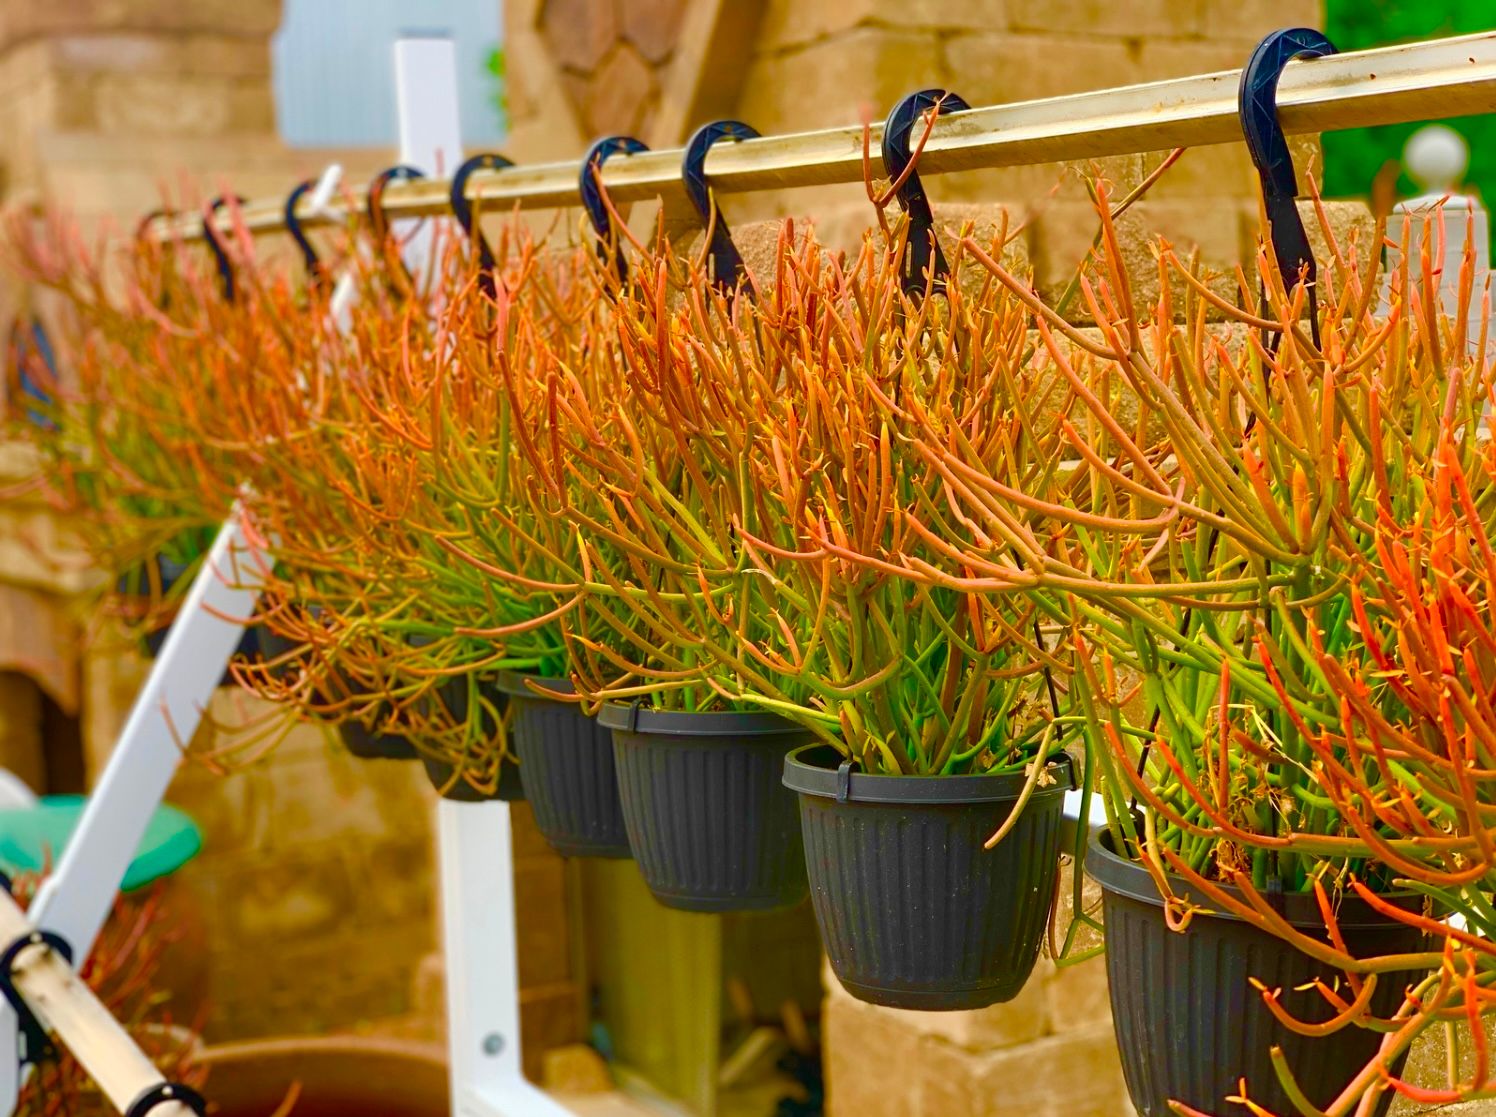
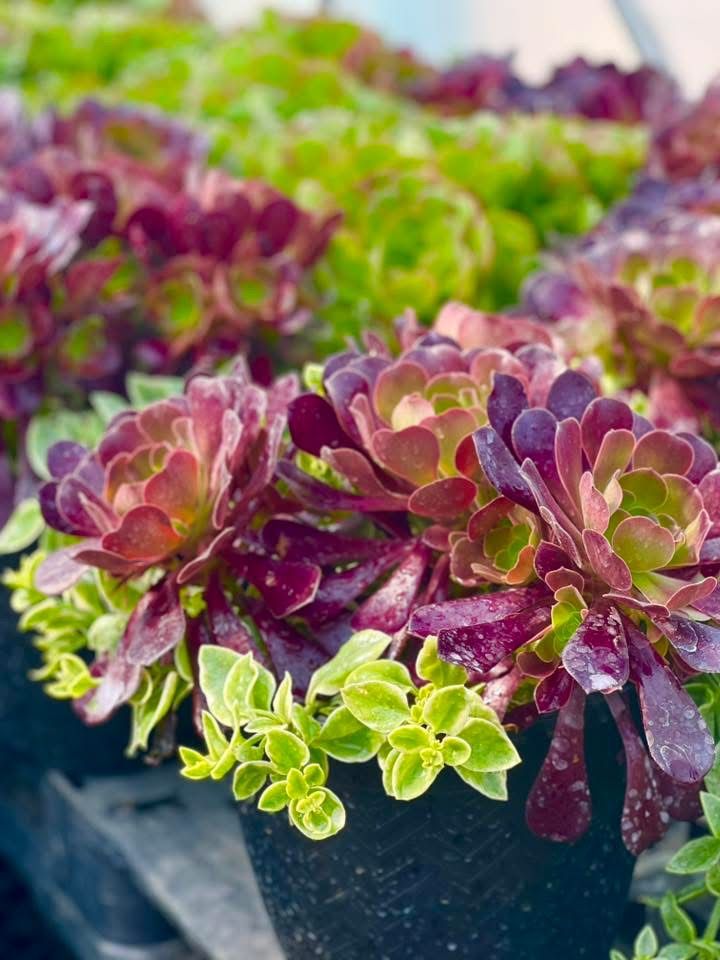
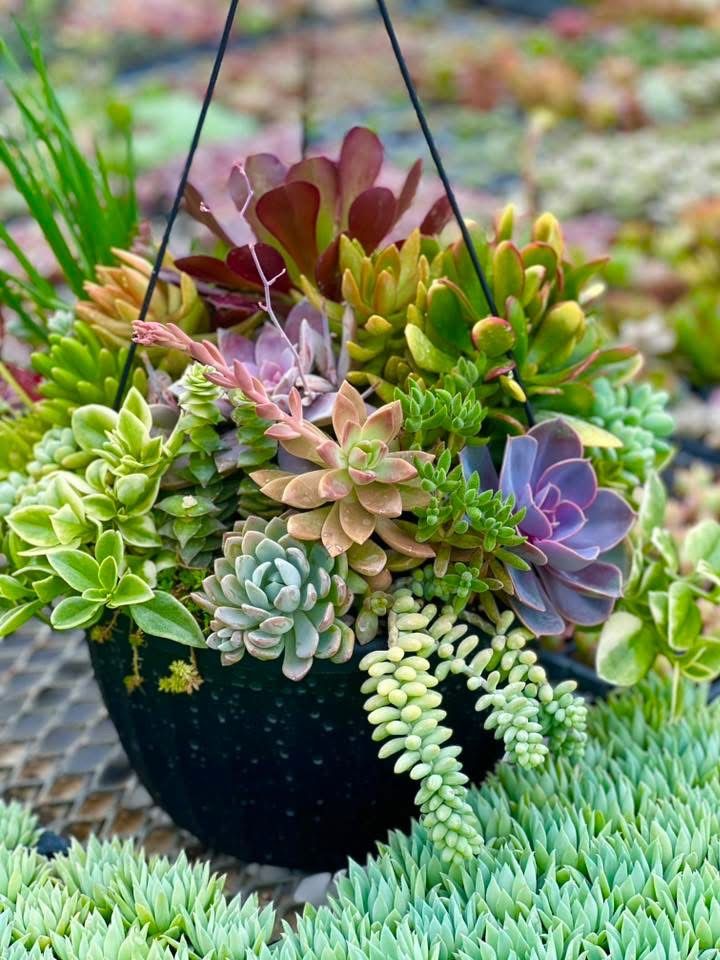
You can purchase succulents by the individual plant, or in baskets, planters or potted arrangements.
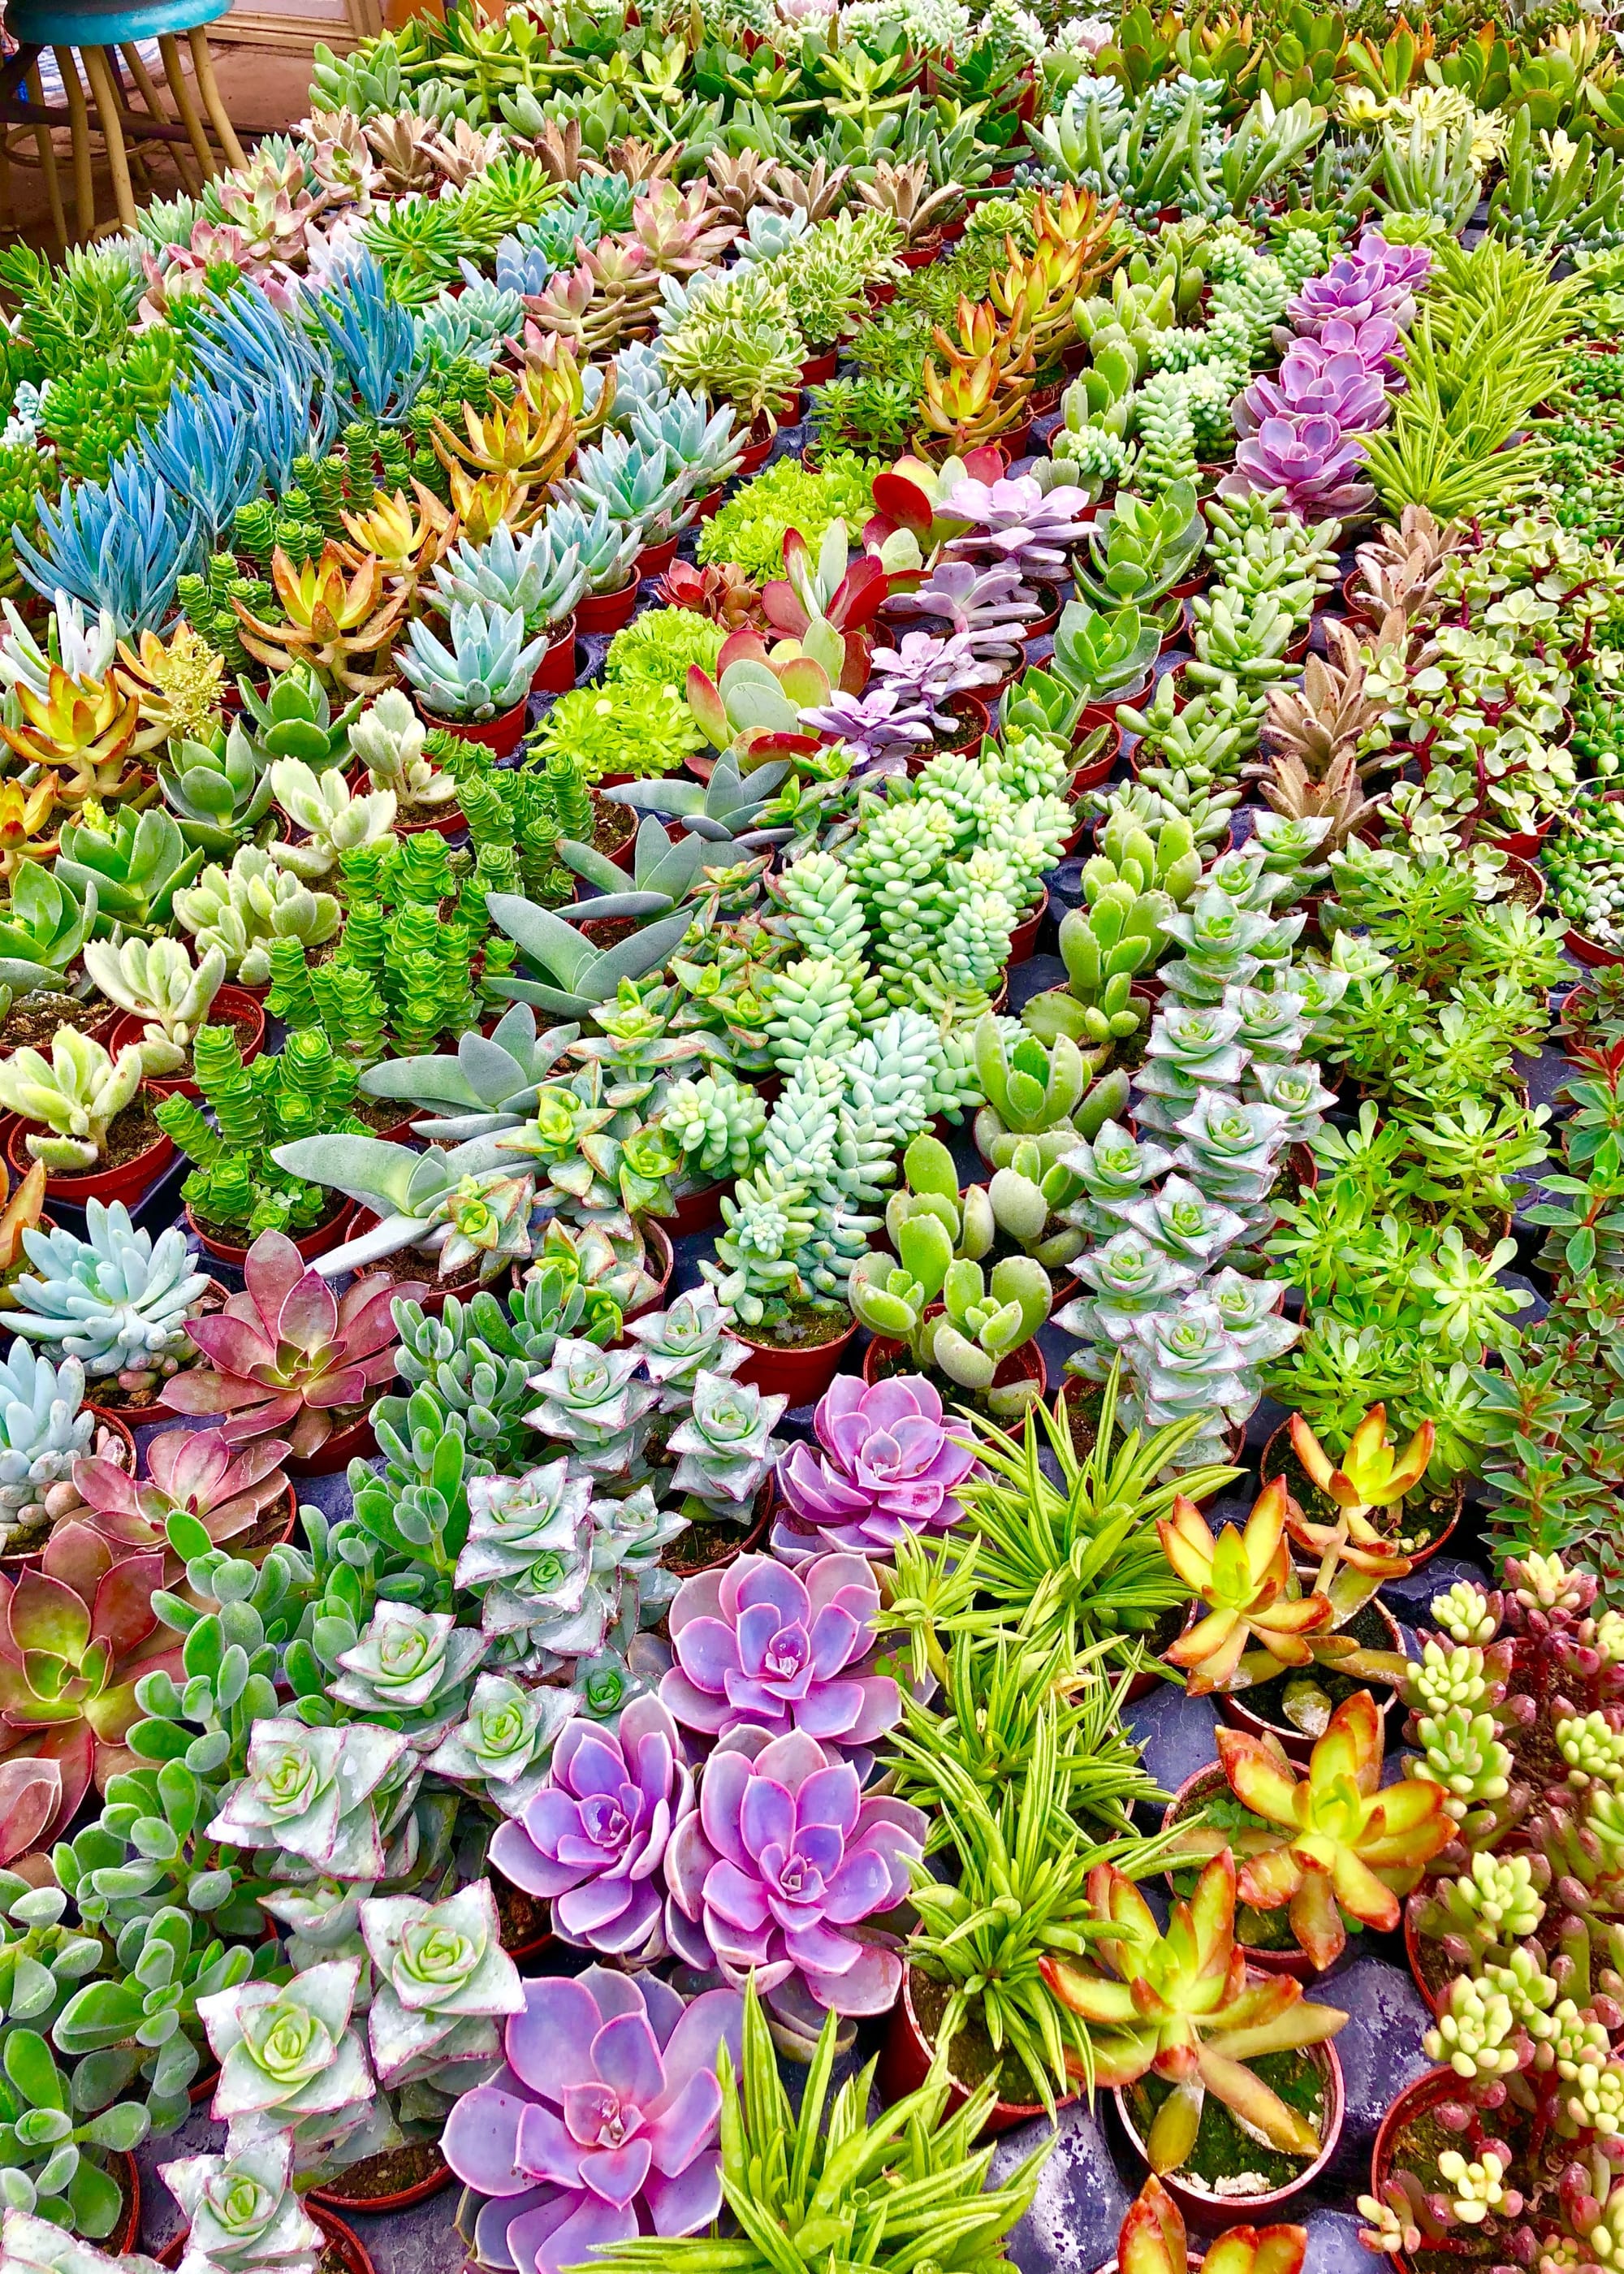
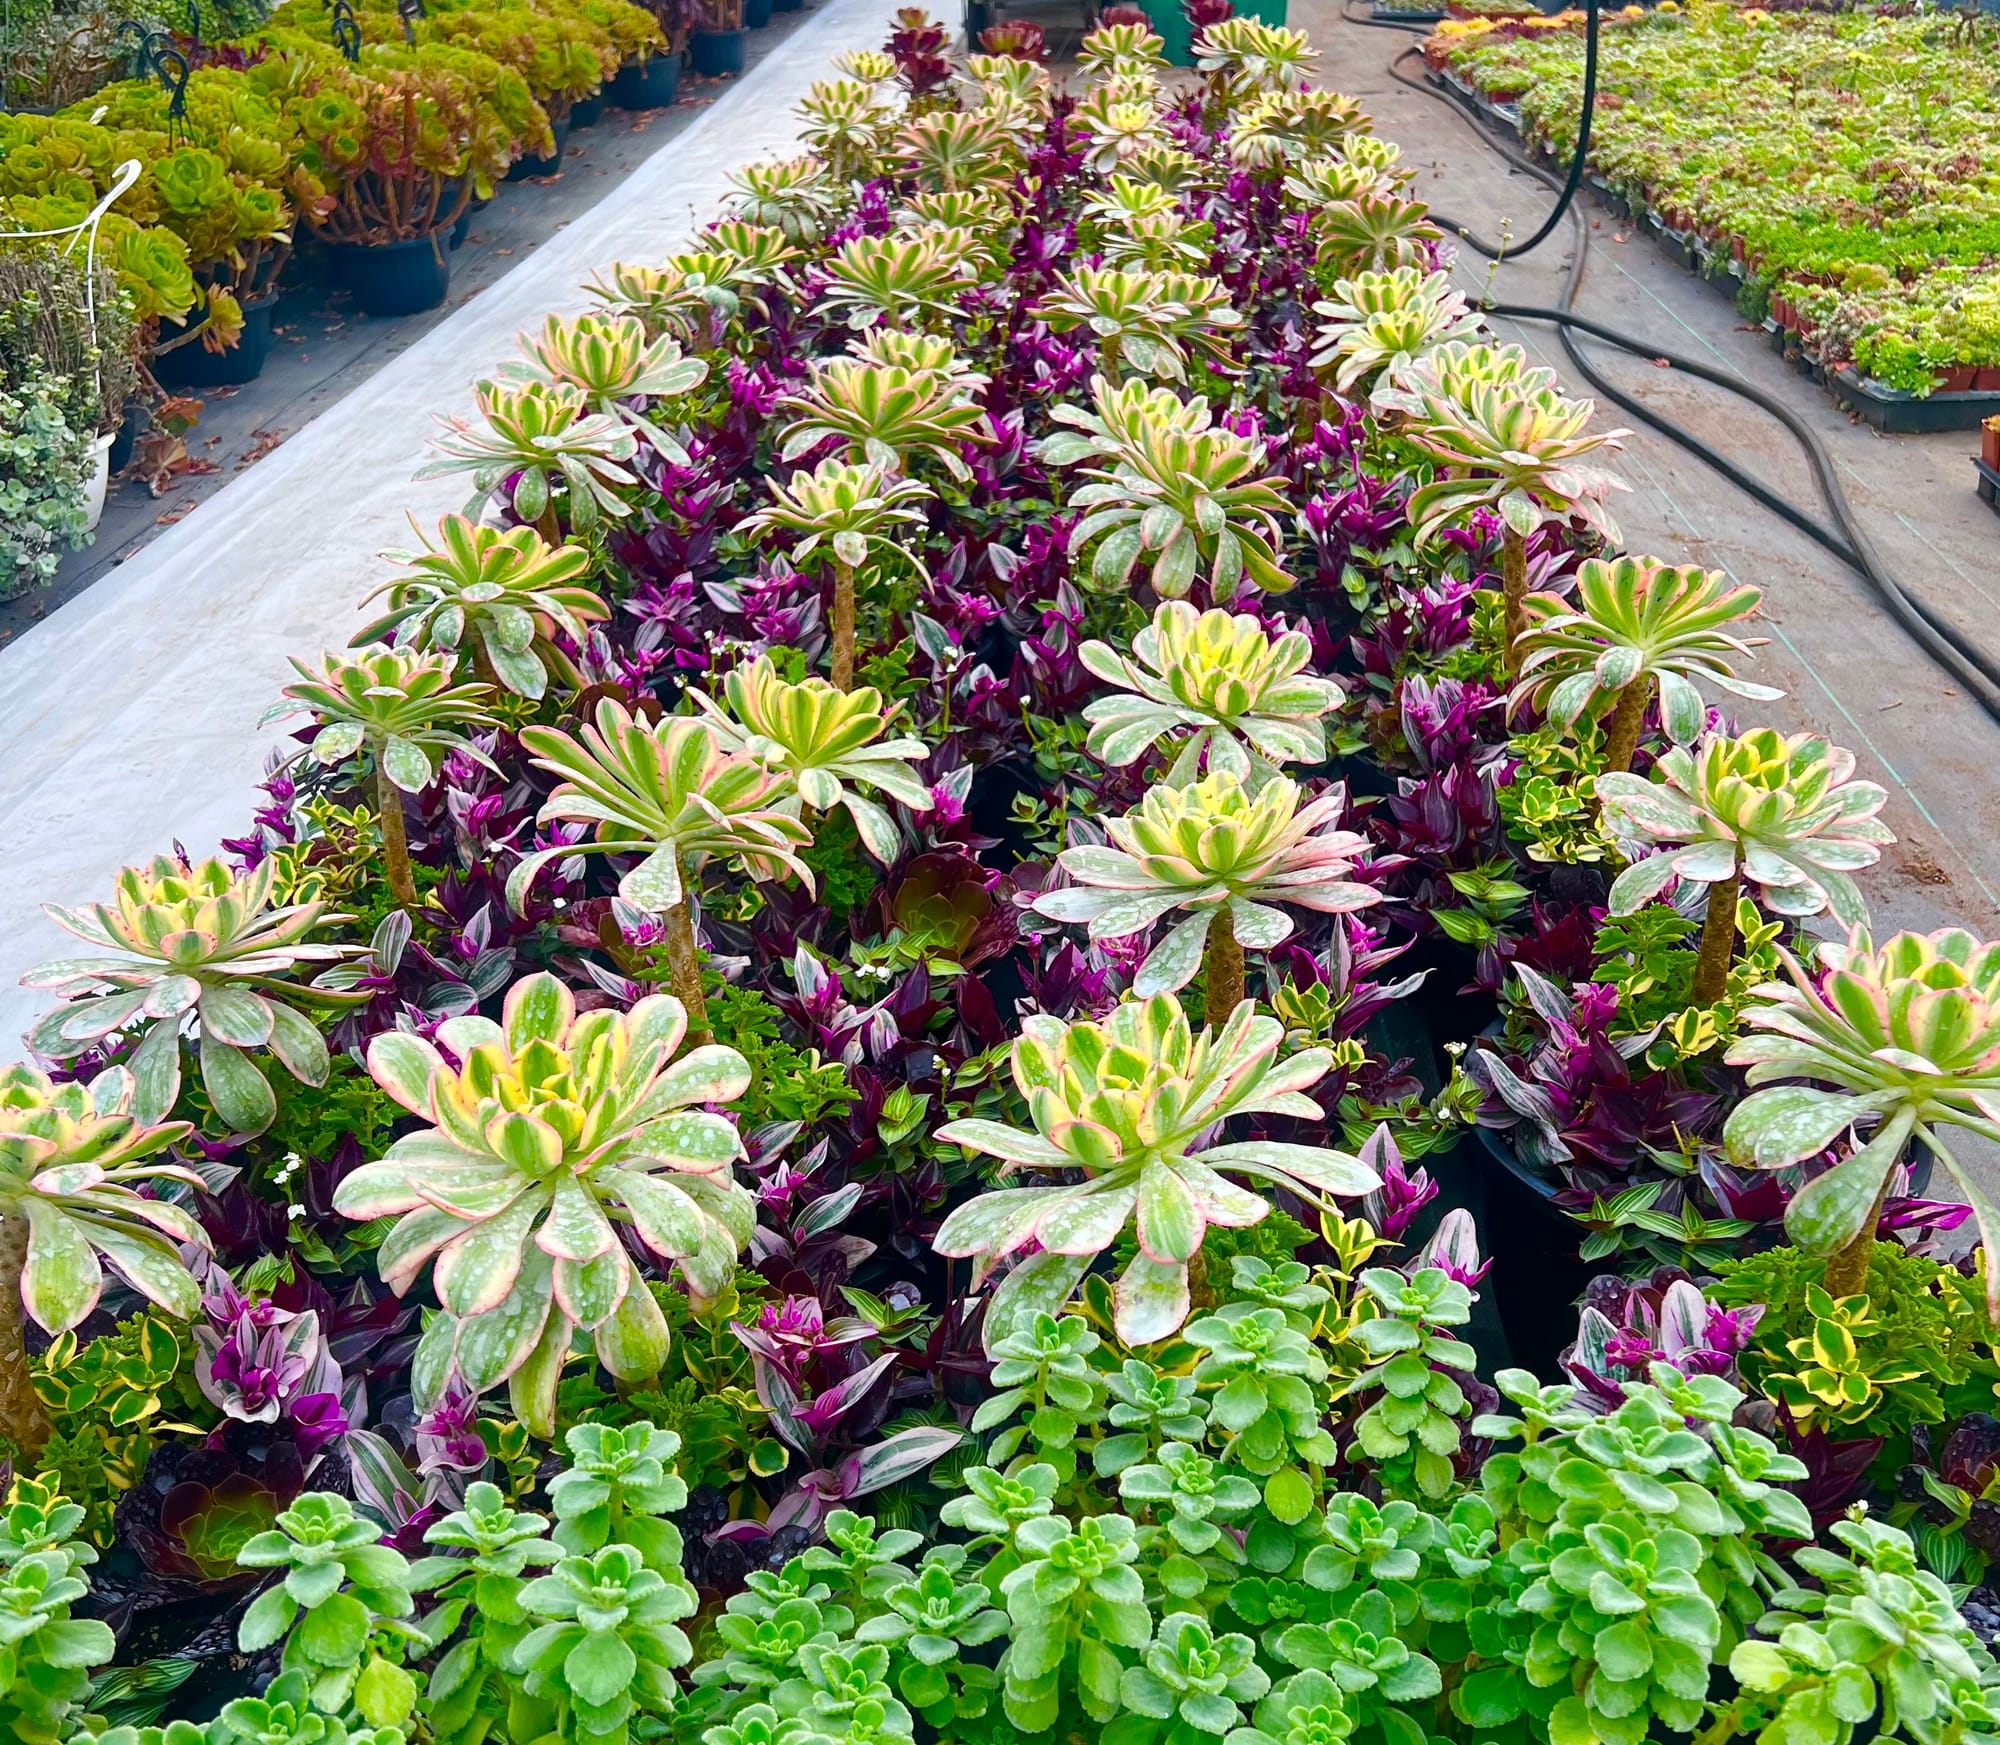
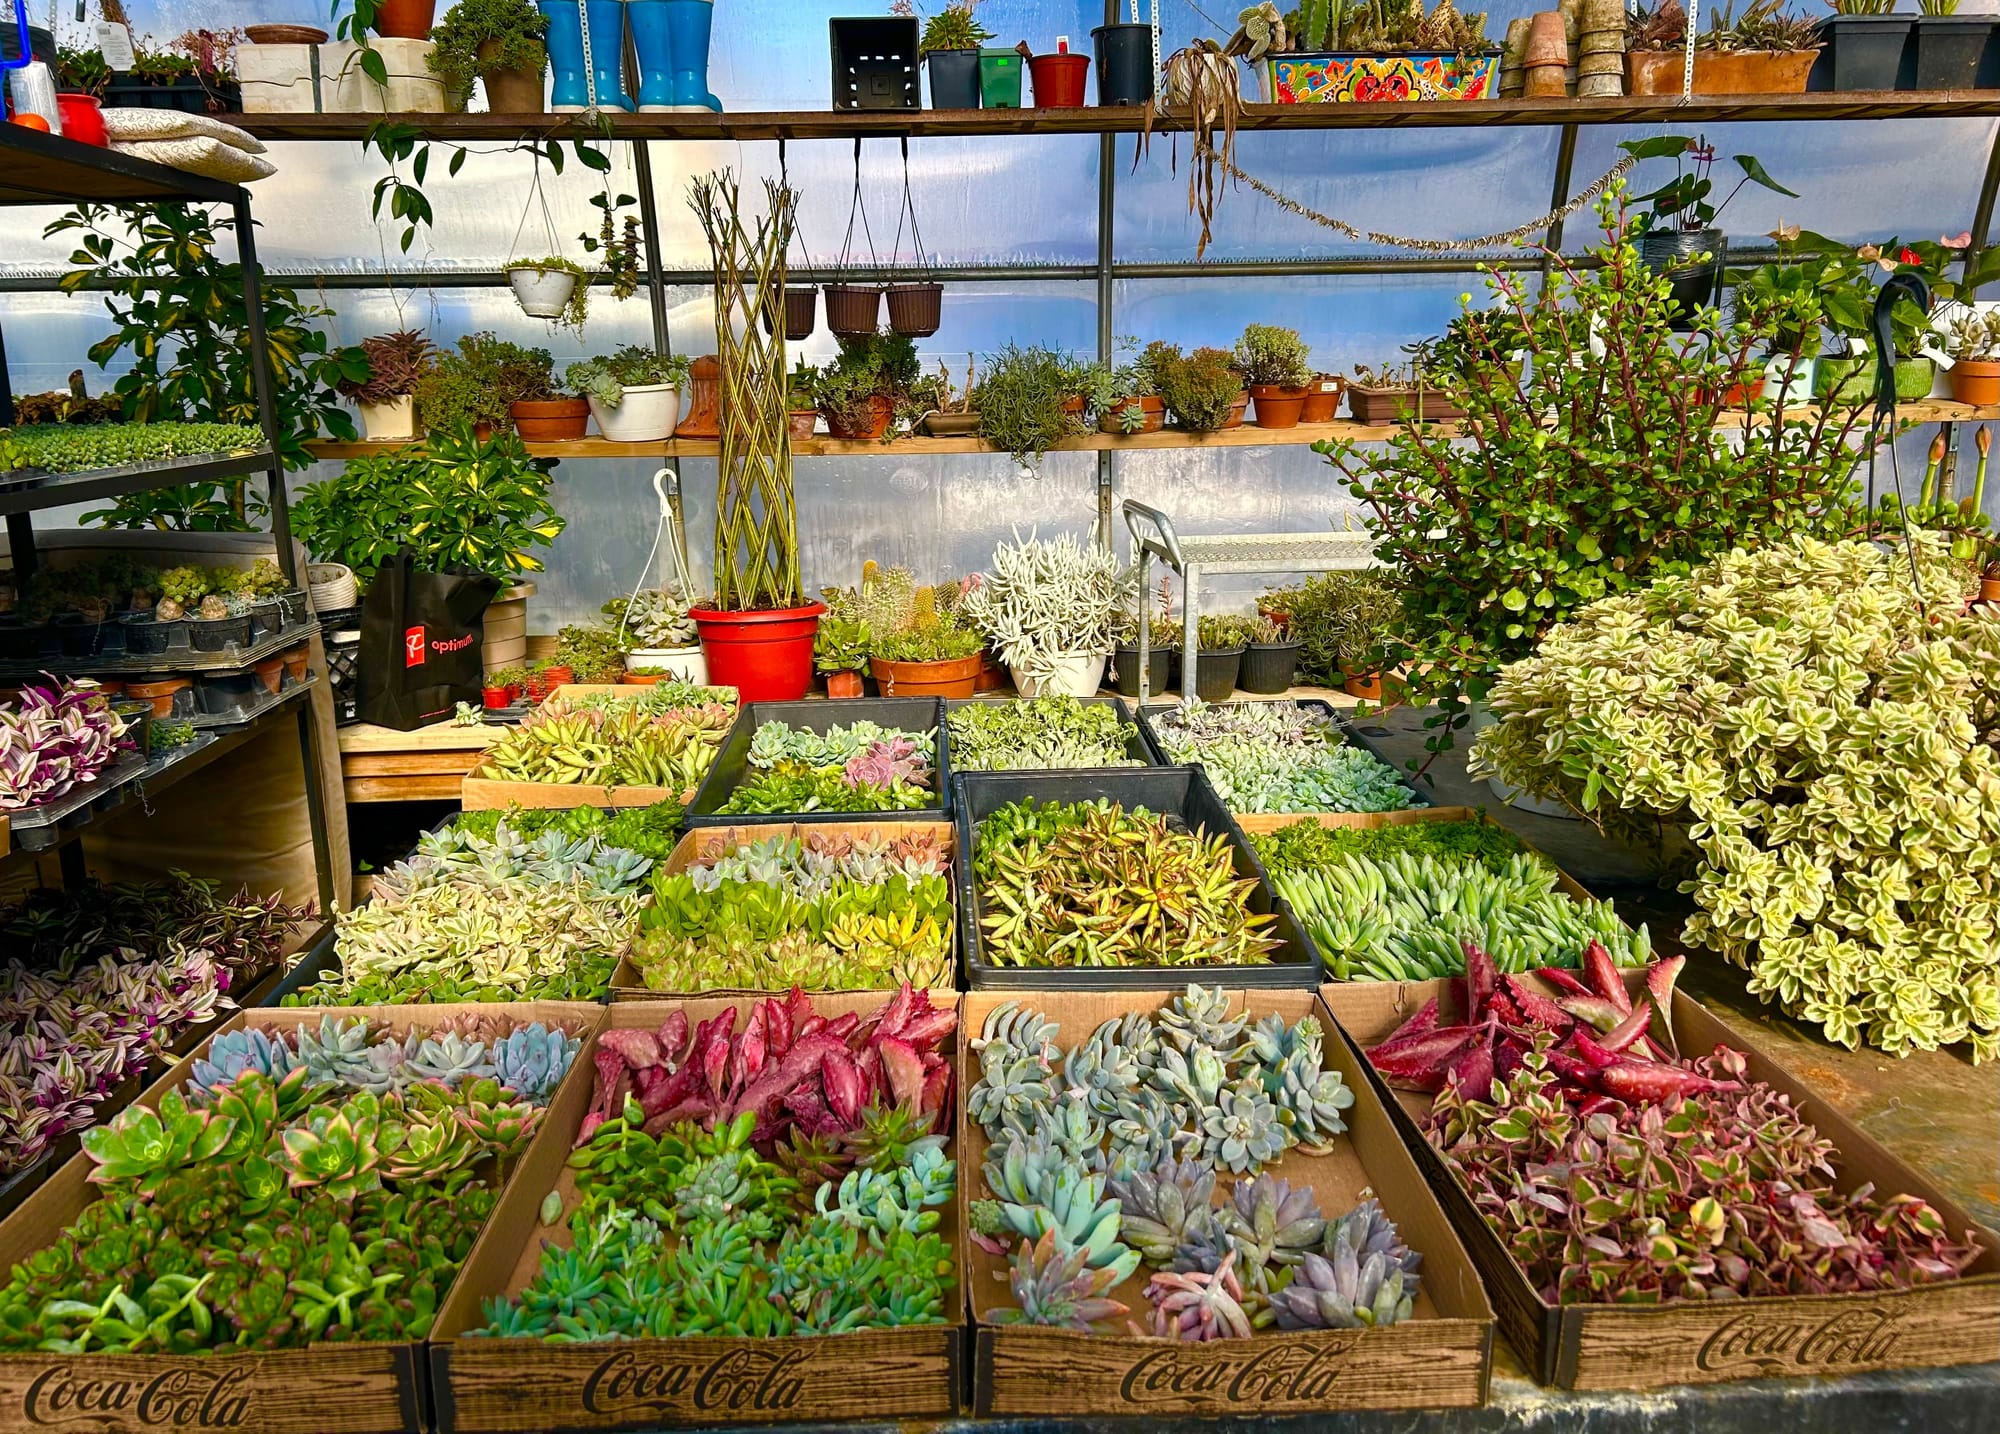
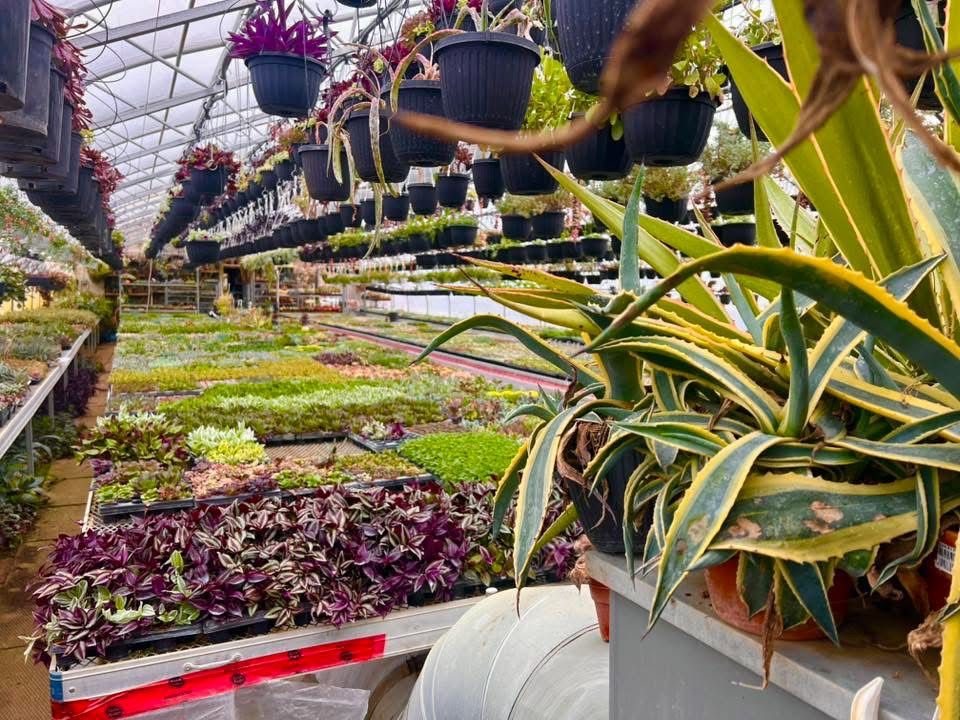
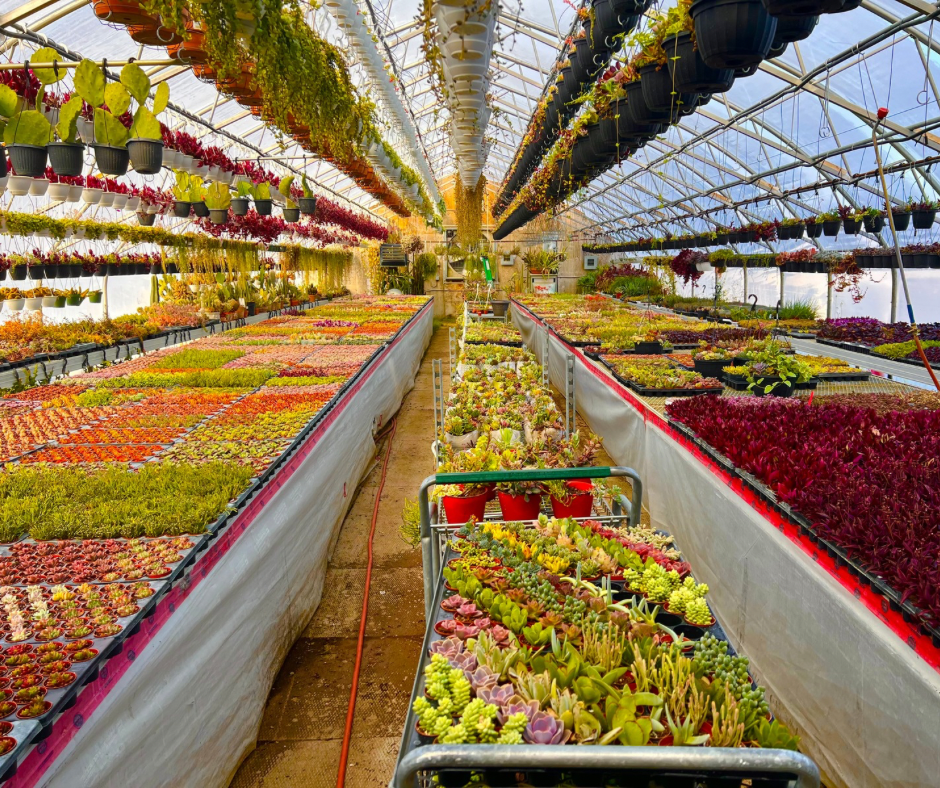
Our succulents are propagated and grown right here within our 5 succulent greenhouses.
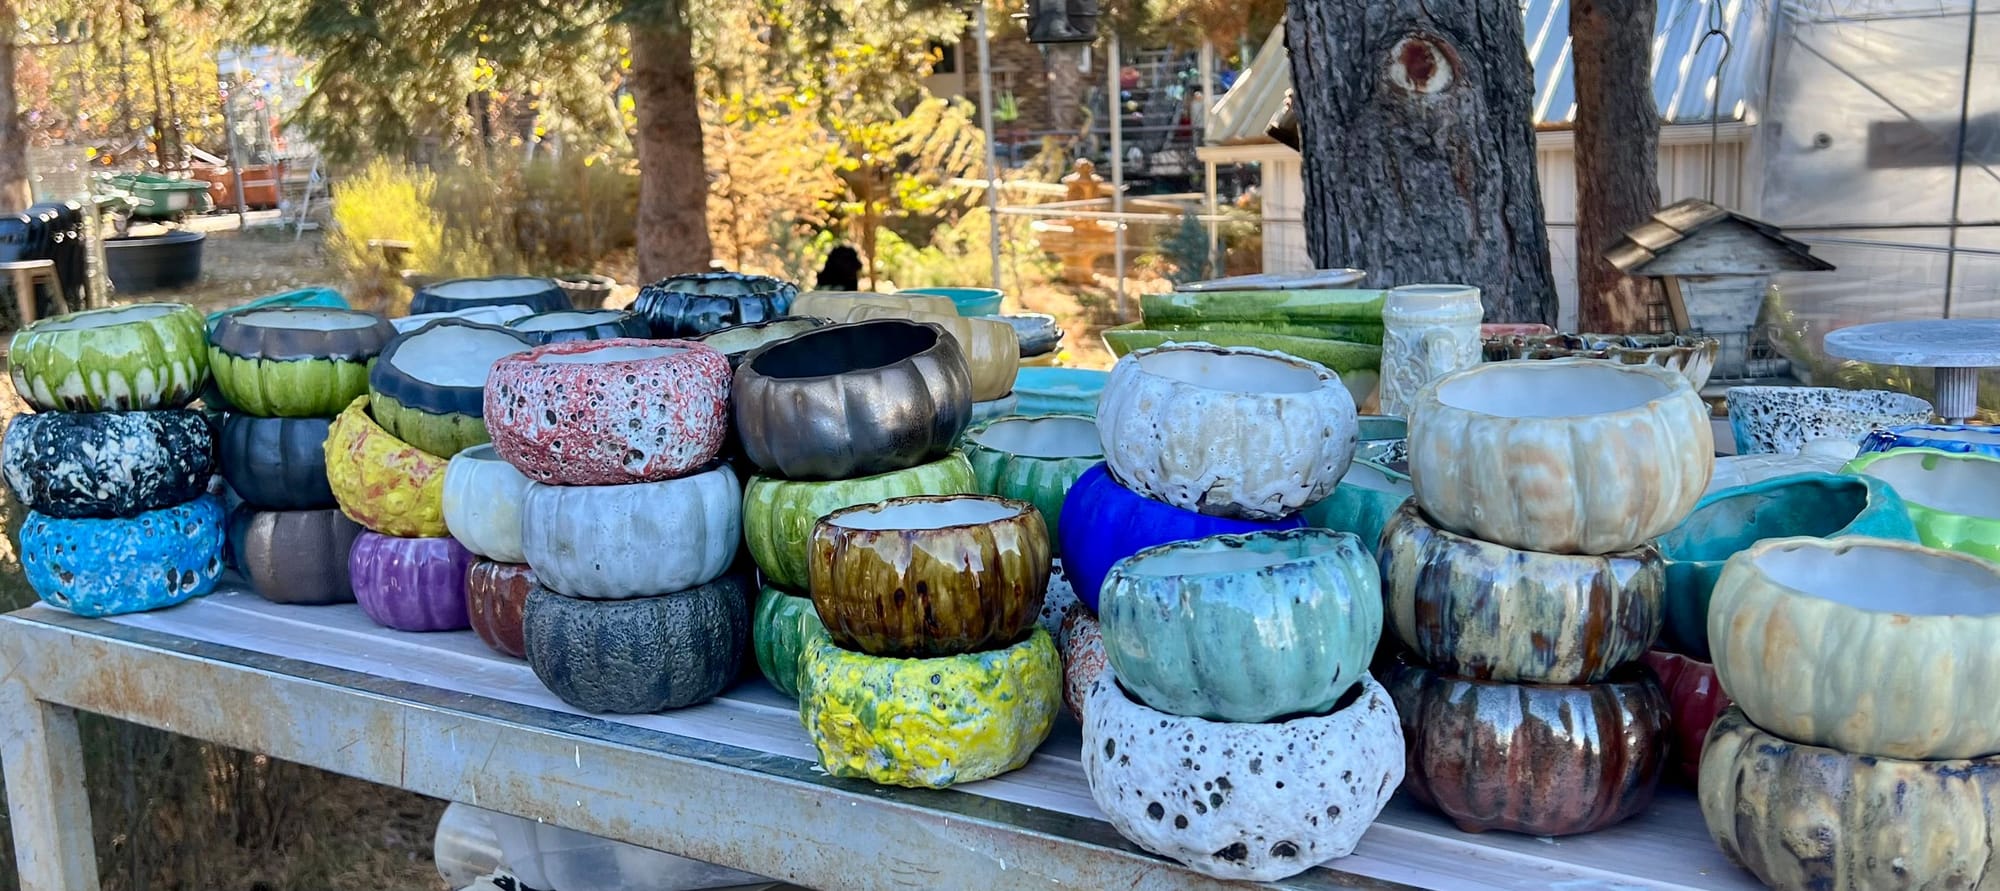
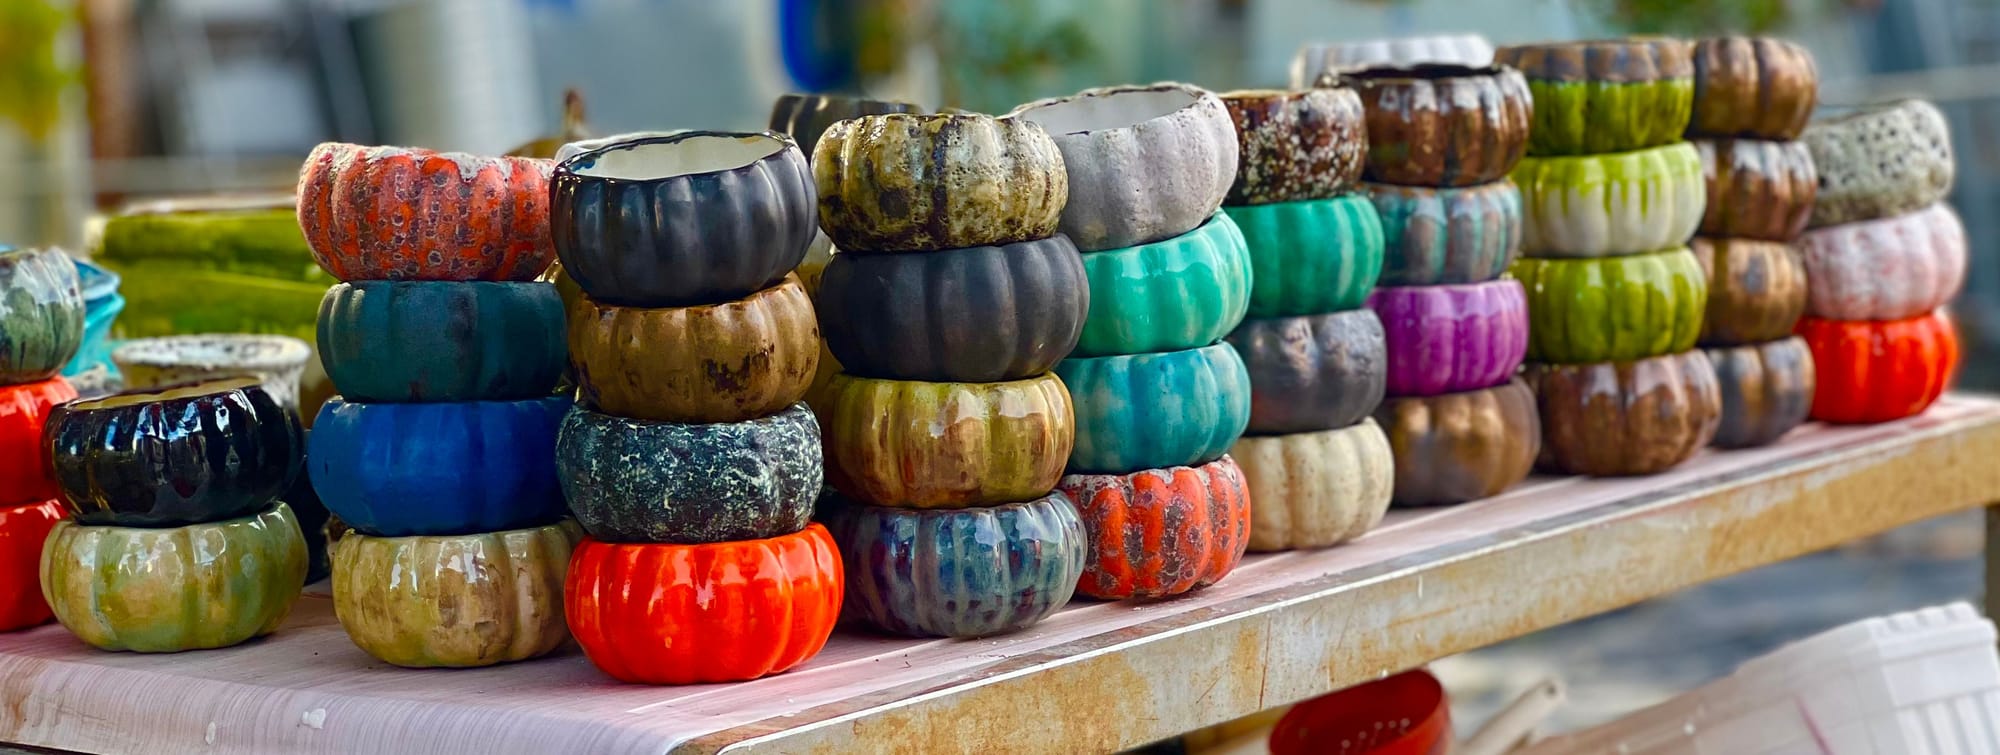
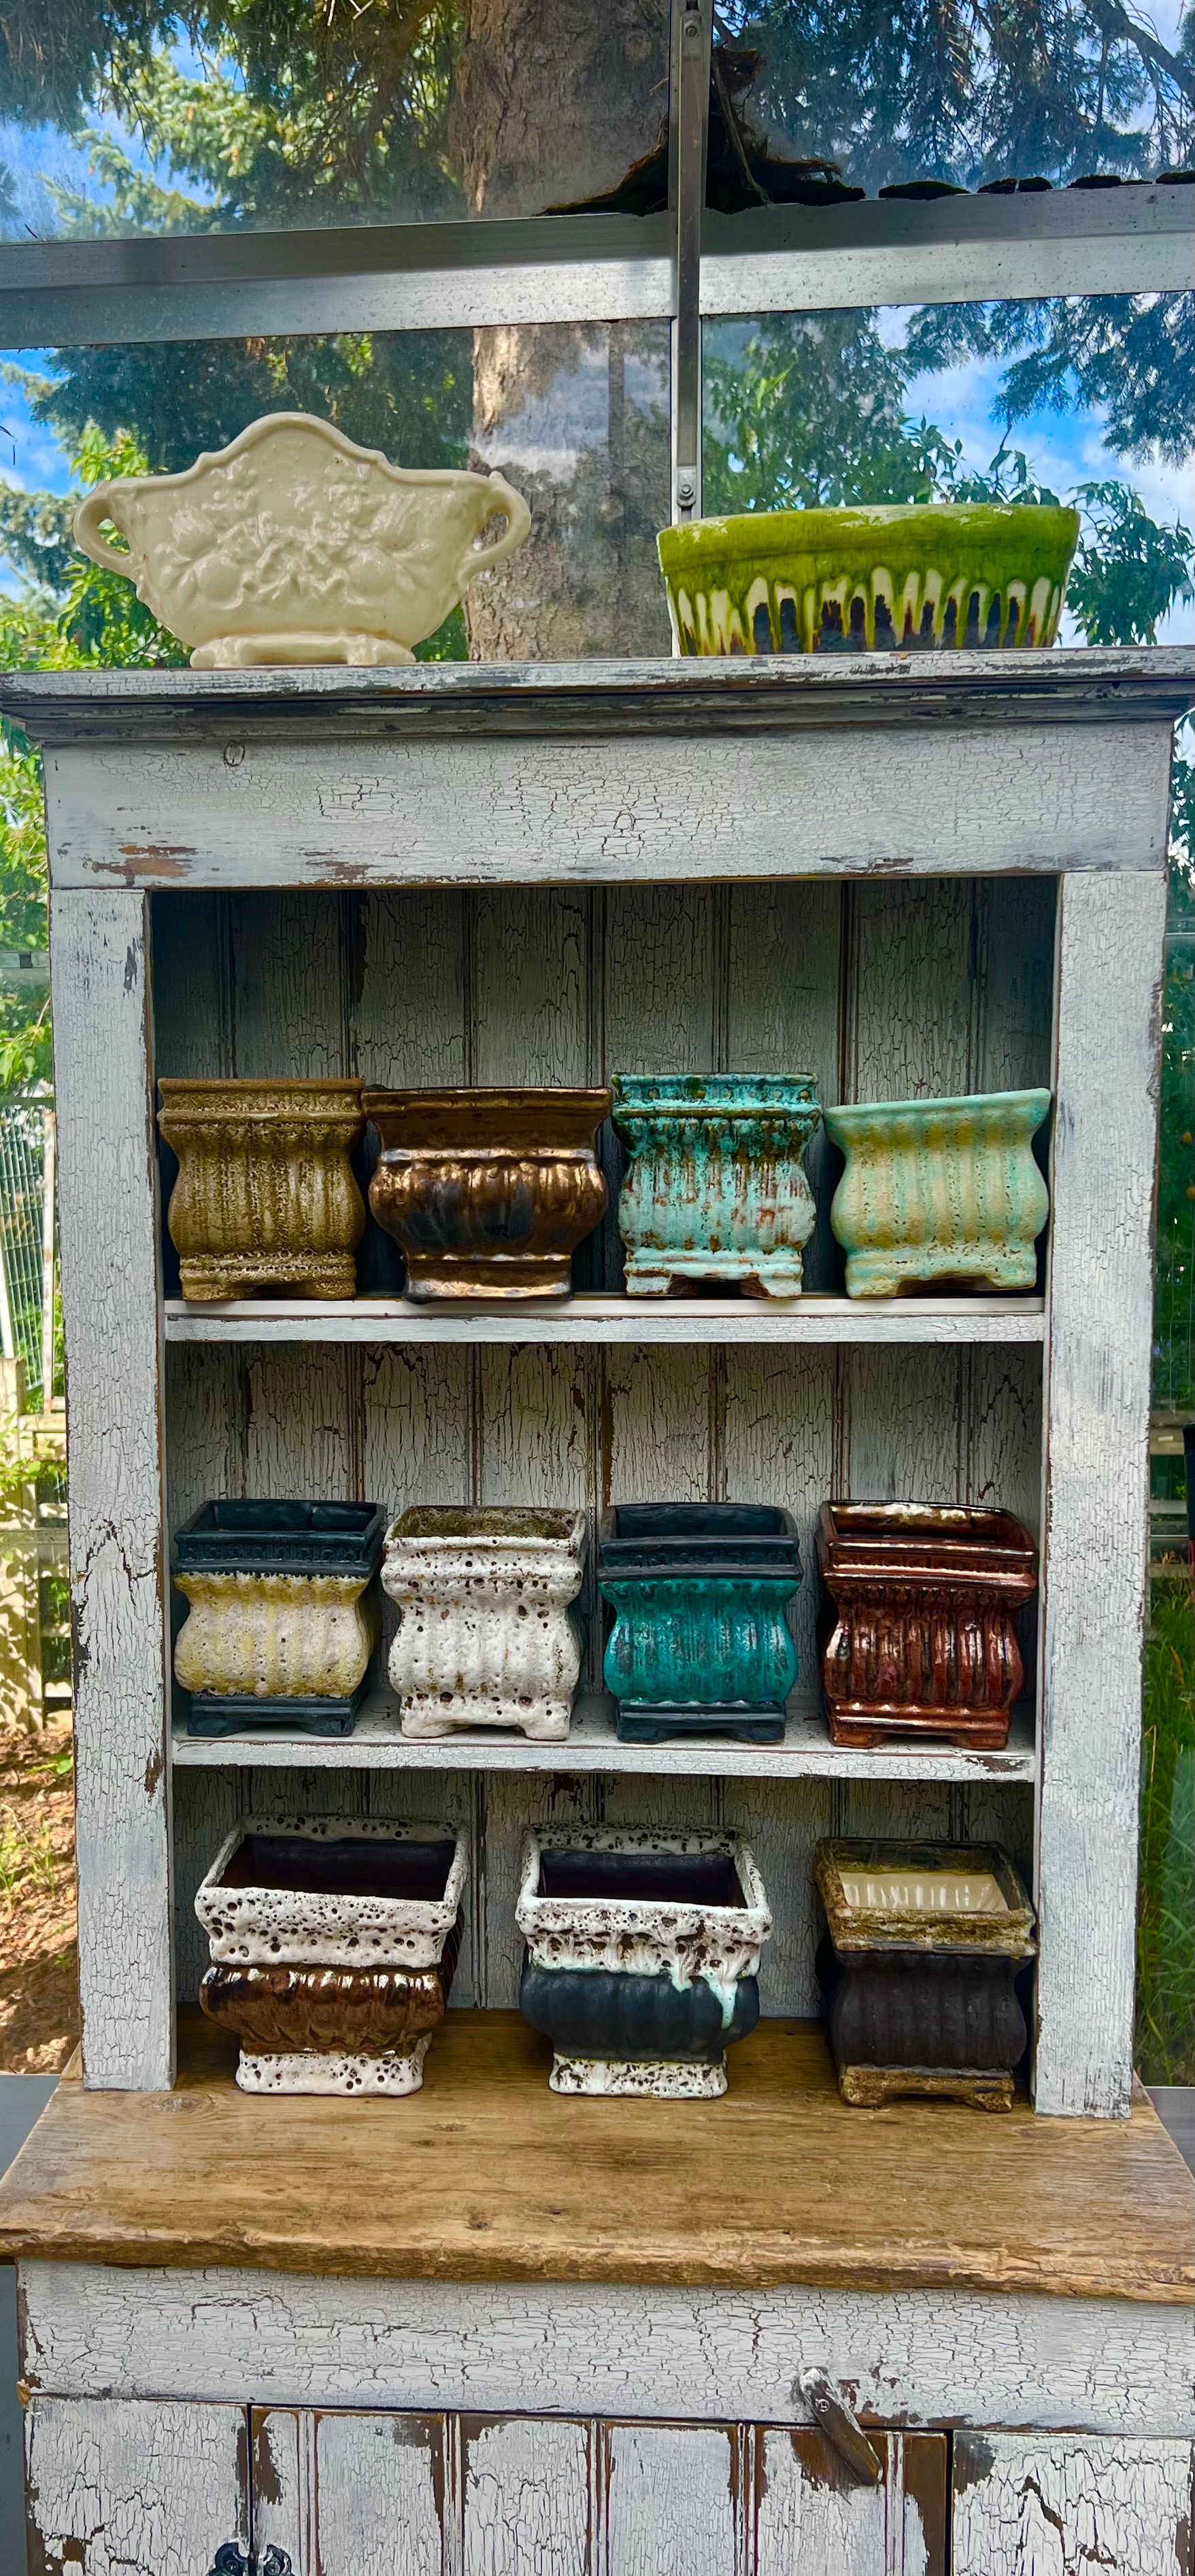
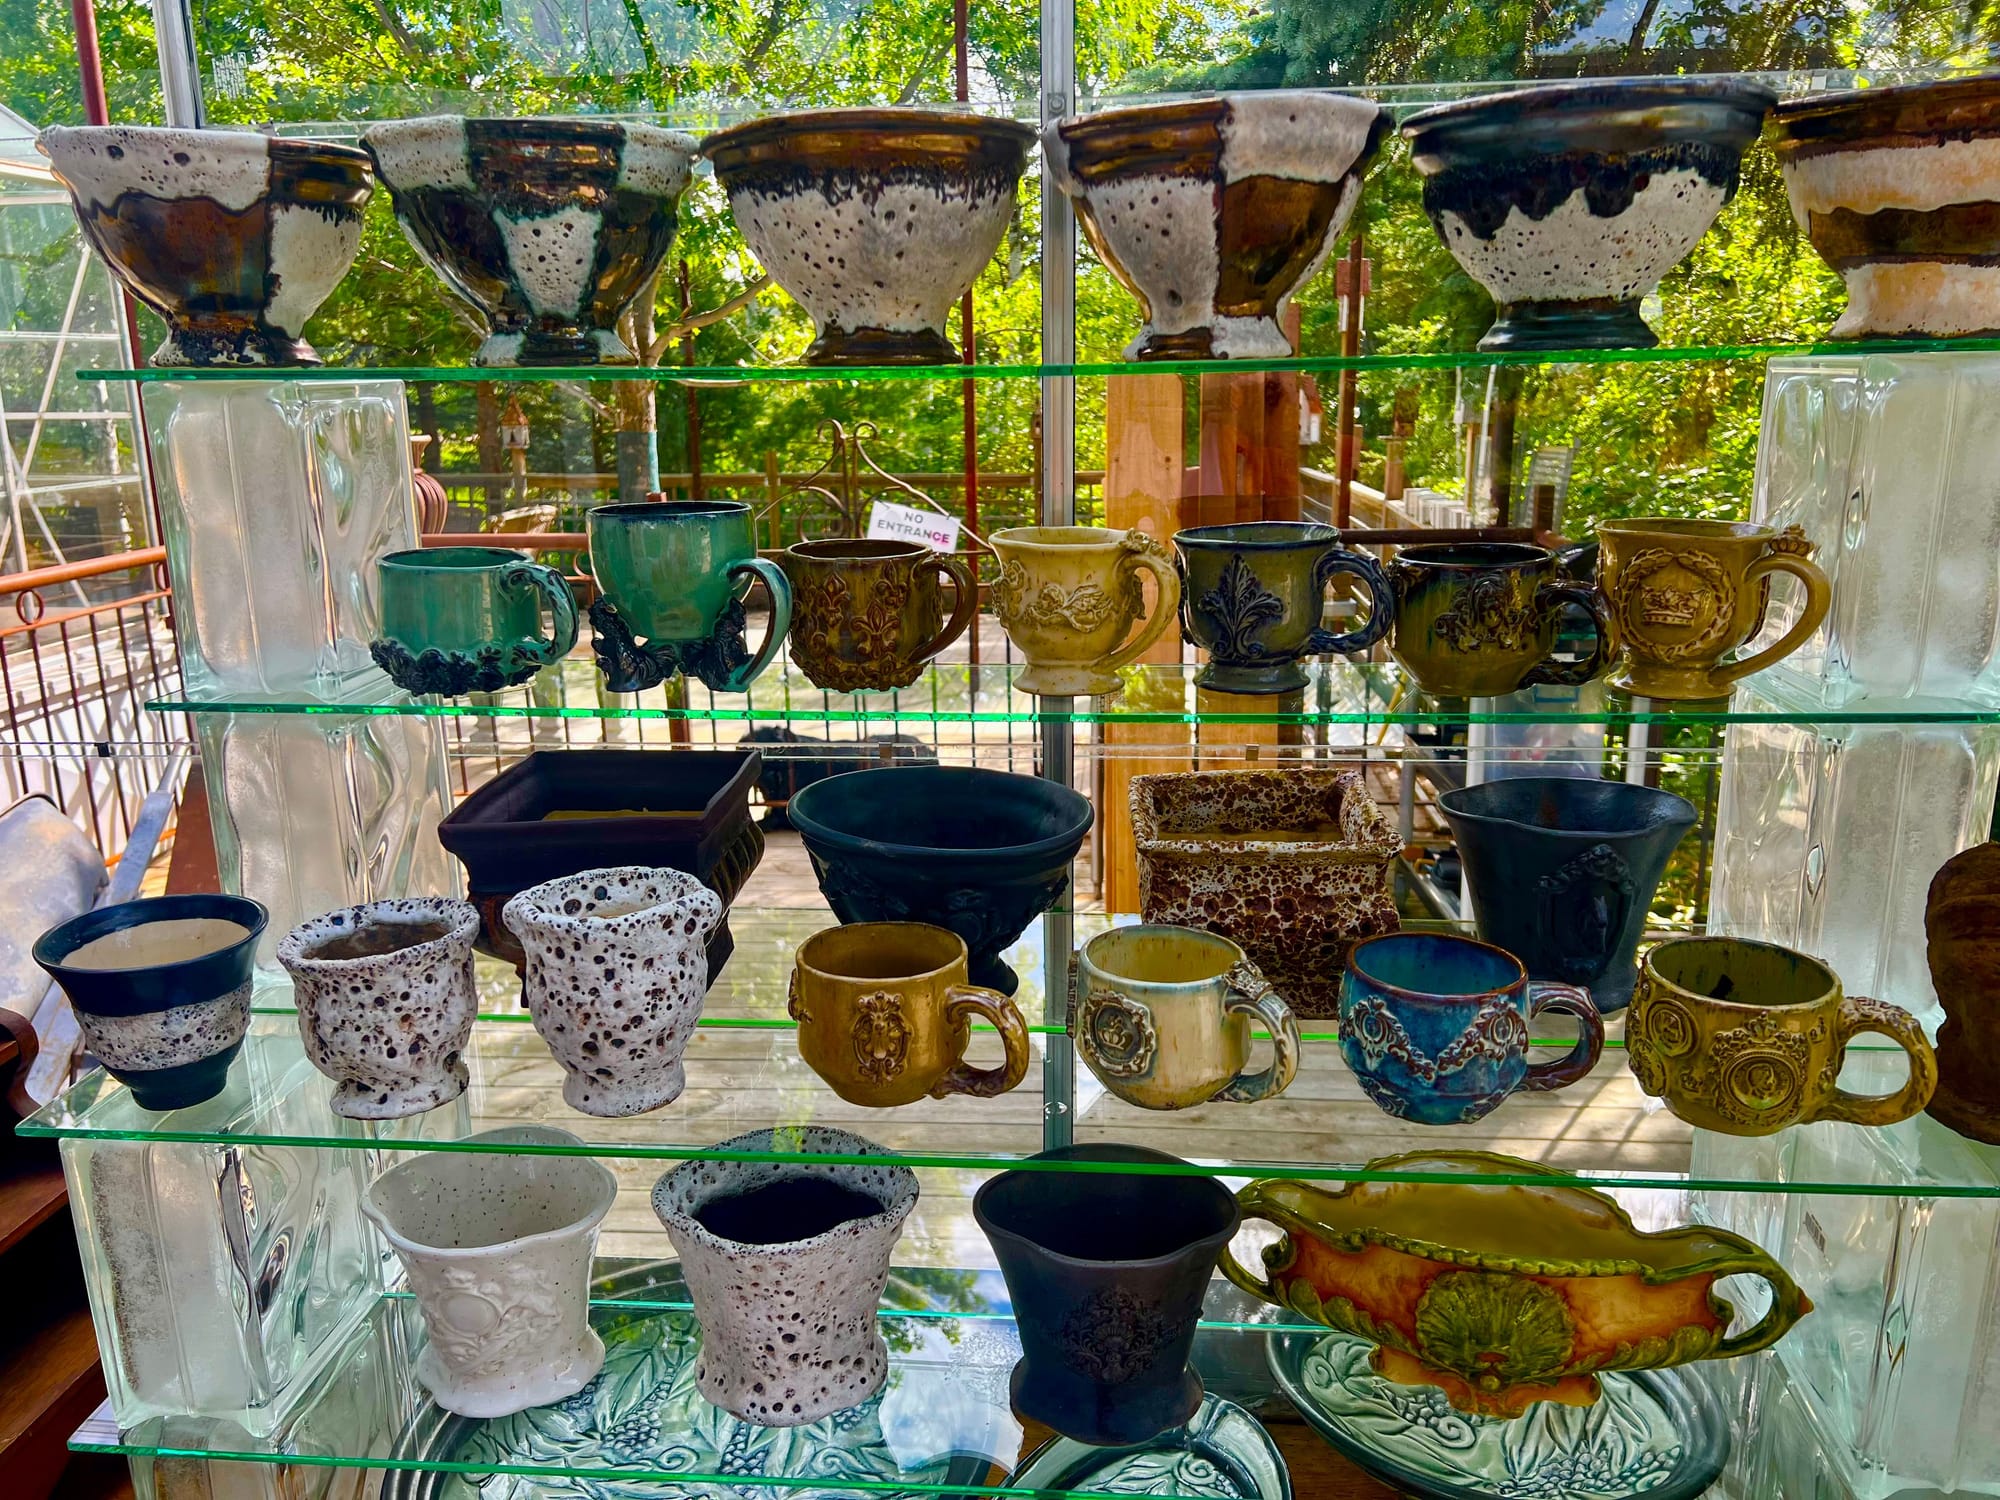
But here you will find unique, colourful and varied pots, some of them even planted with gorgeous succulents.
These pots are ready for purchase and to go home with you.
The charming little new Pot House is situated just south of and adjacent to the outdoor kitchen.
We also have statuary, planters, garden furniture and garden art pieces on display and for sale here.
Talk with our staff if you are interested in purchasing any of these pieces.
It is therefore fitting that this is now the space where succulent classes are held throughout the year.
This space is also a beehive of activity in the winter months, as we use this greenhouse to take cuttings and propagate new succulent crops.
Once our new cuttings are planted, they are moved into our other growing greenhouses before being finally moved into our retail areas.
Antique & Thrift
Later this spring, watch for our Clay Pigeon Gallery here to see featured items, and follow us on our Clay Pigeon facebook account.
We do also have antique and vintage items for sale in our dining room and Tasting Studio.
See an item in our dining room or elsewhere that you are interested in purchasing? Don't hesitate to talk with Roger to see if it is for sale.
And if you want to make an appointment to view antiques with Roger, just contact us at solargardenclasses@gmail.com
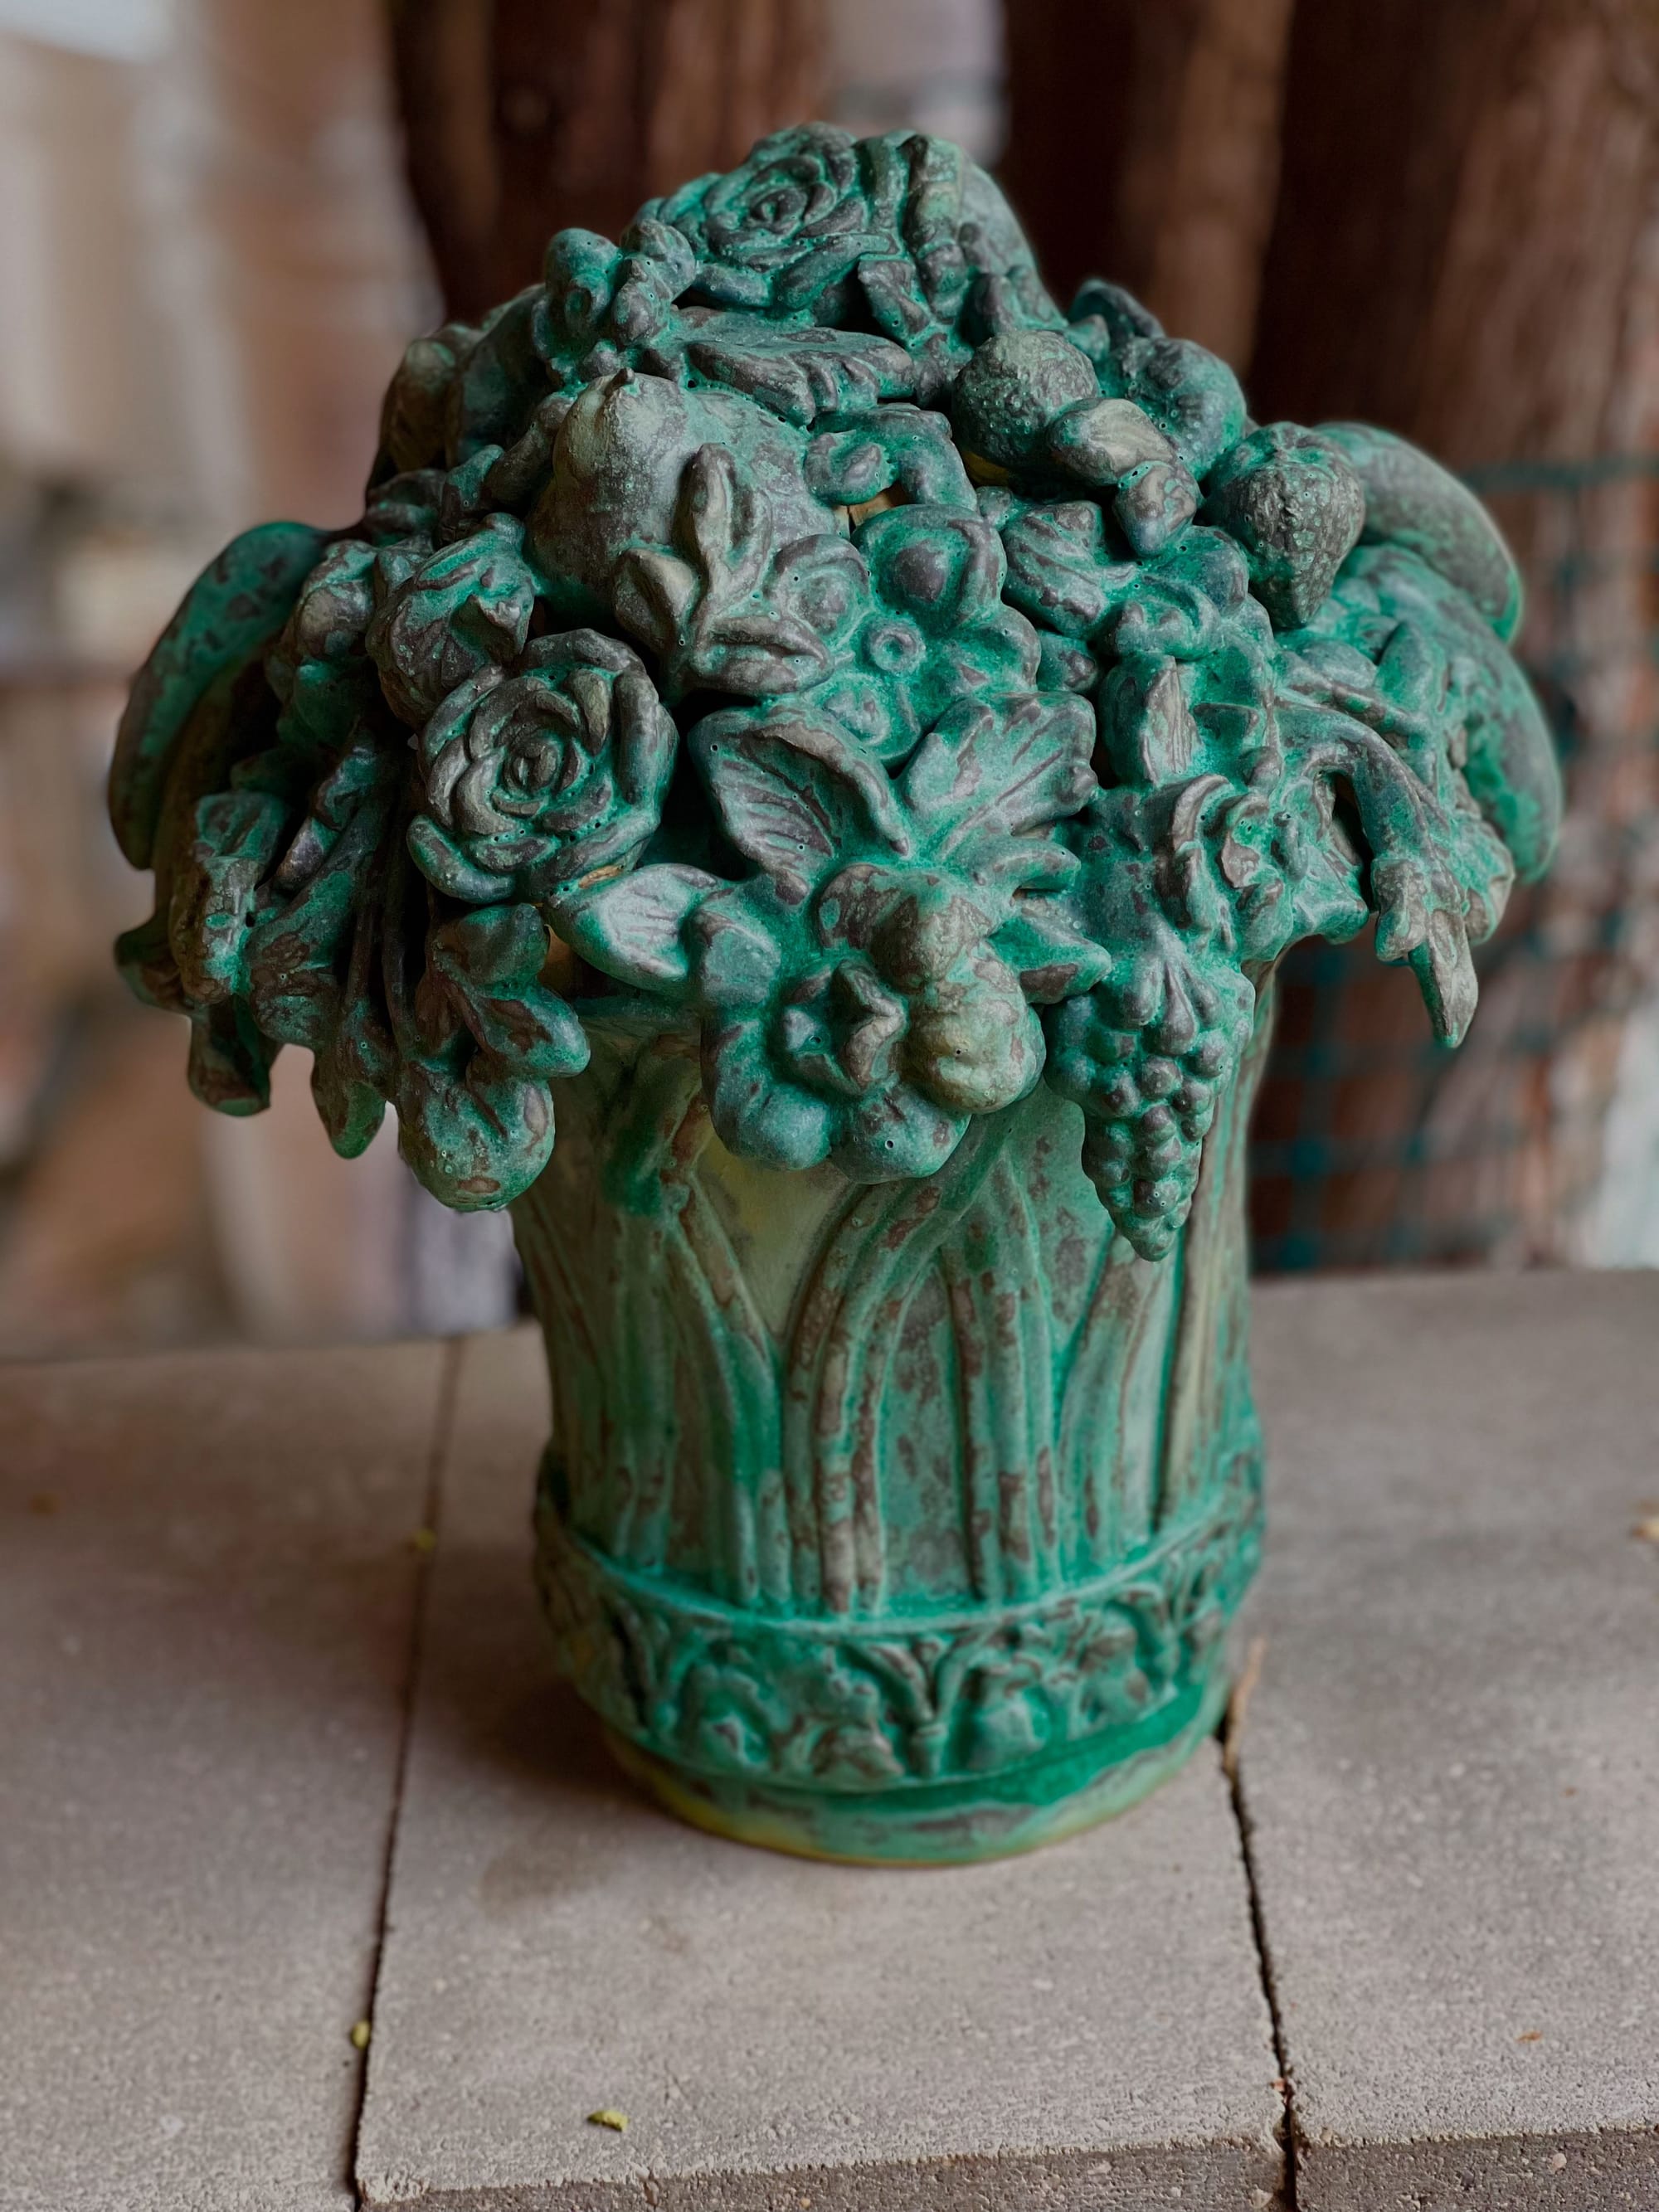
Our original Solar Gardens Ceramics are created, glazed and fired right here.
Almost all of the unique glazes used on our ceramics have been developed within this studio.
This is our space for fresh ceramic ideas and creations.
It is equal parts design springboard, chemistry lab and alchemist's playground.
sign up for our email newsletters
succulent care throughout the seasons
SUCCULENT CARE THROUGHOUT THE SEASONS

To help you along with your succulent endeavours we thought you might like to have a glimpse of what we've learned throughout our 30 years of 'succulent' growth.
Soil:
We've found that the best 'soil' for succulents is not a soil at all. It's a soiless mix!
We use Pro Mix, or Sunshine mix number 4 or 8. To this we add perlite for enhanced drainage.
Pro Mix is available in a 3.8-foot vacuum-sealed bag weighing about 55 lbs, If you buy one we will add the perlite and mix it for you in our mixing machine. Mixing it by hand is quite a chore.
For convenience to our customers, Solar Gardens also sells a bag for $3 that is enough to pot up about 2 ten inch bowls. If you require a larger bag, please don't hesitate to ask as we have other sizes available.
Terracotta Bowl:
Any inexpensive terracotta pot will work for potting up succulents.
When choosing a pot for growing succulents, make sure there is a hole in the bottom. If there is not, you will need to put one in. Use a Dremel with a bit used to put holes in ceramic tile. The bit is available at Home Depot or other hardware stores.
Terracotta draws a lot of water away from the roots of the plants when over-watered. It also retains a lot of heat collected from the sun during the day, keeping the roots warm in the nighttime low temperatures. Remember that cold, wet roots kill cacti and succulents!
Water and Fertilizer:
At the beginning of March, we use a mixture of one rounded teaspoon of 20-20-20 fertilizer to a 2 gallon watering can. Never use chlorinated water or water from a water softener as the salt and chlorine may harm your plants.
- From March to October, use fertilizer every time you water.
- From October to March, do not use fertilizer when you water (which will be infrequently).
- From March to October, water succulents as needed when the soil throughout the bowl becomes dry.
- Remember that these plants are used to dry conditions, and thrive on neglect.
- It is actually better to underwater these plants than to overwater.
- For example, when your pot becomes very dry, your plants may become a bit soft to the touch and wrinkly. This is a good sign that the plant needs a drink.
- When succulents are over-watered (and we see this especially in winter November through March when the days are considerably shorter and cooler), they may die or their leaves turn yellow and fall off (usually beginning with leaves closer to the bottom).
Too Much or Too Little Water?
- In March and April we definitely err on the side of watering less, sometimes only watering once or twice monthly.
- In the months of October to December, do not fertilize.
- During winter months, succulents need only enough water to keep the roots alive. In reality, this amount of water is very little. With light levels low and our days being so short, water sparingly during these months (ie. infrequently and with only a small quantity of water).
- If the leaves start to turn soft, wrinkle or drop (in that order) then your succulents need water desperately.
- If your leaves drop without first having turned soft then wrinkly, that is a sign of overwatering.
- Many people's succulents begin to stretch in January as the days start to get longer. This is a telltale sign of overwatering in December or January.
- If you want your plants in your bowl or arrangement to remain more compact and not grow as much, do not water as much at any time of the year.
- However, if and when your plants do stretch, use a sharp pair of scissors or shears to cut the plant back near the bowl. Always leave a few leaves on the stem to ensure a few pups of growth.
Fertilizer:
When purchasing fertilizer, one should not buy the largest container or quantity available. Buy smaller quantities at a time. When fertilizer sits on your shelf too long, it will turn hard and become difficult to accurately measure. We sell 20-20-20 in a 500 gm container. This size is not available at most garden centres, but this is the only way that we like to sell it in order to limit your waste and unnecessary cost.
Overwintering:
Many, many people do not want to overwinter their succulents and that is just fine. No need to feel guilty. However, many avid gardeners do want to overwinter their succulents and that is great too. Today, succulents are more affordable, less scarce, and prices are more reasonable than in the past. Understand that every living plant (like us...unfortunately) will die at some point. However, succulents will live a lot longer than a dozen cut roses that will last a week (if you're lucky and will cost at least twice as much) even if you're changing their water everyday.
Succulents can outlive annuals and many perennials simply by understanding their seasonal growth habits. Solar Gardens' succulent class bowls cost $65 plus tax (but contain at least $125 value if all plants are purchased individually), are in a 10" diameter terra cotta bowl and contain 13 to 20 different varieties of succulent plants. These plants should surely last the spring, summer and fall (6 or 7 or 8 months) with little to no care outside on your patio or balcony. Keeping that in mind, if you would like to try to overwinter your succulents as some avid gardeners do (and again..don't feel guilty if you don't), here are a few tips:
Since winter days are so short, the plants really prefer to stay dormant (alive, but not growing) and they still need as much light as possible to stay alive. So putting them in a garage or basement or closet with no light will kill them. During this time they require vastly decreased amounts of water since they are not actively growing. Plus, succulents are desert plants and require little water to begin with even when they are actively growing.
We have found that most people kill their succulents during the winter with too much water (and not enough light - see the "Grow Light" section below). During the winter, succulents will still need a bit of water. But how much is "a bit of water"? Well, that is a very hard question to answer since the amount of water they need depends on many variables, such as - how warm or cold the room is, how much (or little) light they are receiving, how many plants are in the pot, how big (or small) the pot is, what the pot is made of (ceramic, terra cotta, glass or plastic), how big (or small) the plants are, and how much drainage each individual pot allows (if it has drainage at all). In general, a good rule of thumb is to add a small amount of water if the soil is exceedingly dry. With our class 10" terracotta bowls, you might add a cup of water occasionally during the winter but only if the soil is very dry.
So in a nutshell, most succulents die during the winter dormant period from COLD and WET roots. The key is to water infrequently with a small amount of water, just enough to keep the roots alive during dormancy. When overwintering, succulents prefer a sunny window (south is best), hardly any water, and a temperature above freezing.
The absolute BEST way to overwinter succulents is under grow lights....
Grow Lights
For those that are very serious about overwintering succulents we highly recommend grow lights. We carry a fantastic, amazing type at our Avalon shop.
Lastly, don't be too upset if you haven't overwintered your succulents successfully. Like most things in life, it takes trial, error, time and patience. Not everything works (and grows) successfully all the time....unfortunately!
Who Doesn't LOVE a Summer Holiday? Succulents are no Exception!
Whether you've overwintered your succulents or purchased new ones in the spring, fall or winter, they ALL enjoy a summer holiday outside. But you should be aware of just a few things before moving them outside.
#1. When placing outside NEVER let them freeze. Often we play it super safe and bring them indoors for the night if the forecast minimum is for +3 C. It's OK to leave your plants out during the day if it is above freezing, but in the spring we generally don't put them out during the day unless the temperature is going to be about 8 C or above. Of course some prefer not to put them out until about the 3rd week of May when (hopefully) the freezing is over and you don't have to bring them in at night. Whenever you put them out, keep an eye on your weather app. This is equally important in the fall if you plan on bringing them in to overwinter.
#2. It's really hard on your succulents if you take them from your low-light houses, greenhouse and/or grow lights and put them out in direct sunlight. If placed out in the sun without acclimatizing, they will sunburn for sure. The sunburn won't usually kill the plant (if it is not too severe), but it will create dead looking areas on the leaves. These areas will never heal, so the leaf will be scarred for its' life.
#3. To acclimatize your succulents to the sun, introduce them to the great outdoors gradually. For the first 3 or 4 days place them in the shade all day. After that, place them in a partly shady spot for another few days and then they can go into the direct sun in about a week.
and
#4. Your succulents don't HAVE to be placed in the direct sun for the entire day. Most succulents will be happy all summer on a deck that may only get sun 3 or 4 hours of sun a day.
The main benefits of giving your plants a summer holiday are 3-fold:
- when your plants are outside they will be happier and appreciate the fresh air and its movement.
- you'll enjoy the benefits of added colour and less stretching of your plants (unless you're watering them too much).
and
-they will gain strength with direct sunlight which will give them more energy to help get them through our terribly LONG winters.
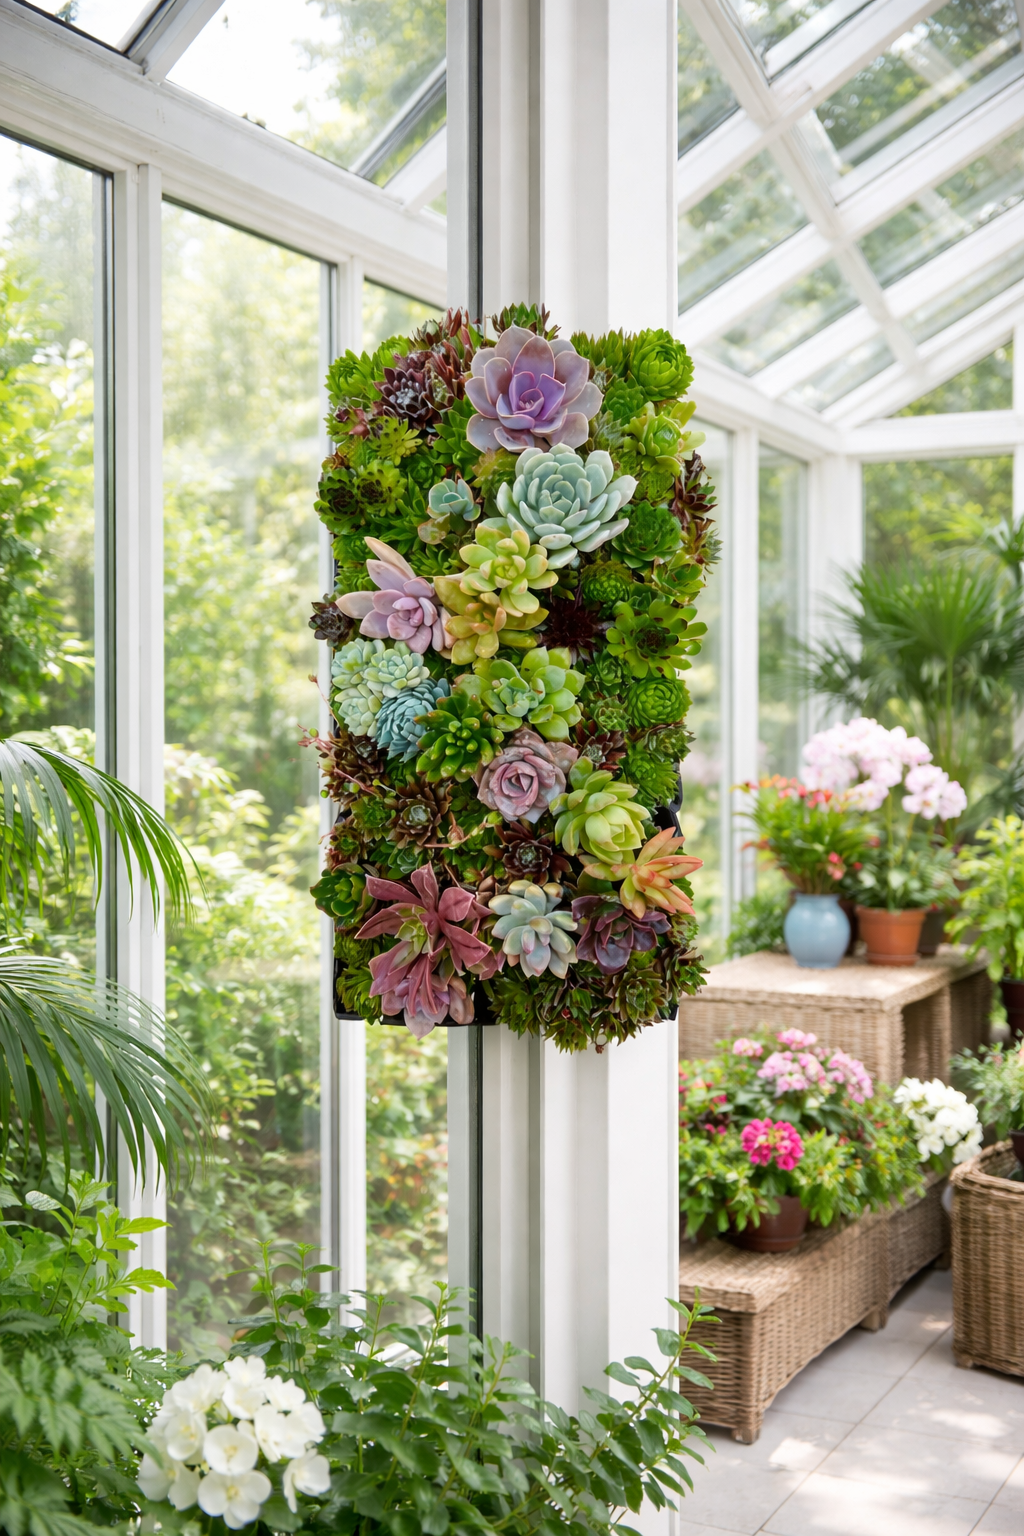
Overwintering Living Walls
In our living wall class, you may have planted your wall with either all hen and chicks (sempervivum), all other succulents that can't freeze or a combination of both. If your wall has nothing but hen and chicks in it skip to the next paragraph. If planted with all succulents that can't freeze (all succulents other than hen and chicks that are non-hardy in our climate) you can either overwinter the entire wall indoors or pull out the plants and plant them in pots either individually or like we do in the succulent bowl class - group together in a lovely arrangement using as many bowls as you need. If your wall has a combo of both types then you must separate the hen and chicks from the non-hardy succulents. For overwintering the non-hardy varieties be sure to read the section 'OVERWINTERING" above
The ABSOLUTE best way to overwinter the hen and chicks in your living wall is to lift them and plant them in your garden in the fall. Make sure they have thick snow cover all winter (it's good to have a place to pile all that driveway snow). Then in the spring you can lift them and plant them back into your living wall (It's so much fun to replant them into the wall in the spring and make up a new design). This is a little more work than just setting your planted living wall outside and hoping it will survive. Having said that, many of our living wall clients have very successfully overwintered their living walls right in their frames. If trying this, be sure your plants have a good snow cover as well.
Bugs:
If you can see bugs on your succulents (aphids, fruit flies or cotton ball-like "downy mealy bugs"), use End All. End All is a green product made with pyrethrum (from the citronella plant).
Before you take your plant indoors in the fall, give it a good spray with End All. Spray from the edge of the bowl inwards, up and around, under the leaves. Wear a pair of rubber gloves and a respirator when spraying your plant in order to take proper safety precautions.
We always have End All in stock year round.
If you see small cotton balls on your plants you have mealy bugs. Before spraying with End All it will definitely help if you first remove any cotton balls that you see with a Q tip.
Unfortunately bugs are a fact of life and can occur on your plants any time of year. Of course bugs can attack your plants when outside and can be transferred into your house if you are overwintering your plants. Also, bugs and bug eggs can be brought into your house at any time of year. Small bugs and their tiny (usually invisible) eggs can be brought into your house by hitching rides on fruits, vegetables and grains that you buy at the grocery store. If your plants seem bug-free in the winter and then suddenly bugs appear (especially those annoying, tiny flying fruit flies) then they (or their eggs) have hitched a ride directly from the grocery store to your kitchen. The key is to be vigilant all year-round. Inspect your plants every week (even in the winter). It is much easier to deal with a few insects than a whole swarm of them.
End All is an oily substance that will stay on the plant surface for a couple of months and will actually enhance the colour of your plant! Solar Gardens carries it year round in our retail centre. As succulent specialists, we can say that End All in our experience is safe on succulents. However, if you are considering using it on non-succulent plants, we cannot guarantee that End All will be safe on all plants. You would need to research that as all plants are different.
Solar Gardens uses a systemic commercial product in late February and early March, which is drenched into the soil for the new active roots to absorb the chemical and ensure no bugs will exist. The chemical we use lasts for 8-9 months, and a one-time application per year is all that is needed. This doesn't mean that bugs cannot exist on the plants. But it does mean that for 8-9 months after our drenching, any bugs that bite into this plant will ingest the chemical and die.
Mealy-bug infestations can also be managed using a commercial product. Only commercial growers have access to it. It's expensive and requires additional precautions. As a result, it is not available to the general public. If you have a severe infestation, we can treat your succulents for you using this commercial product at our acreage. Send us your request via the CONTACT US form and we can provide a cost estimate.
loyalty cards
This is a content page where you can freely add any content such as text, images, links, etc.

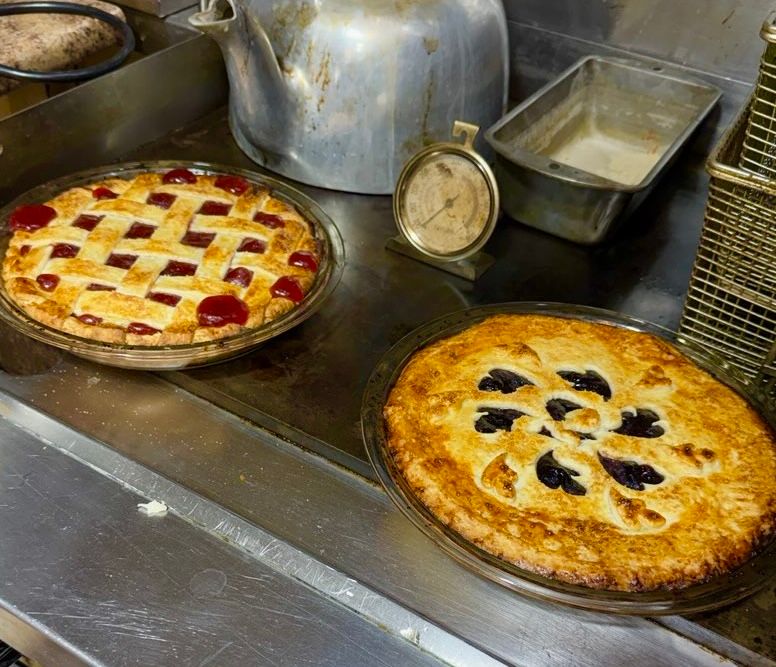
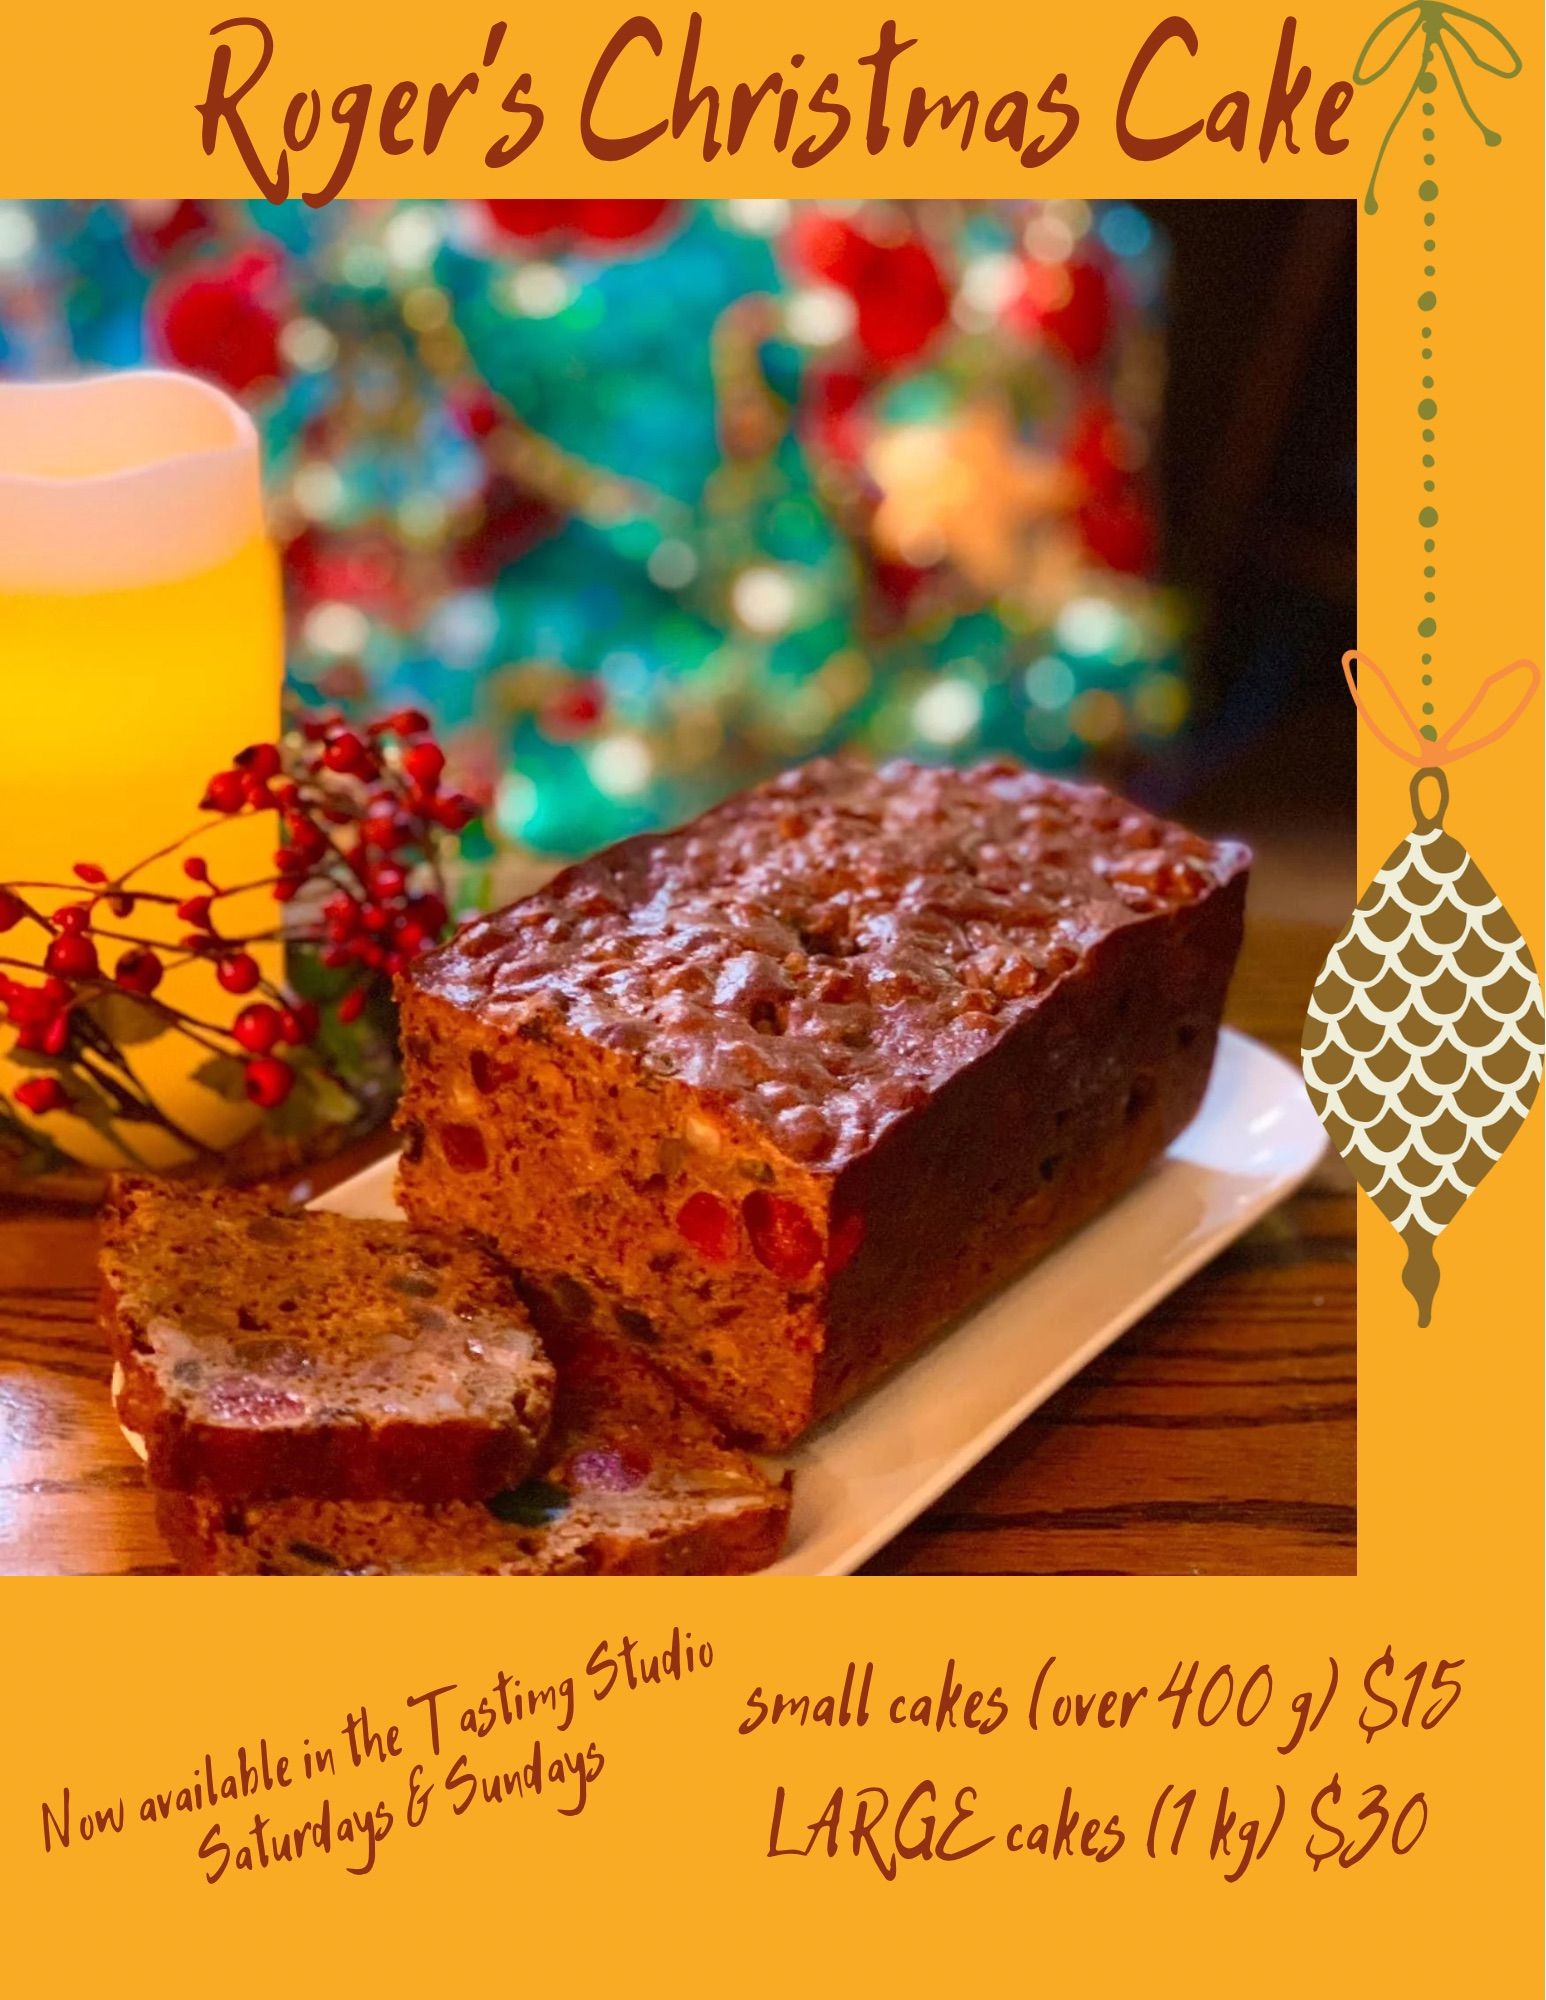
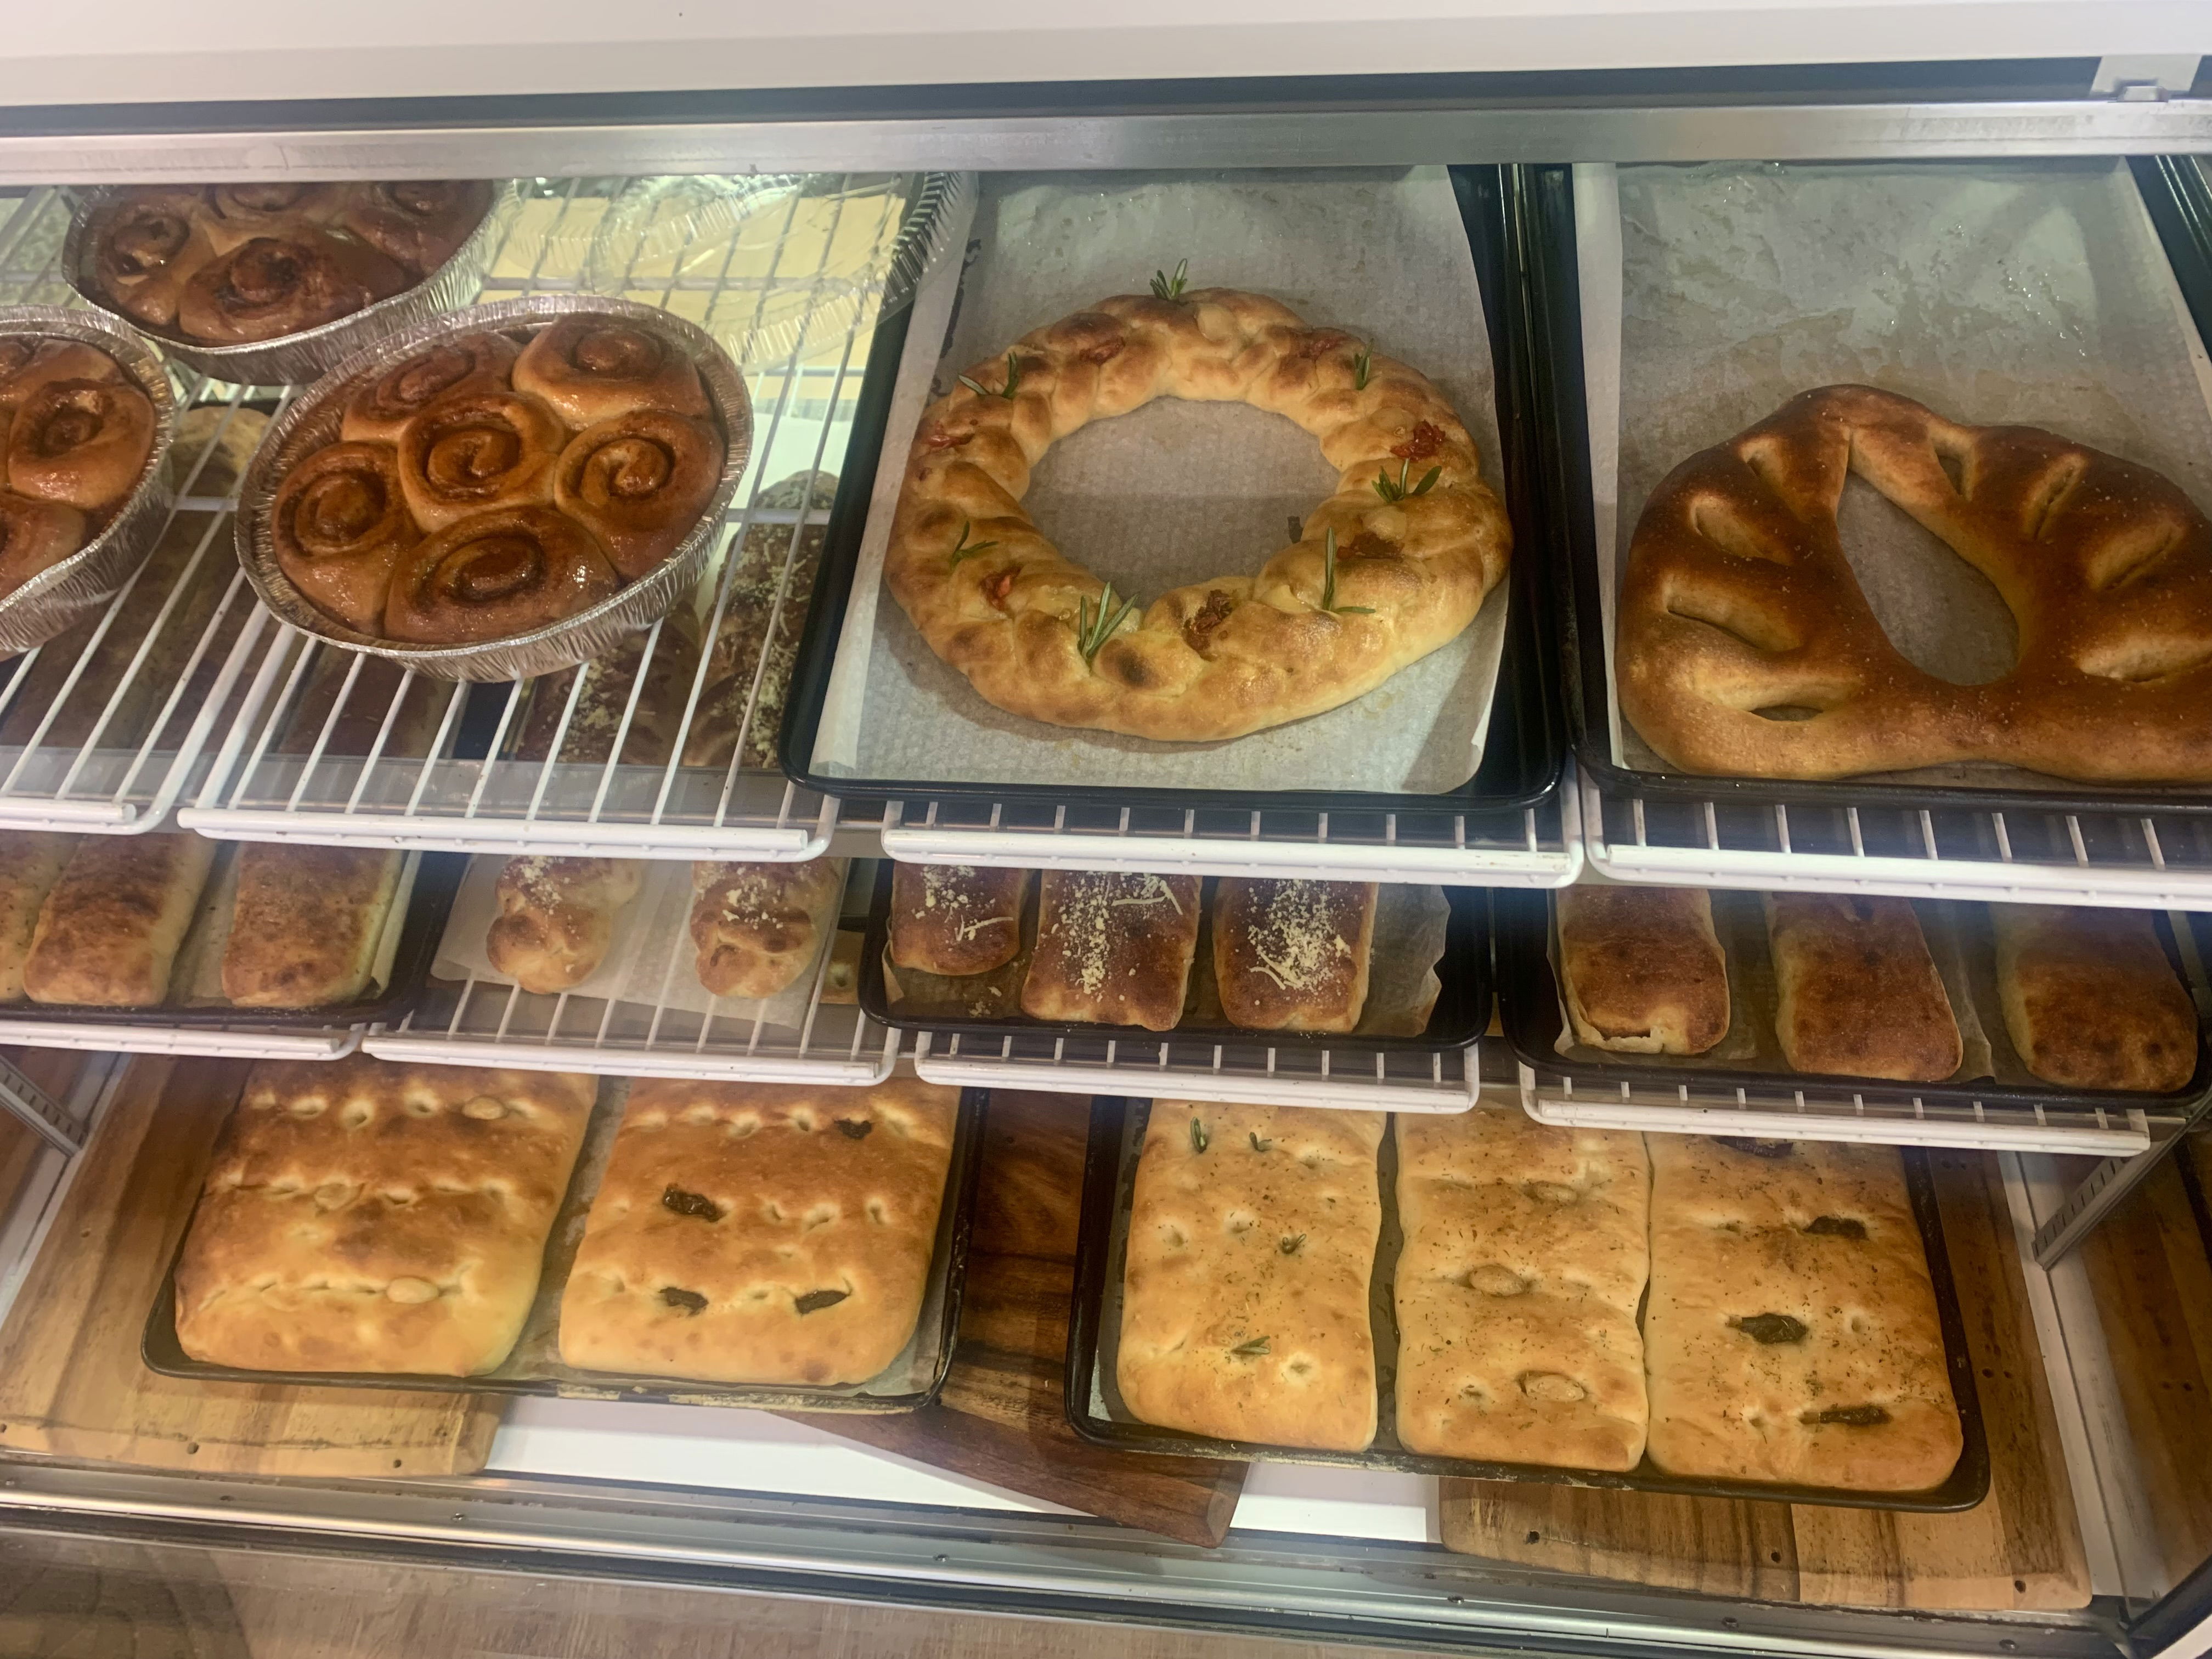
fresh baked artisan bread
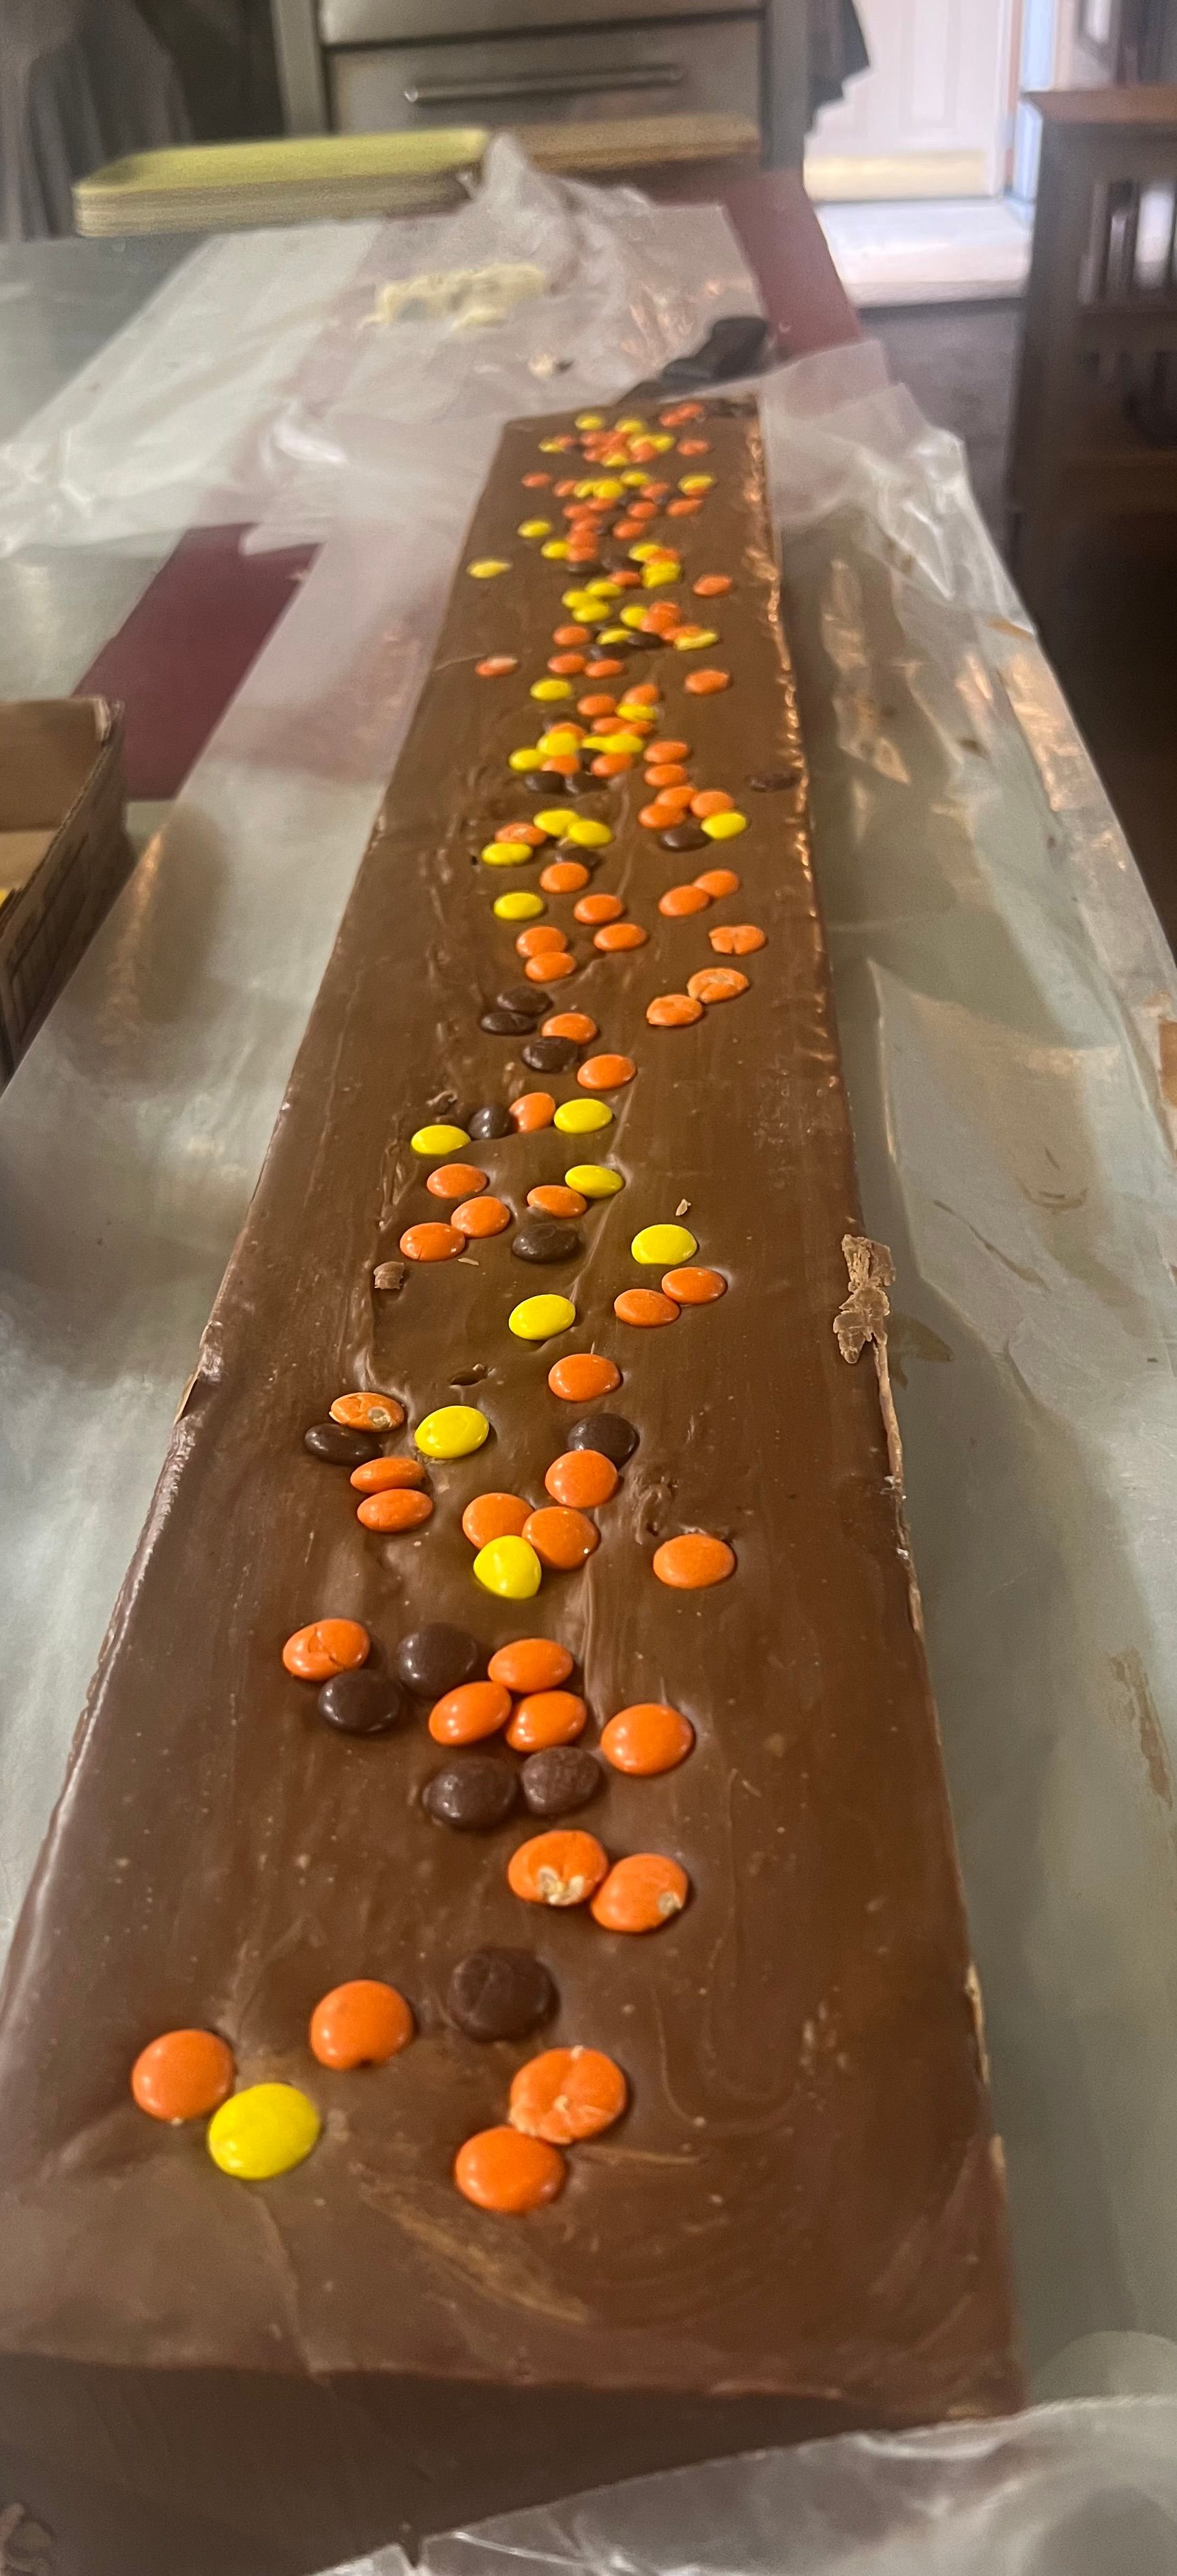
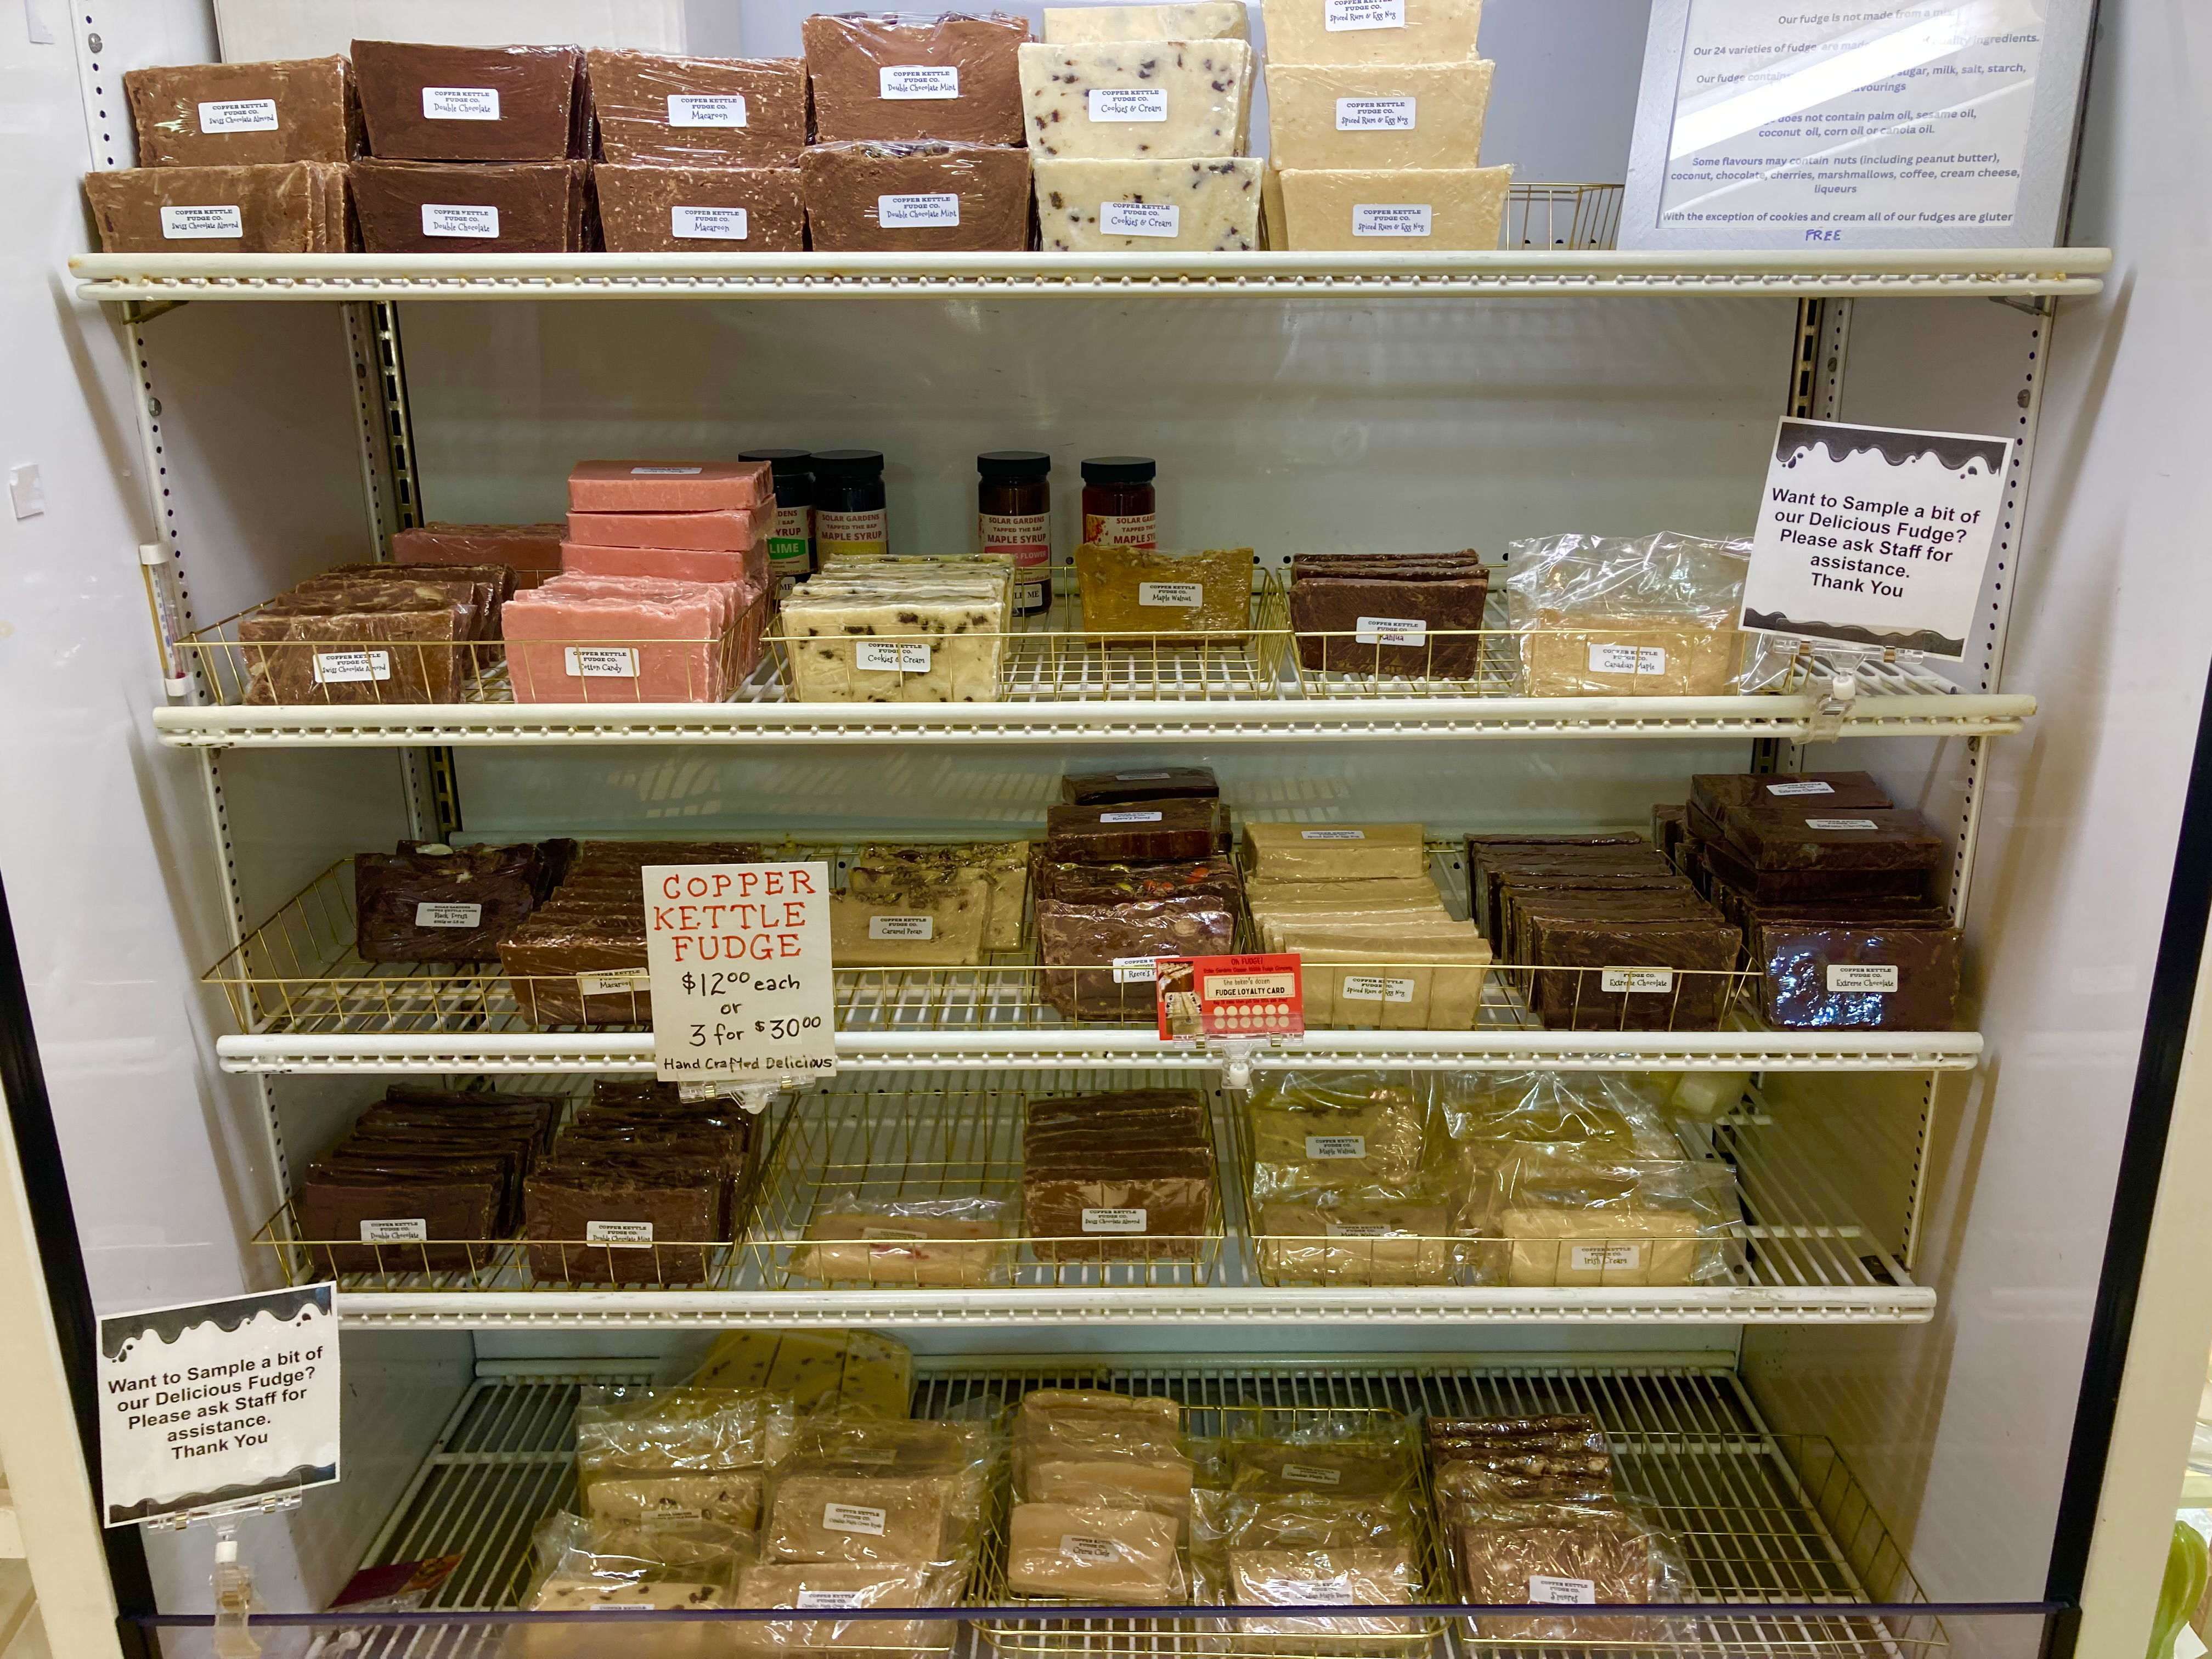
copper kettle fudge
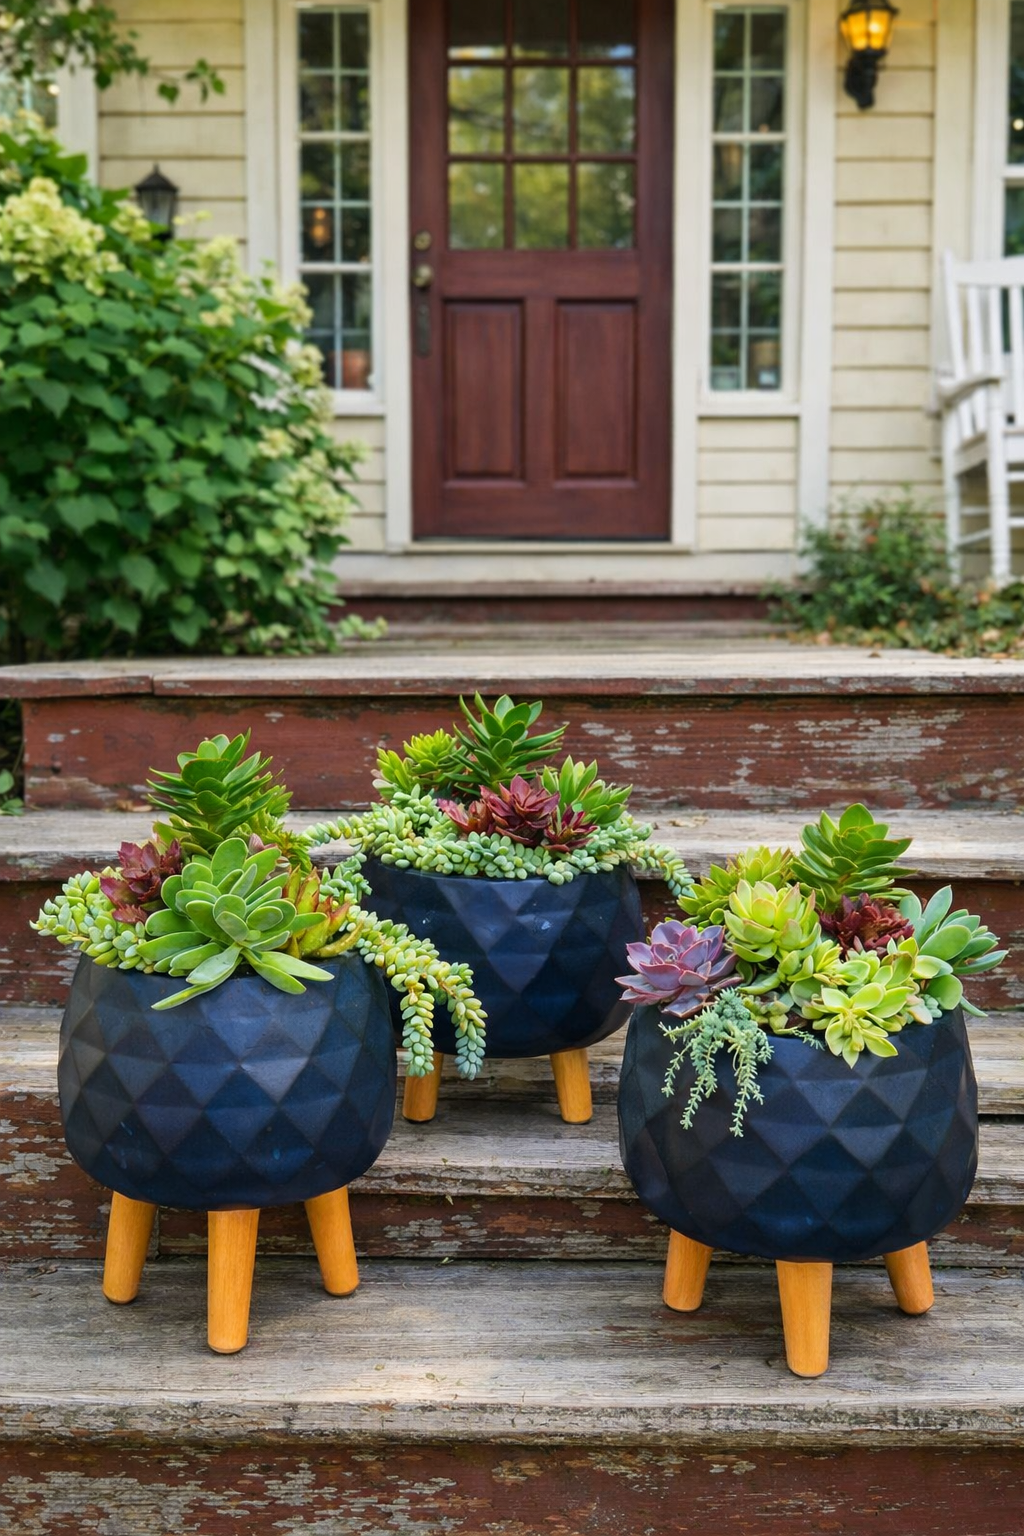
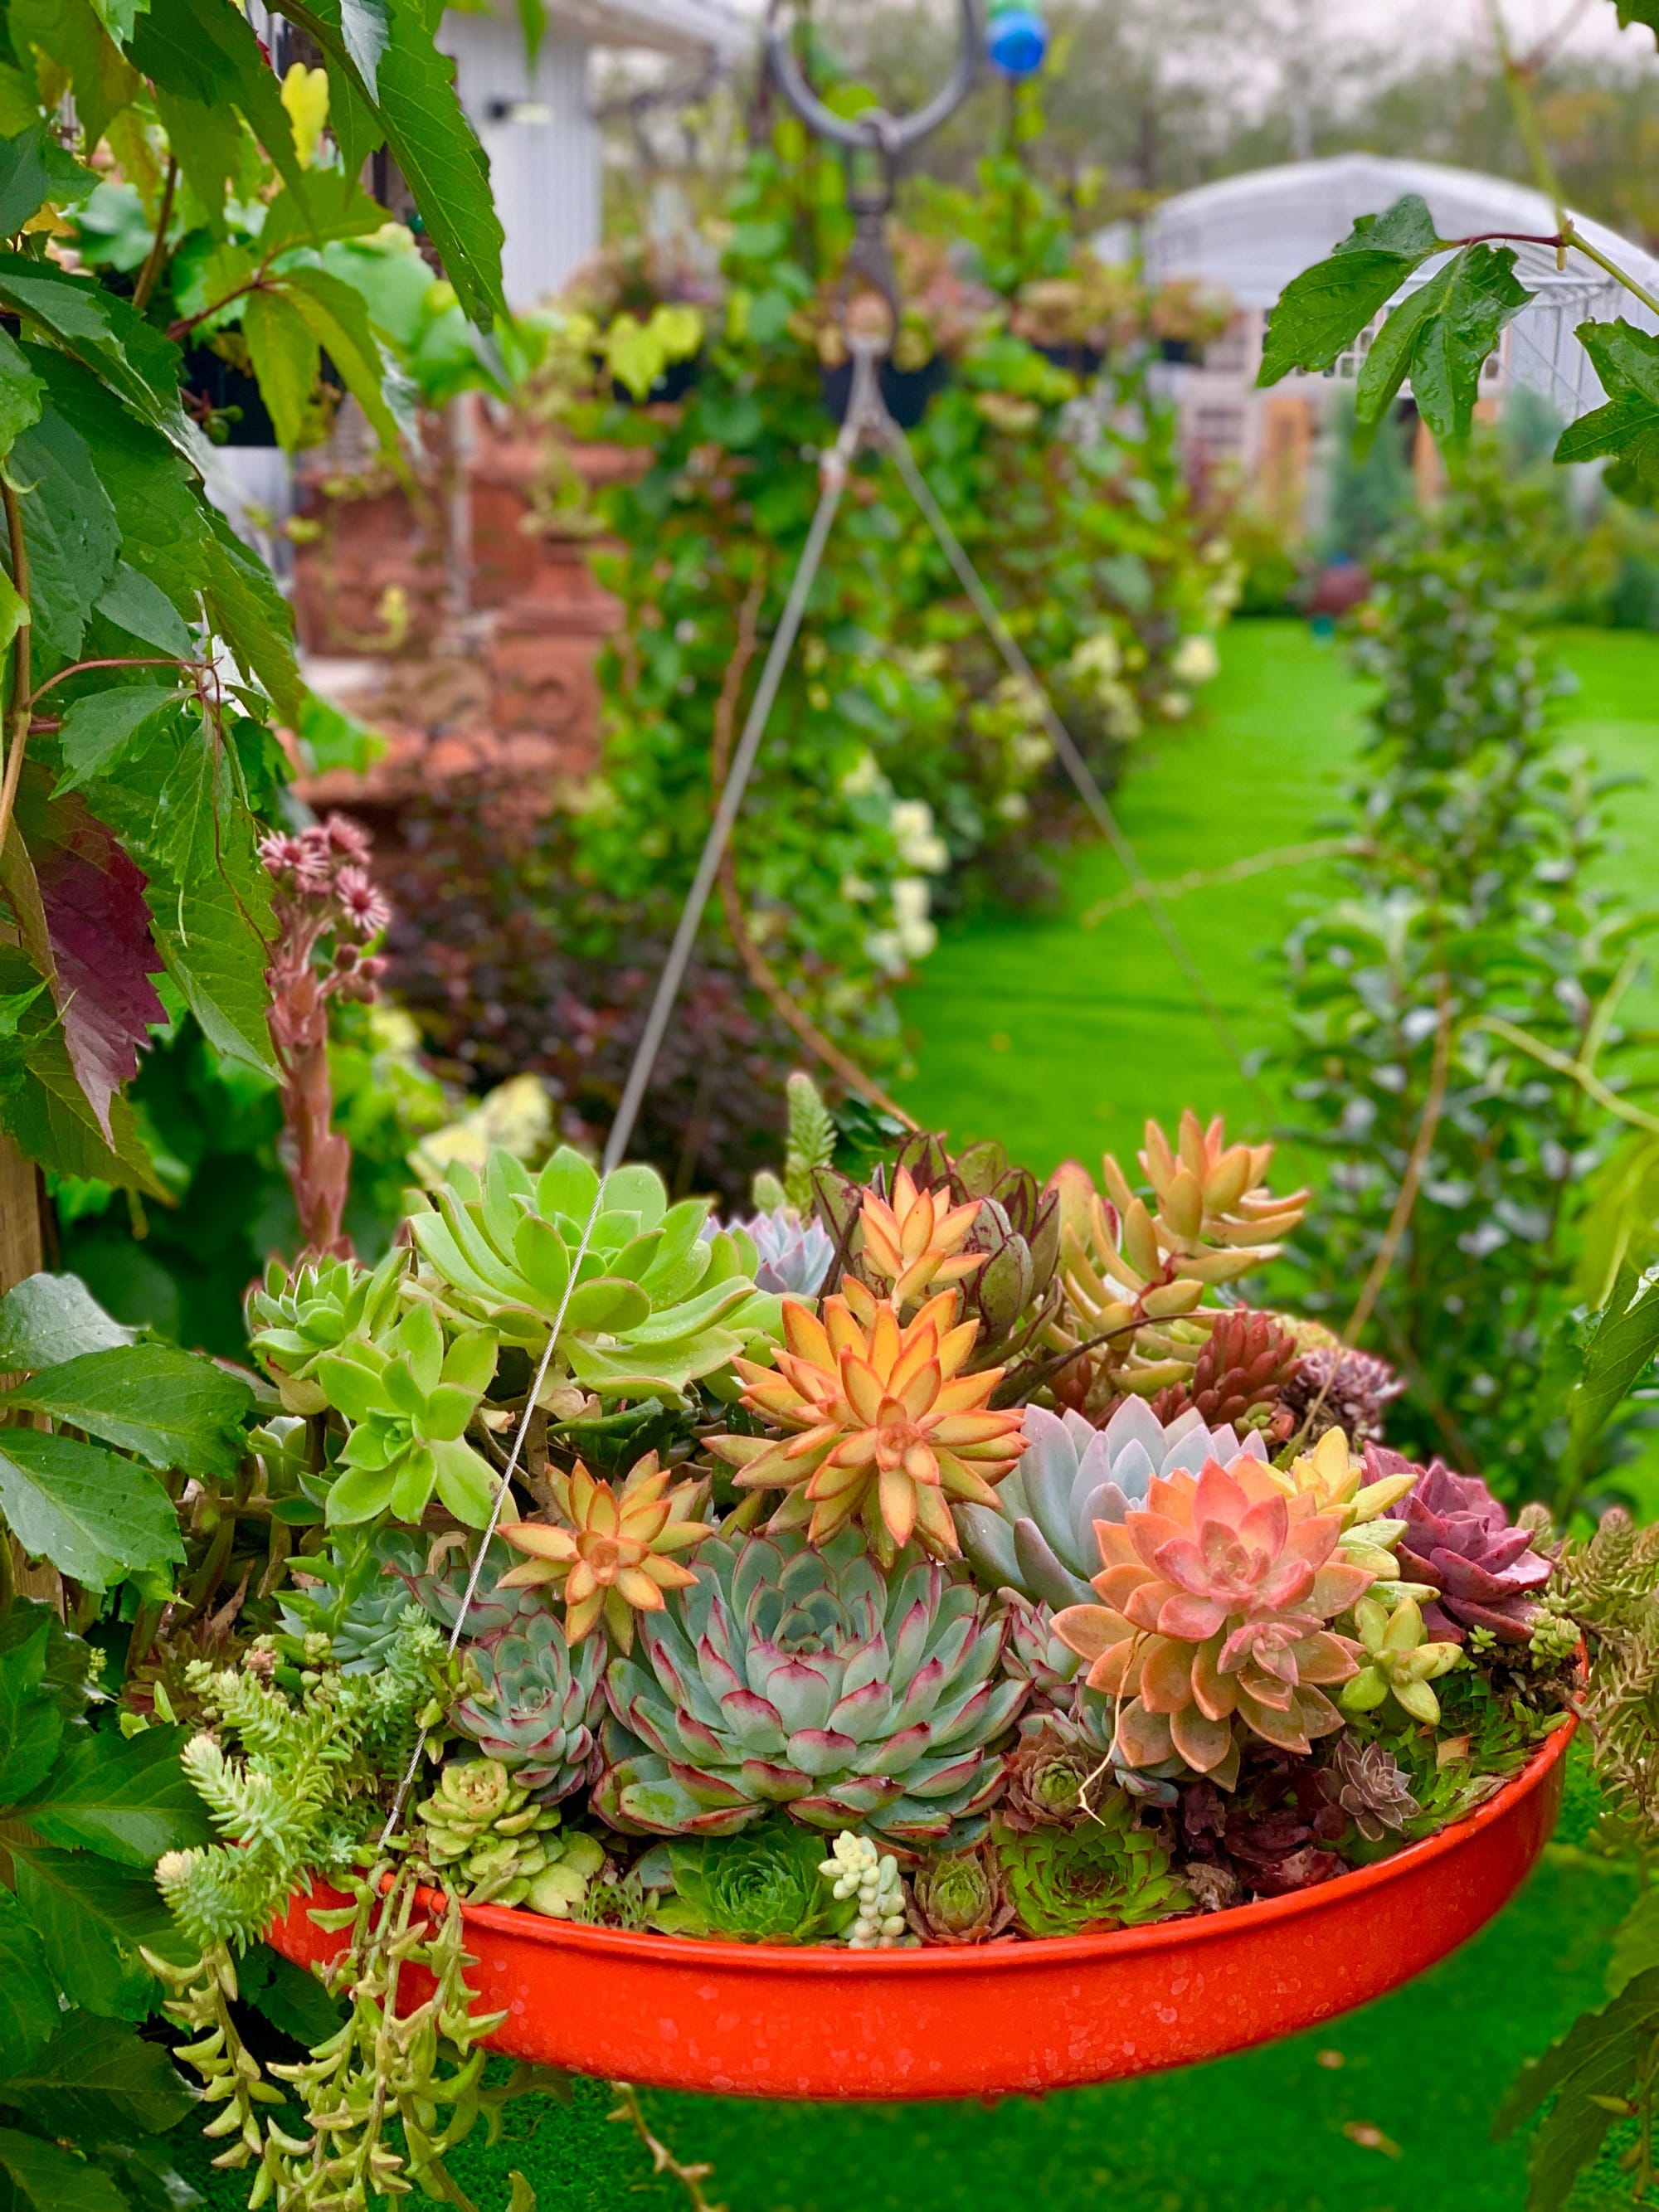
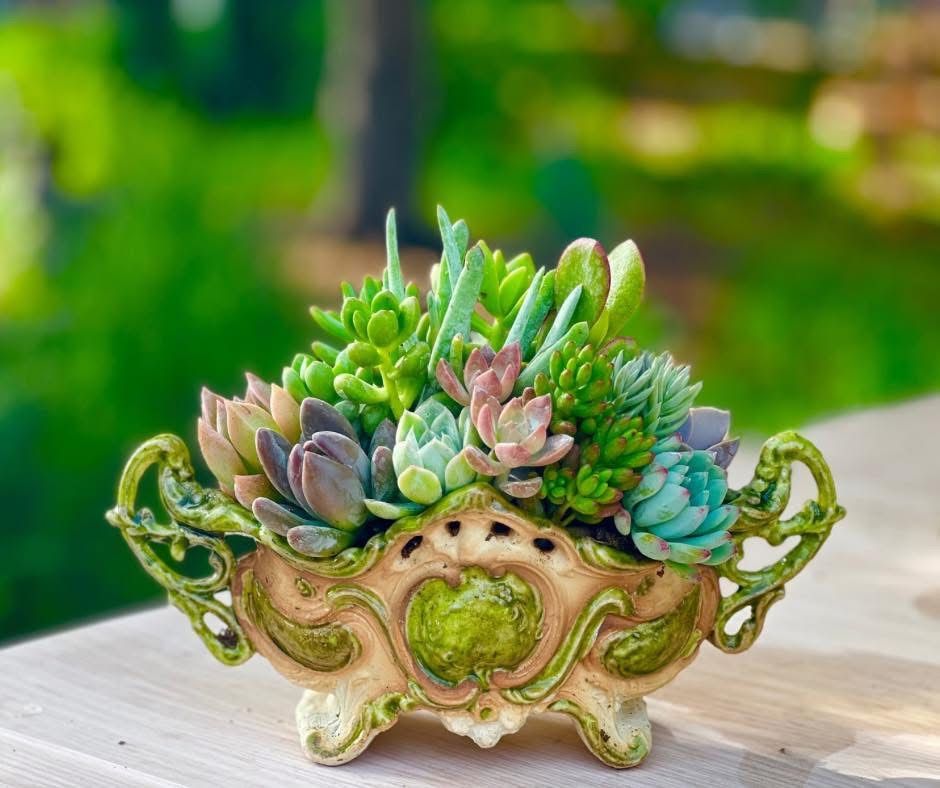
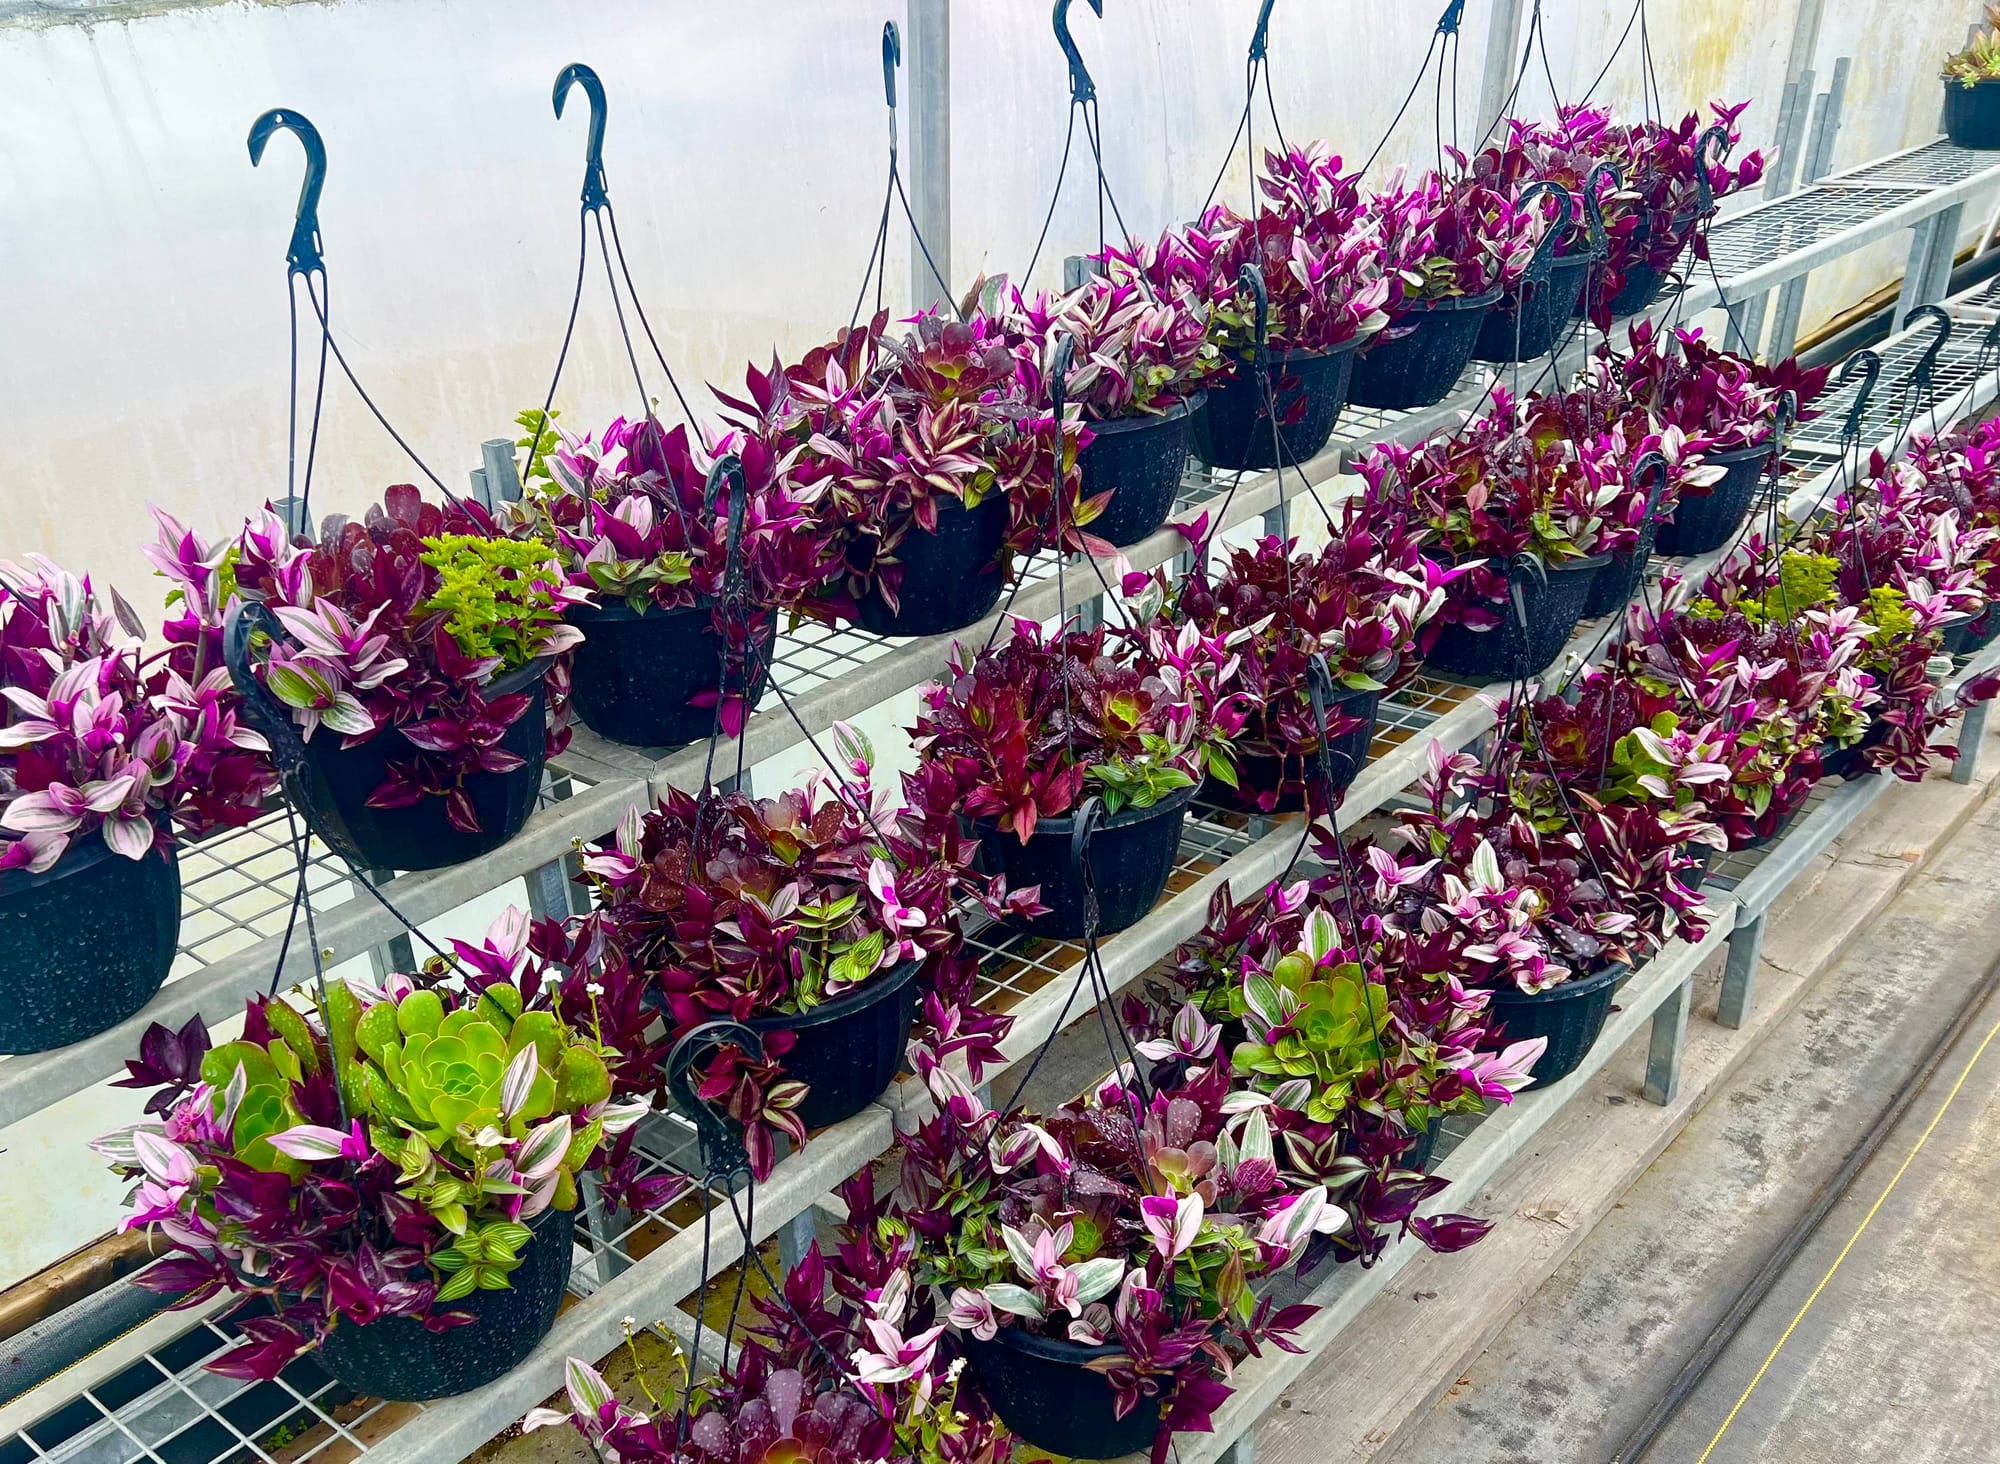
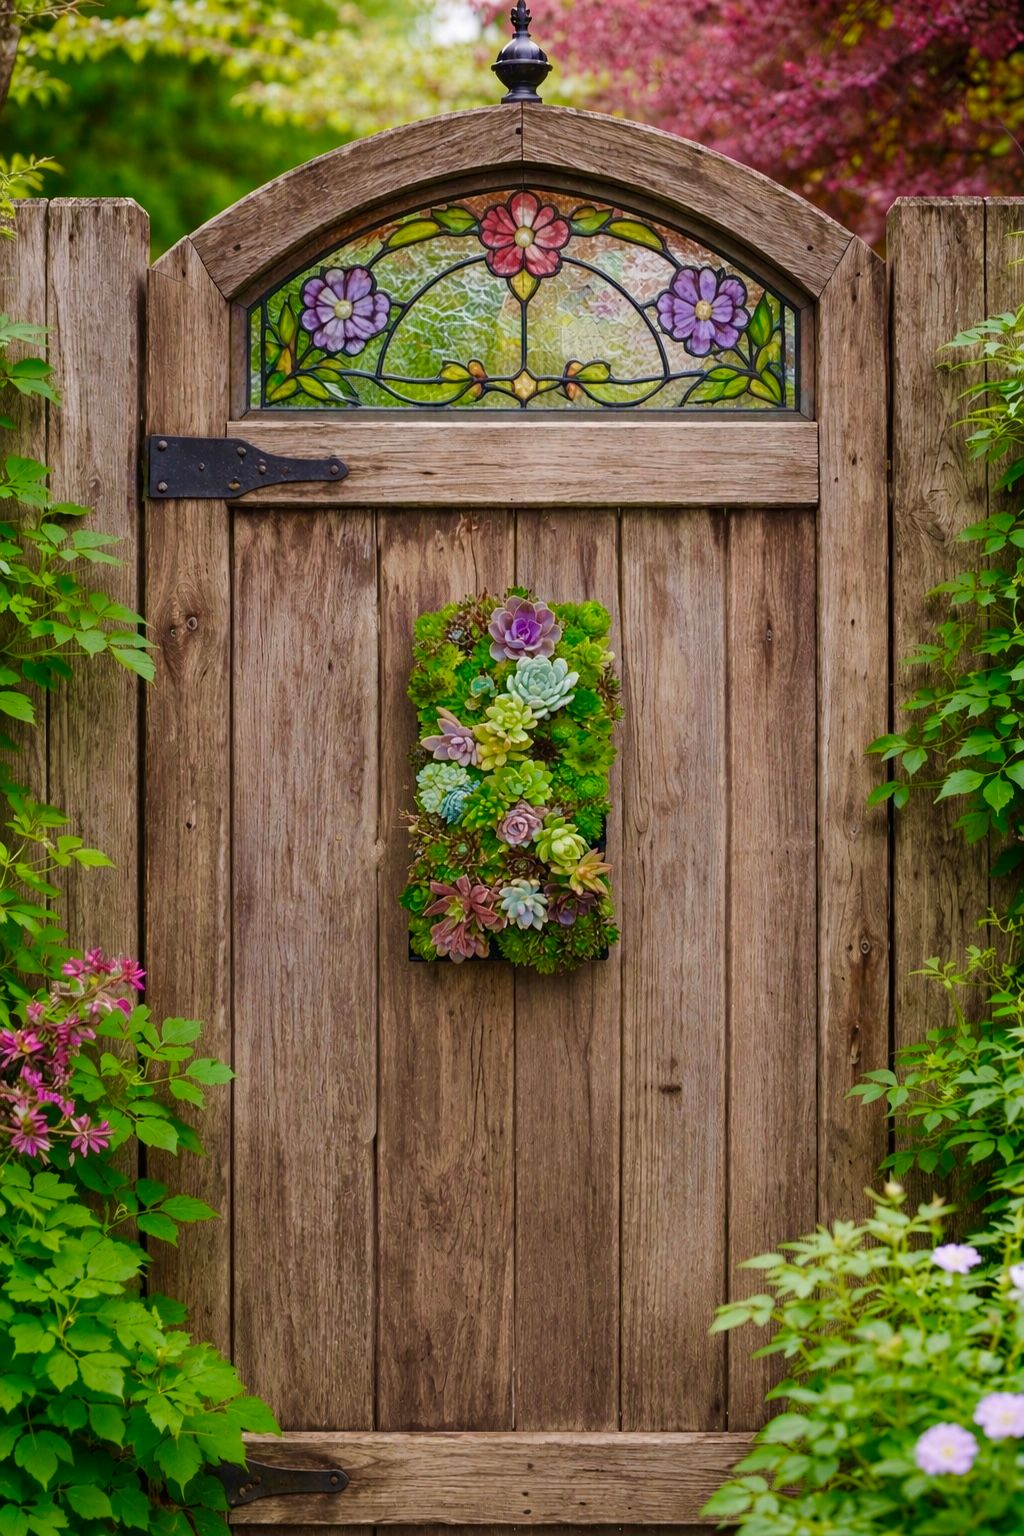
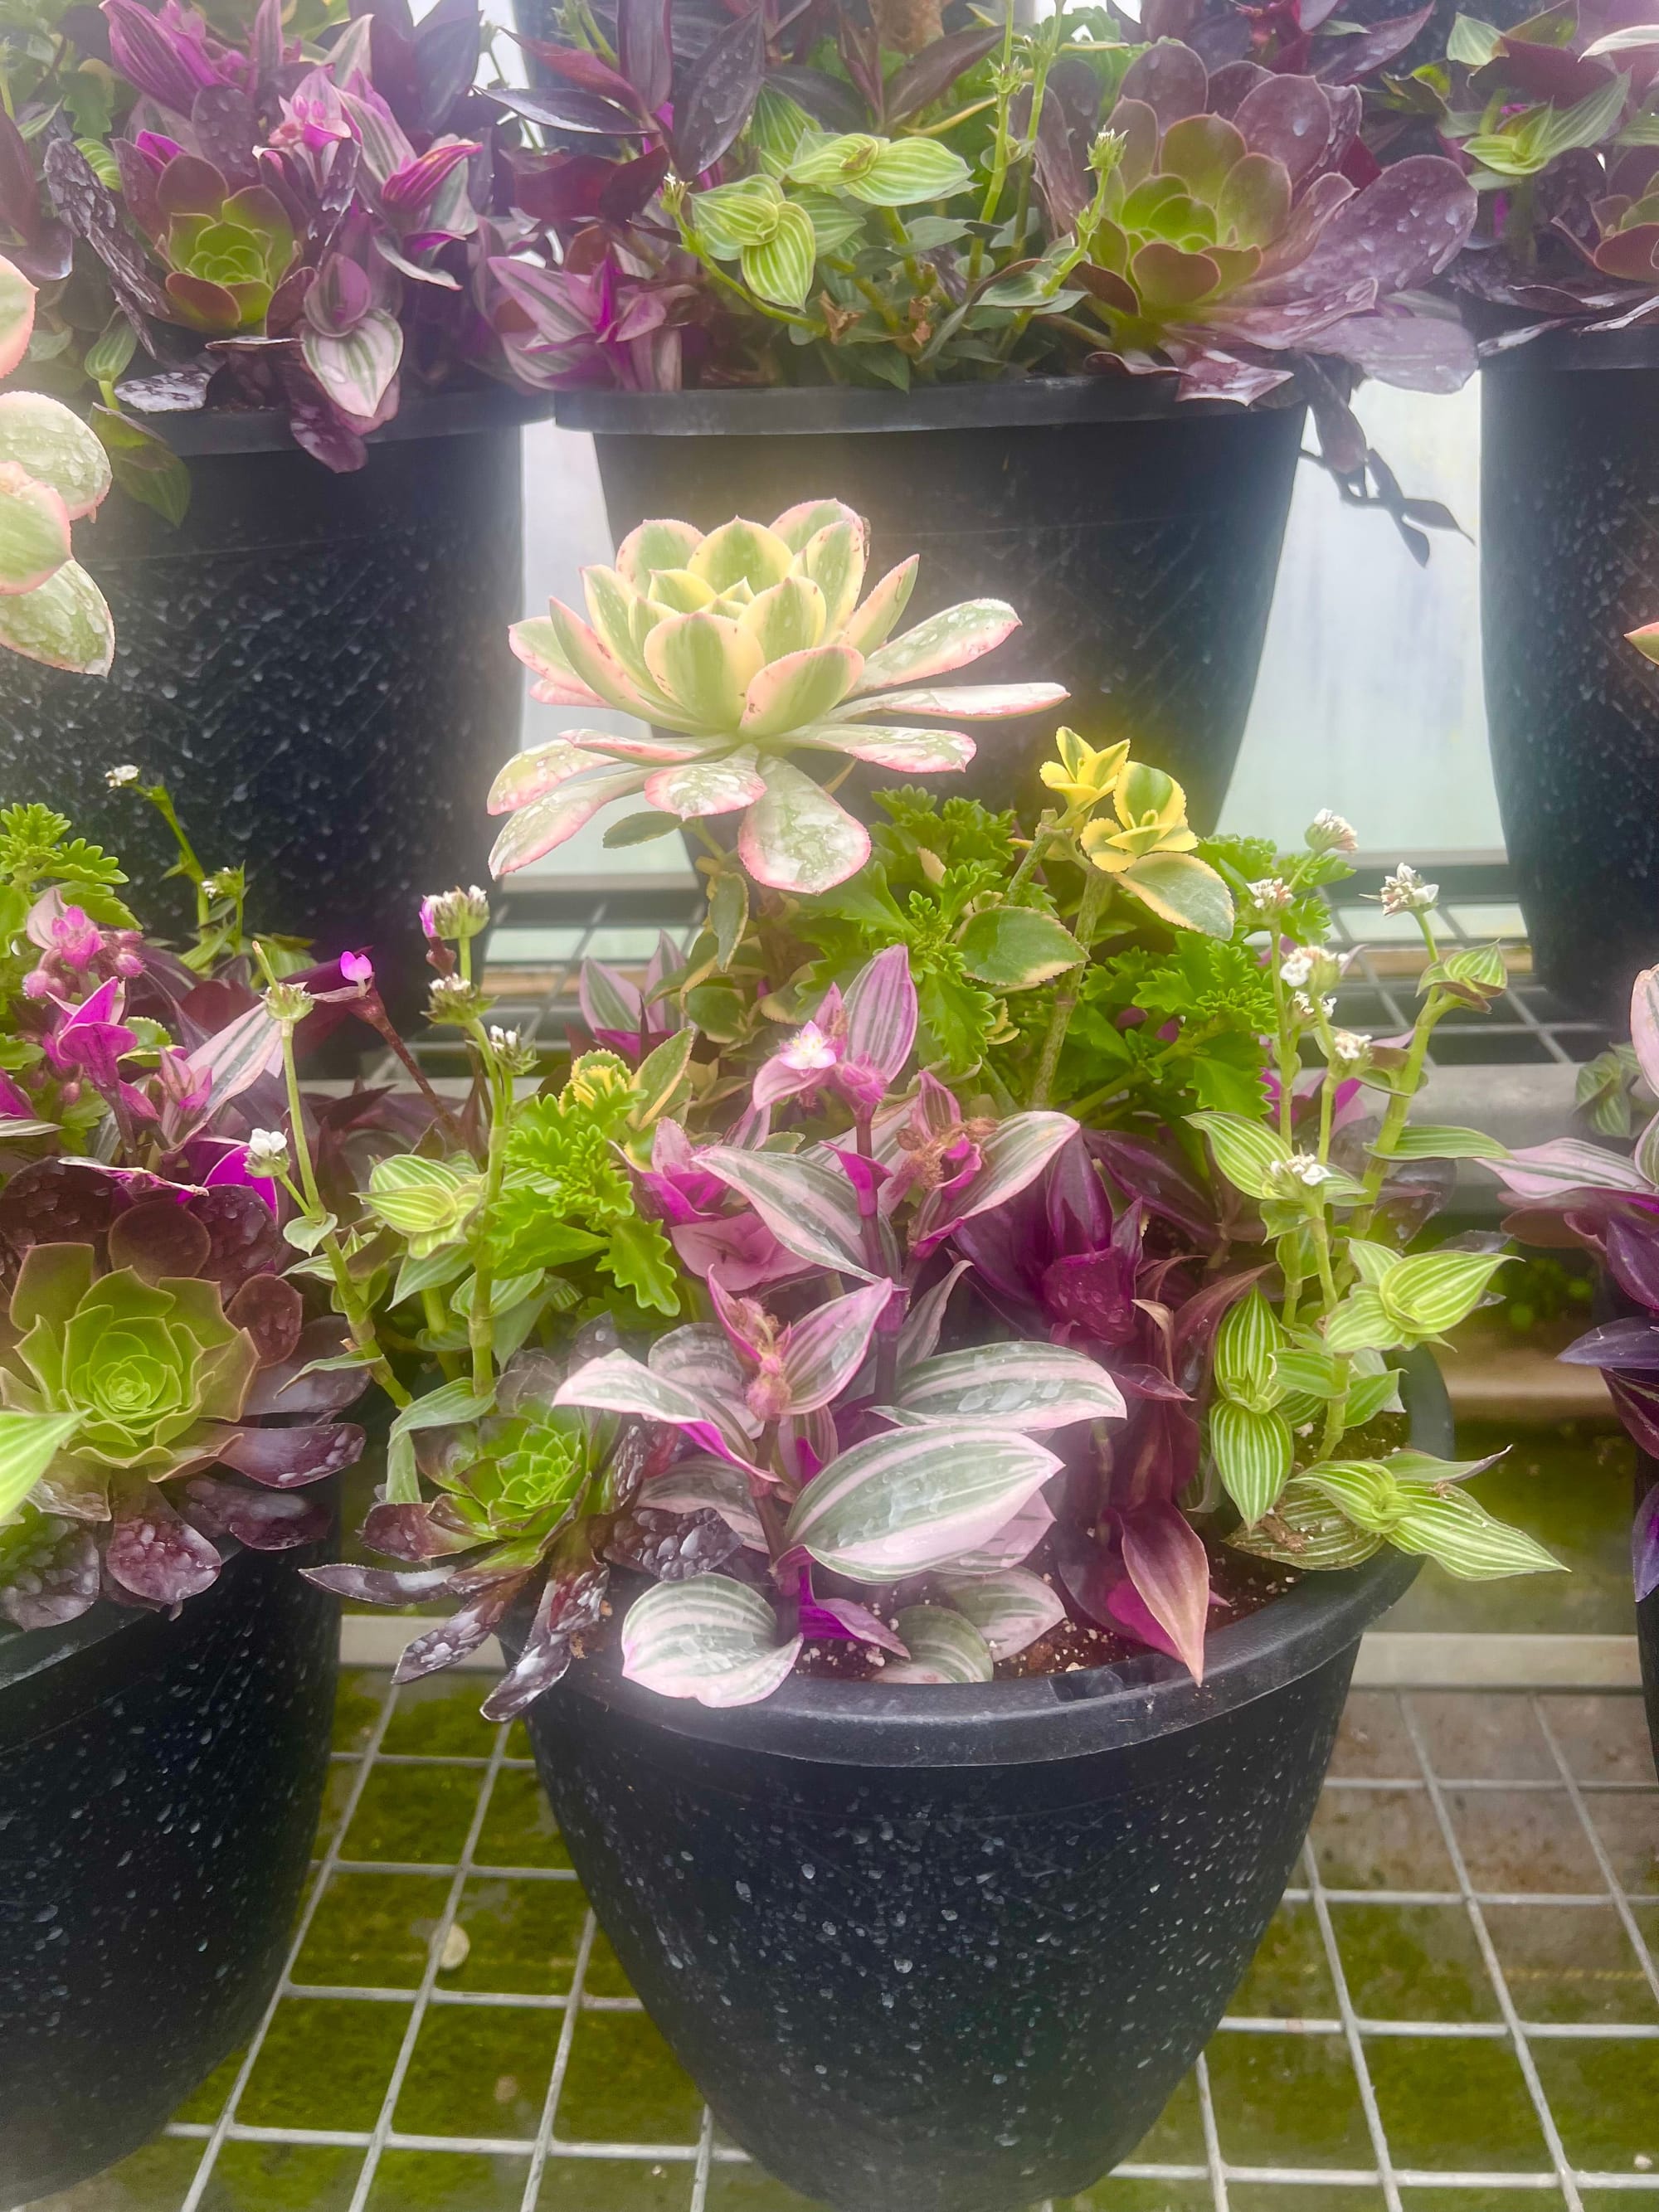
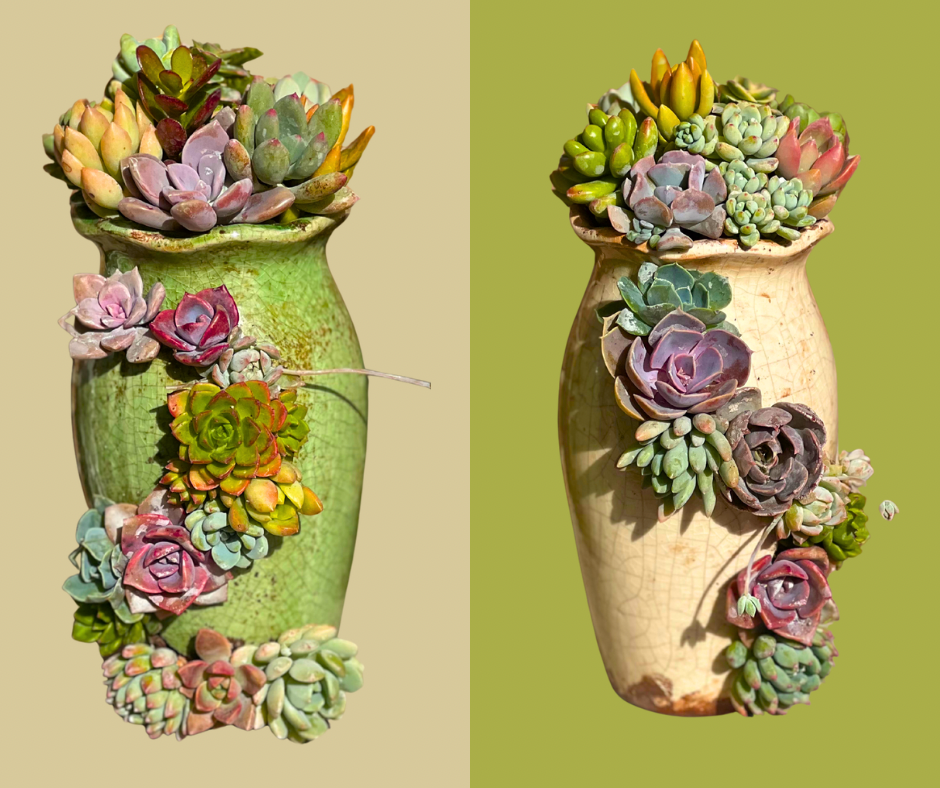
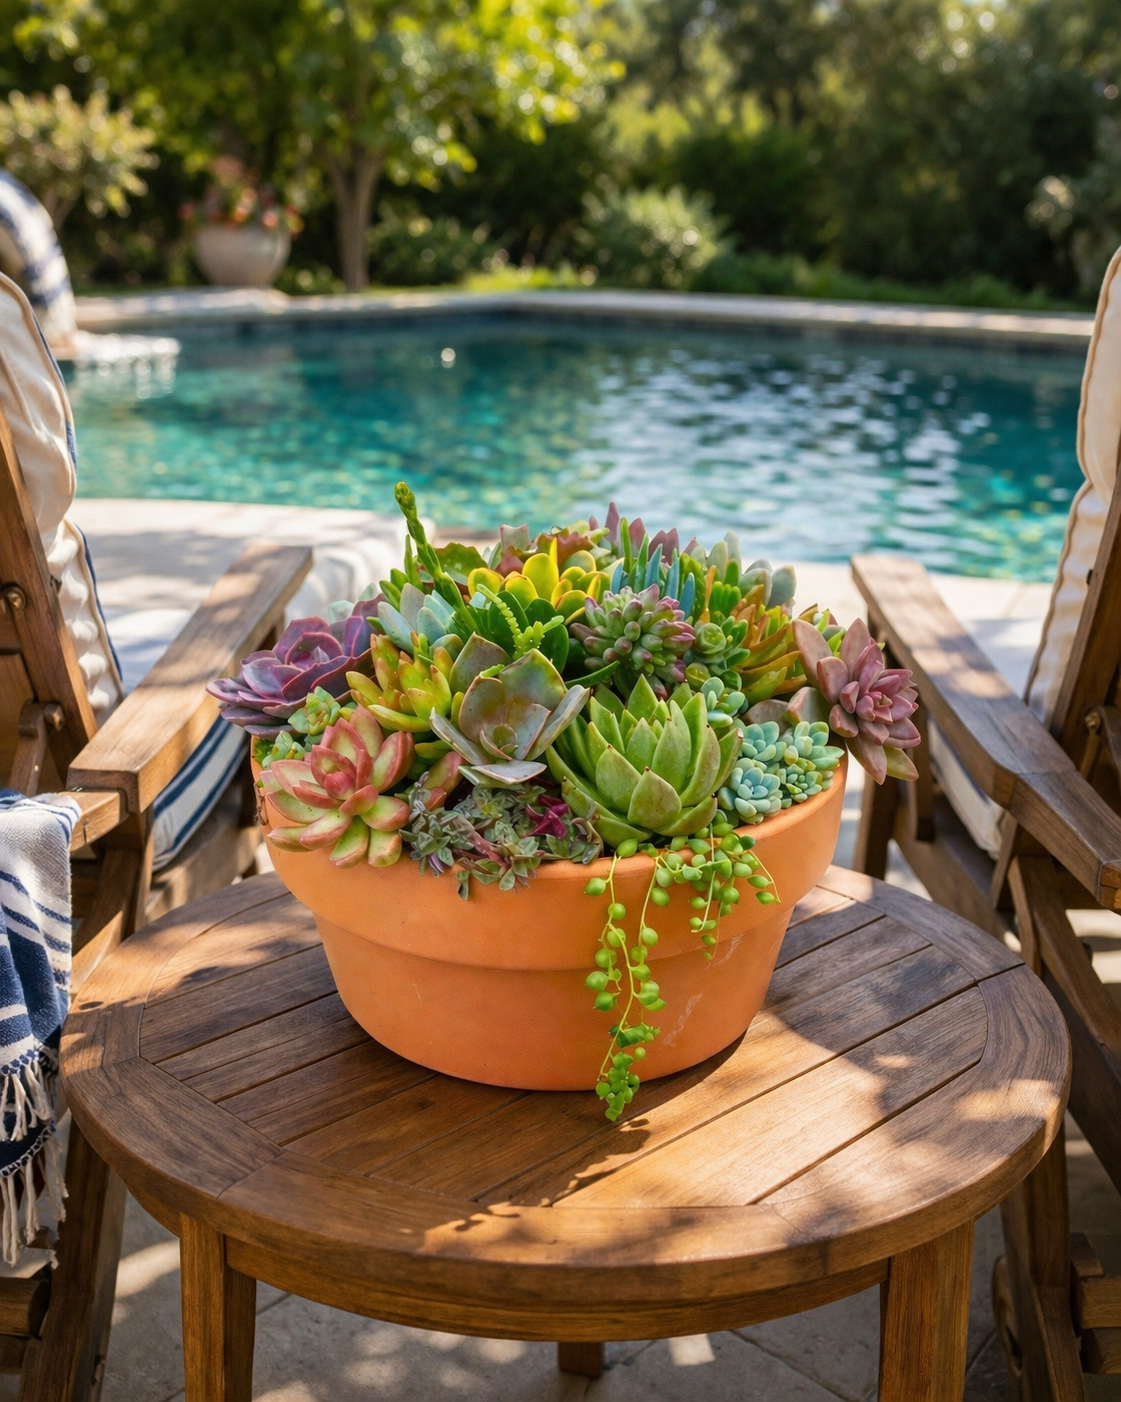
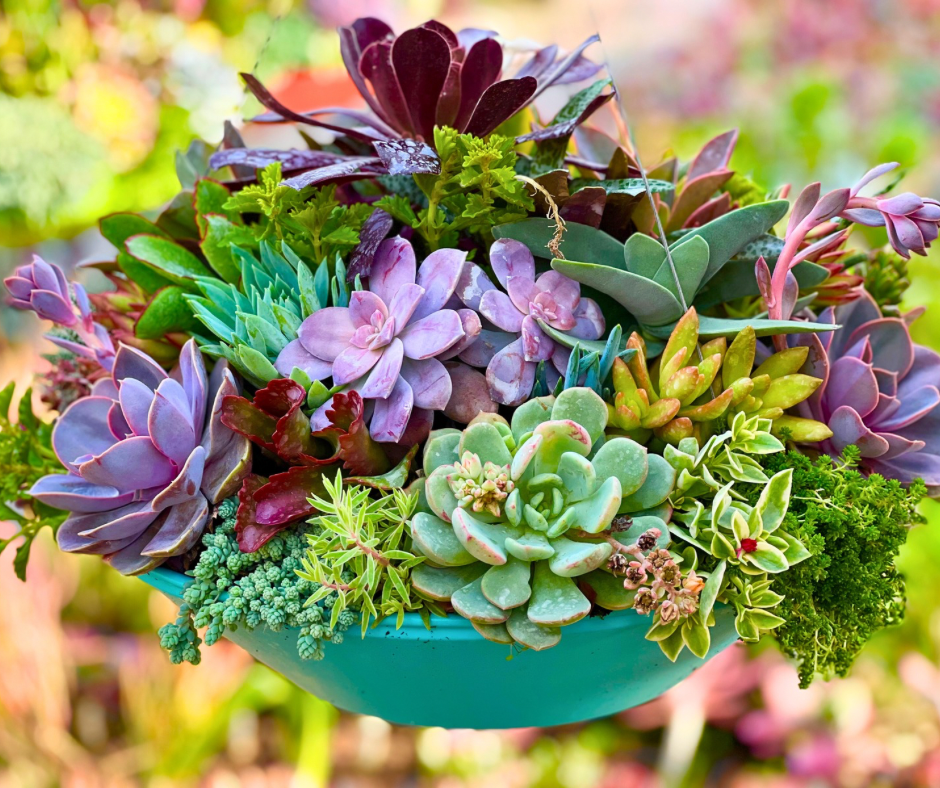
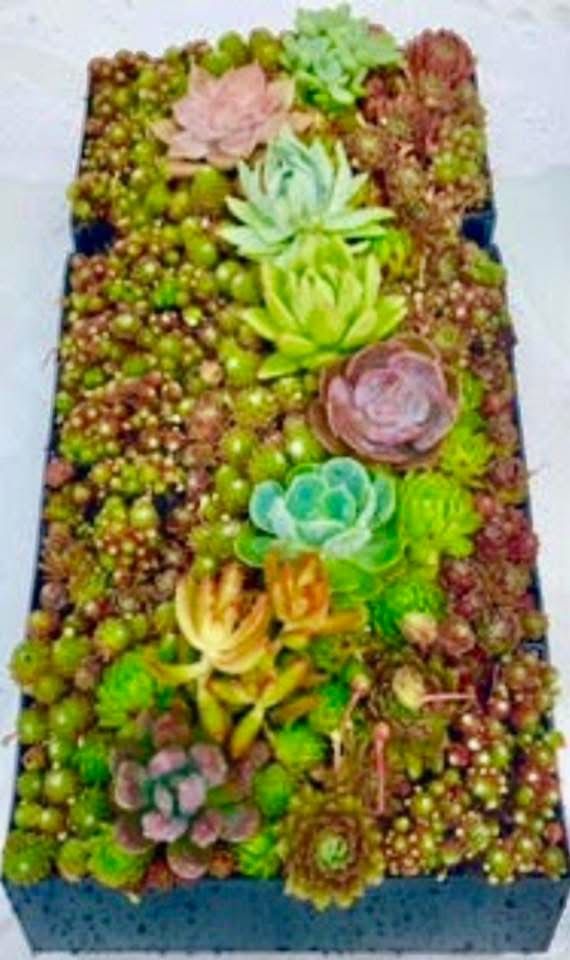
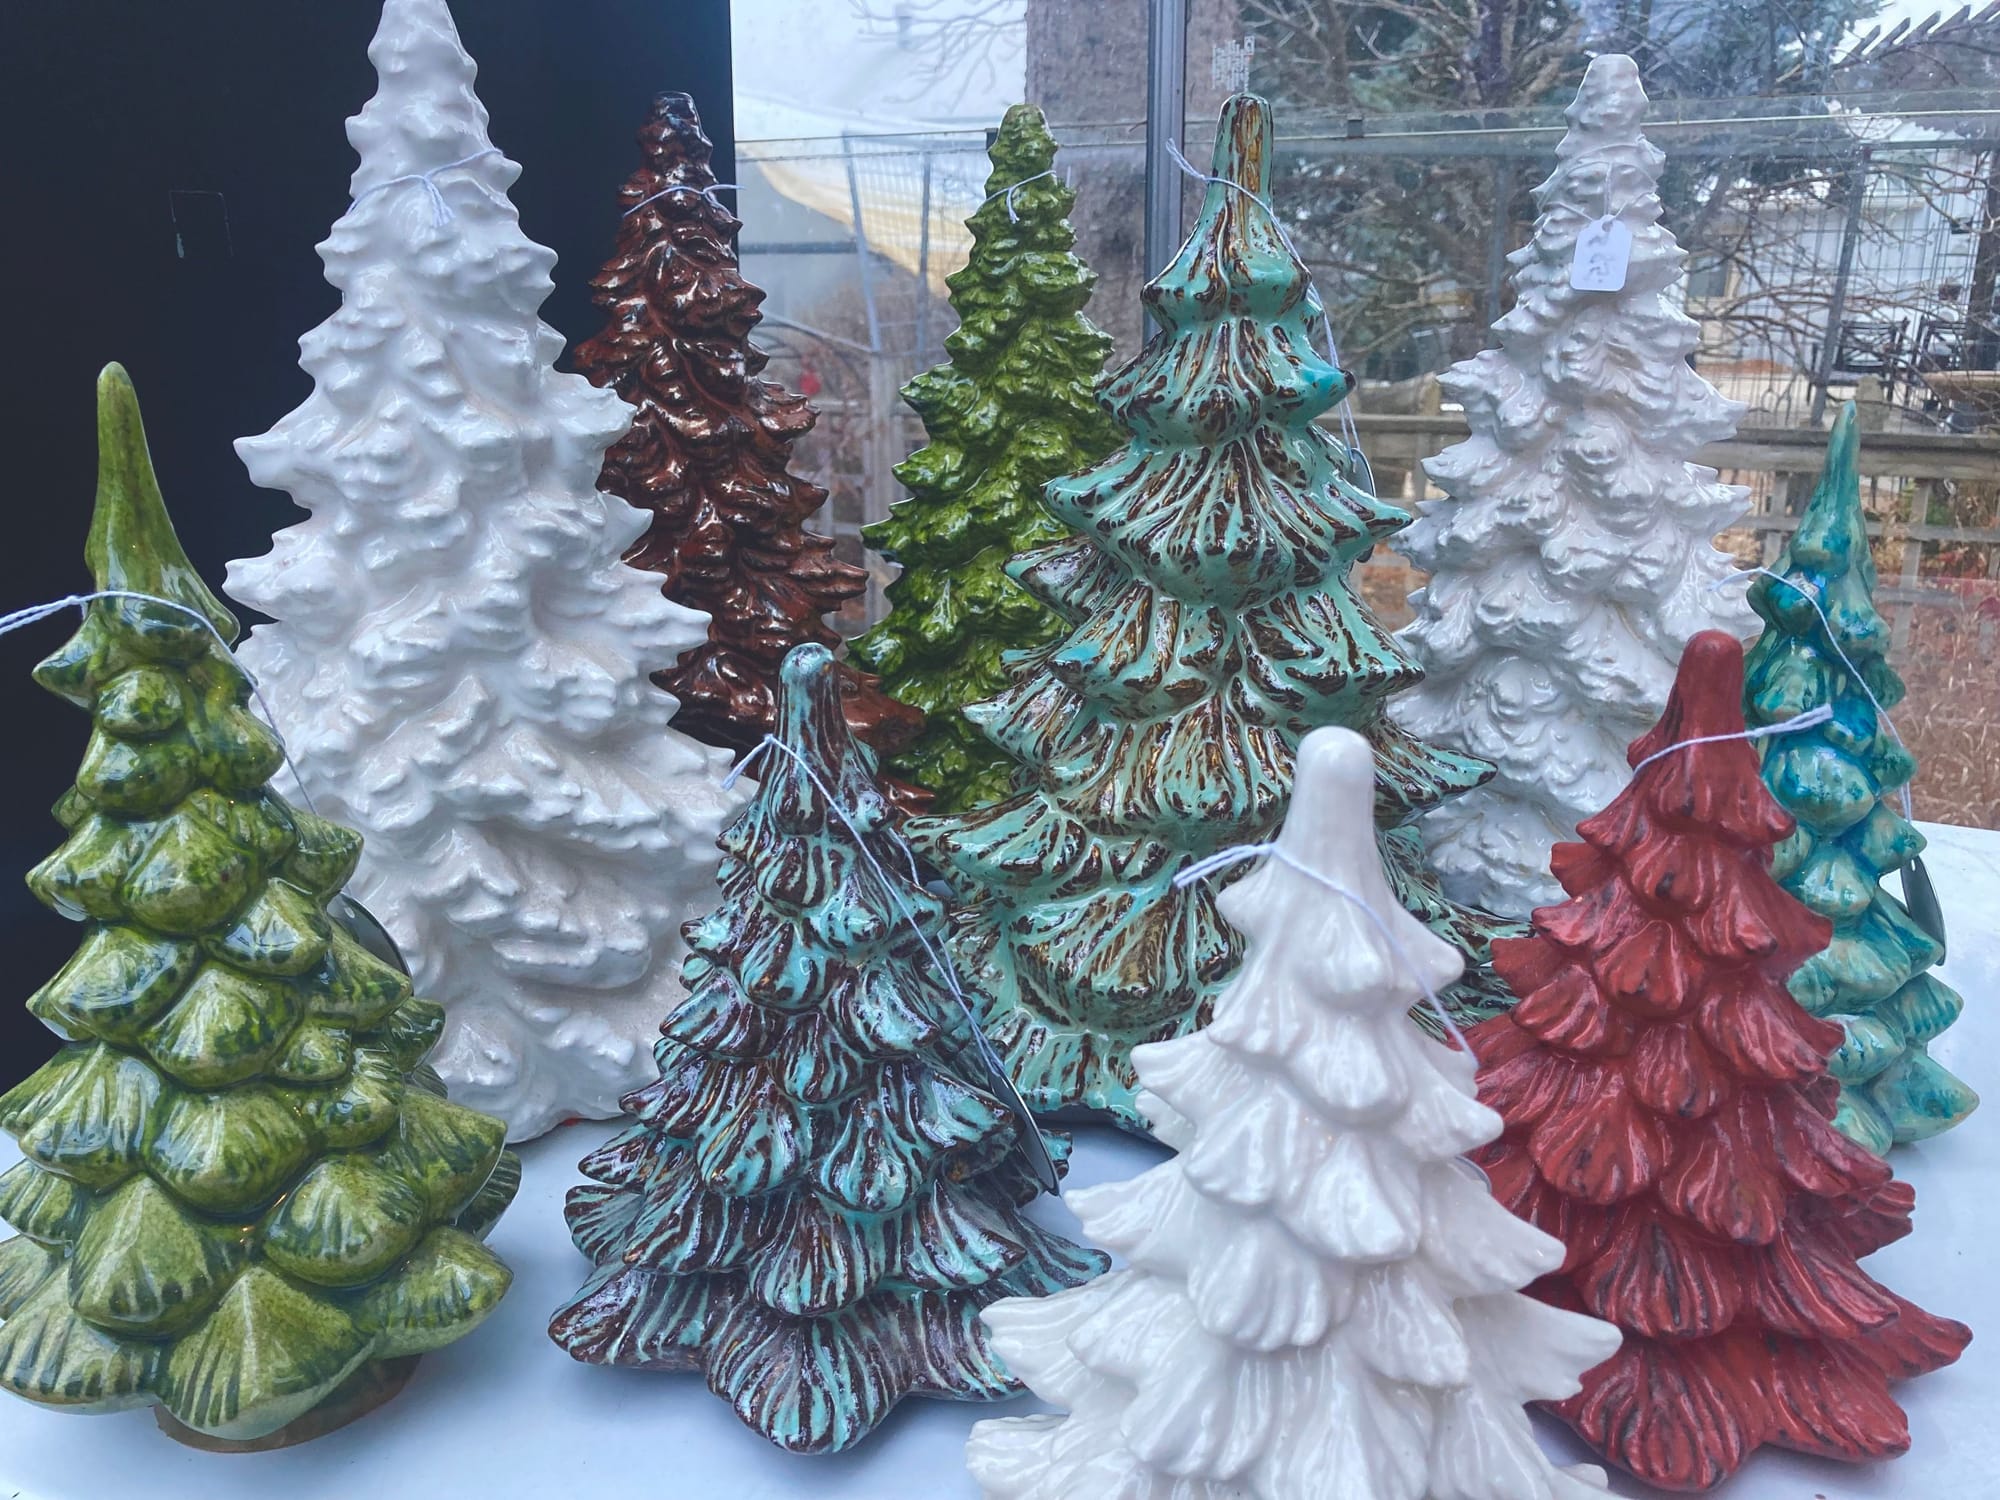
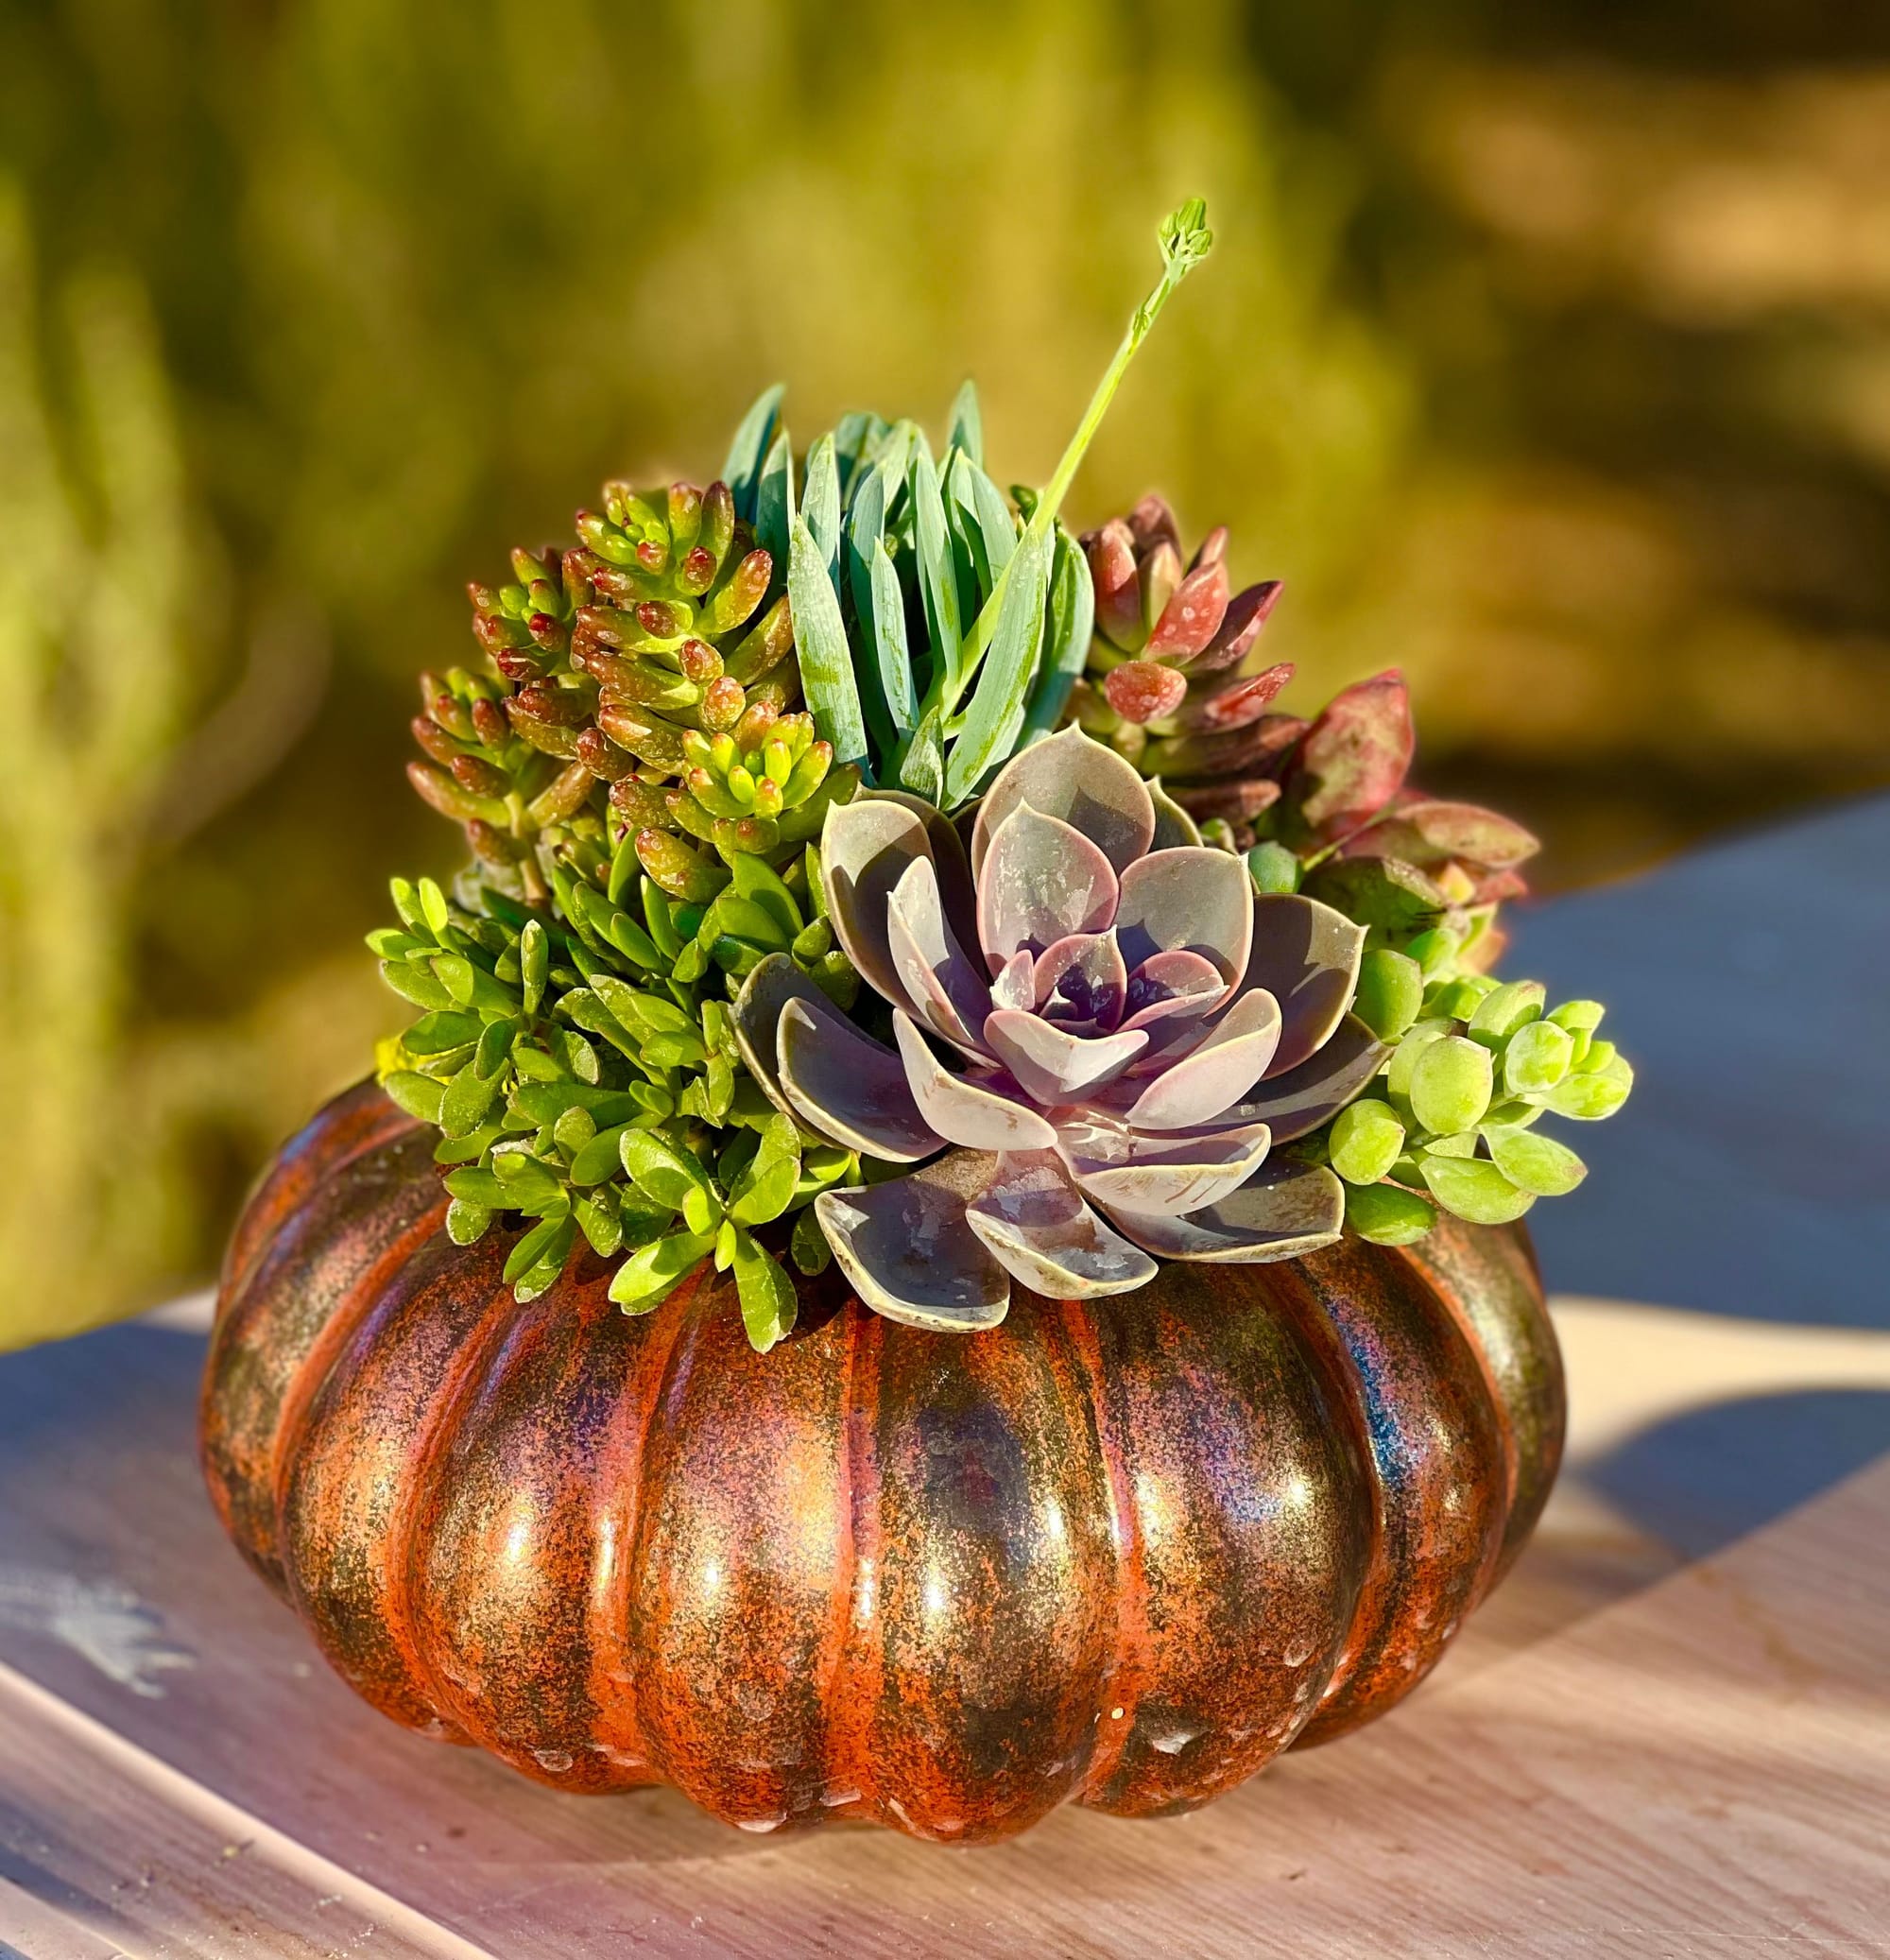
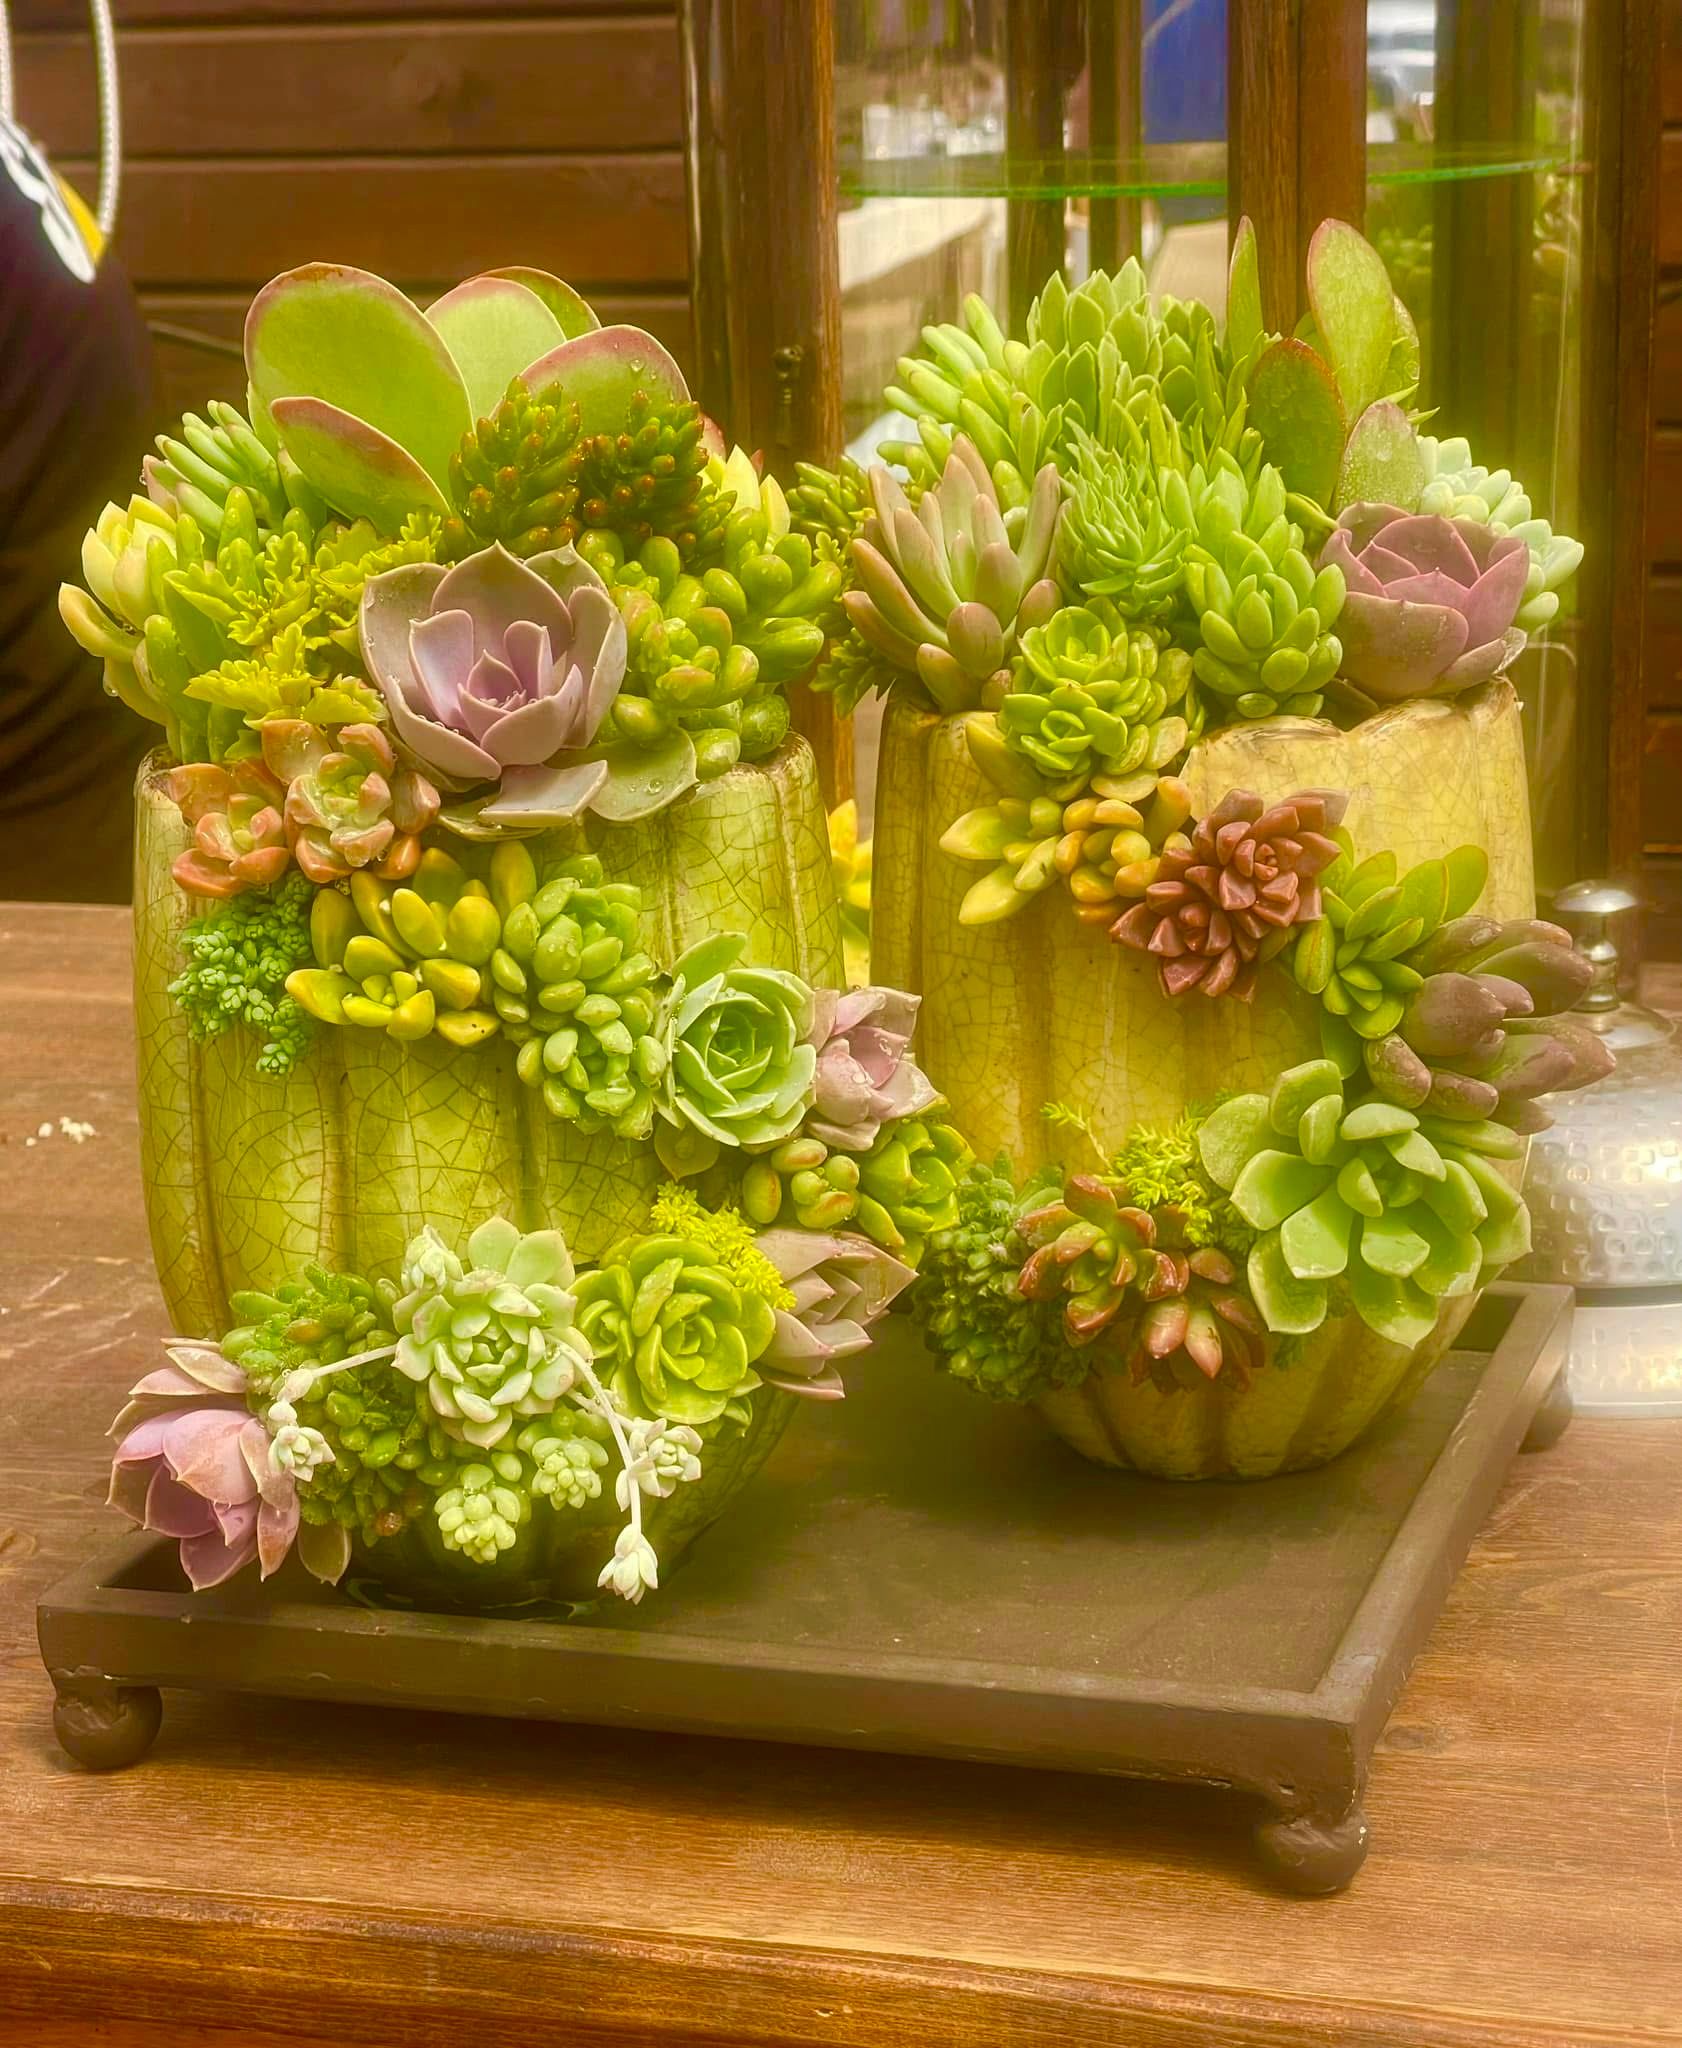
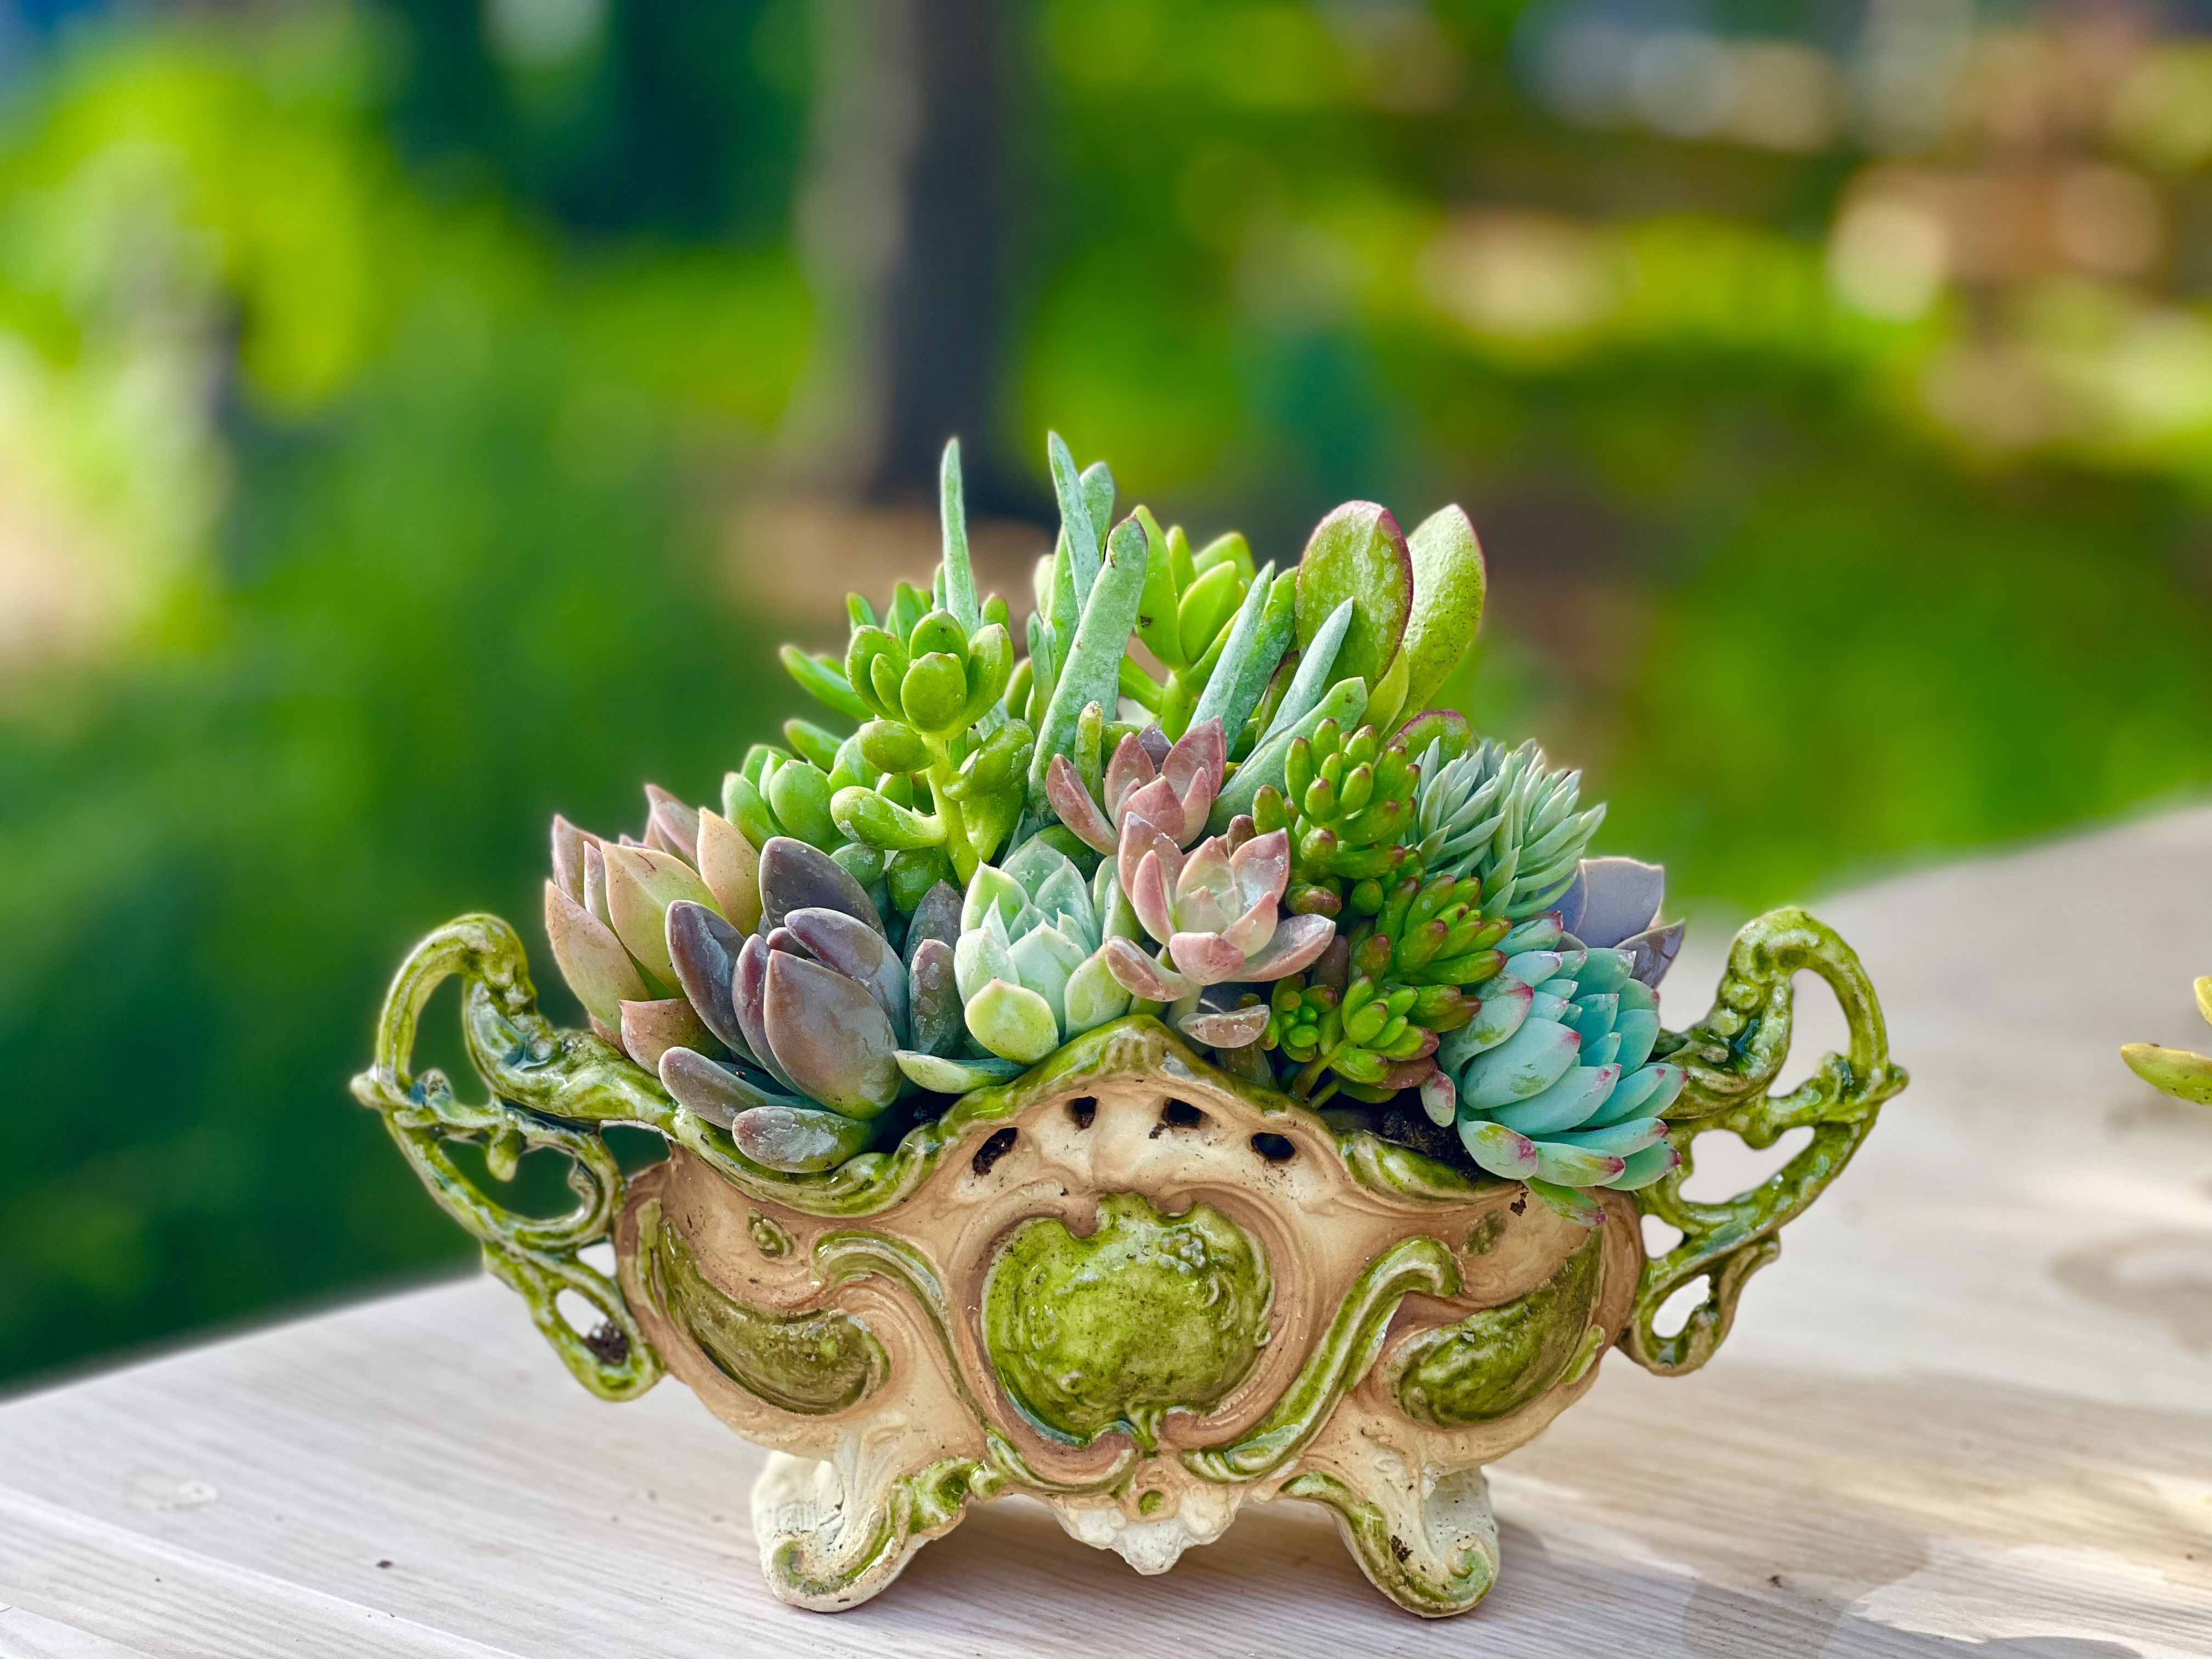
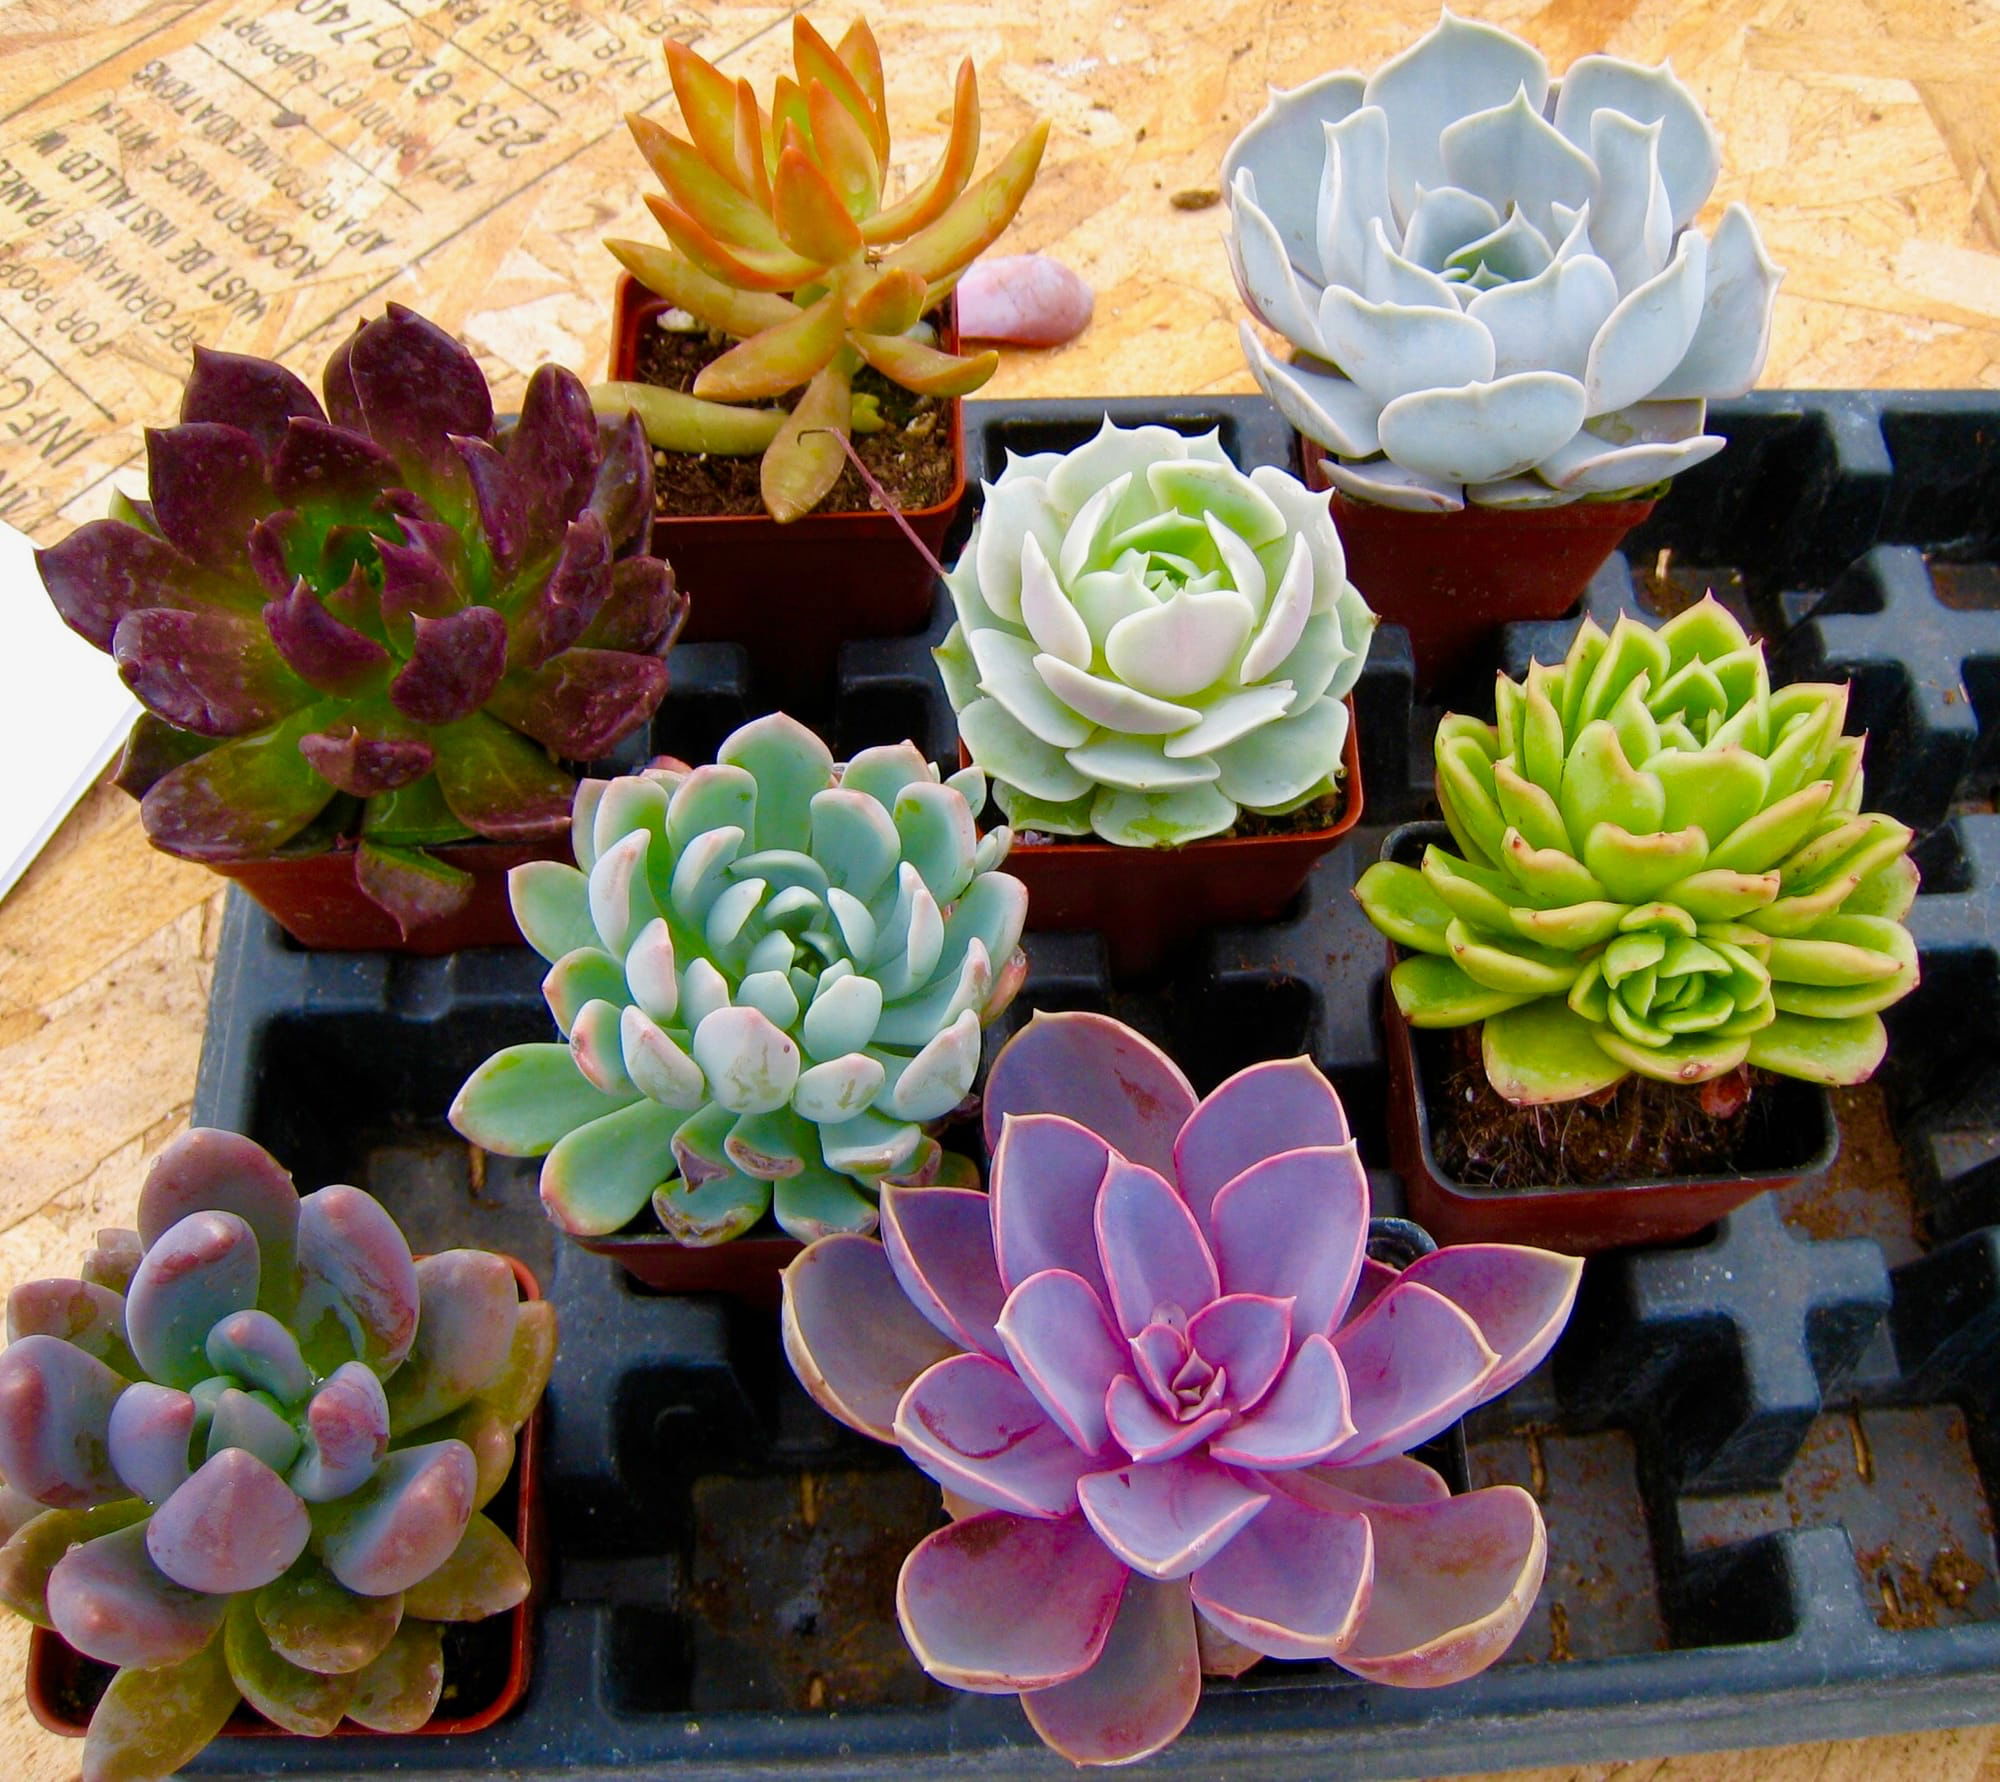
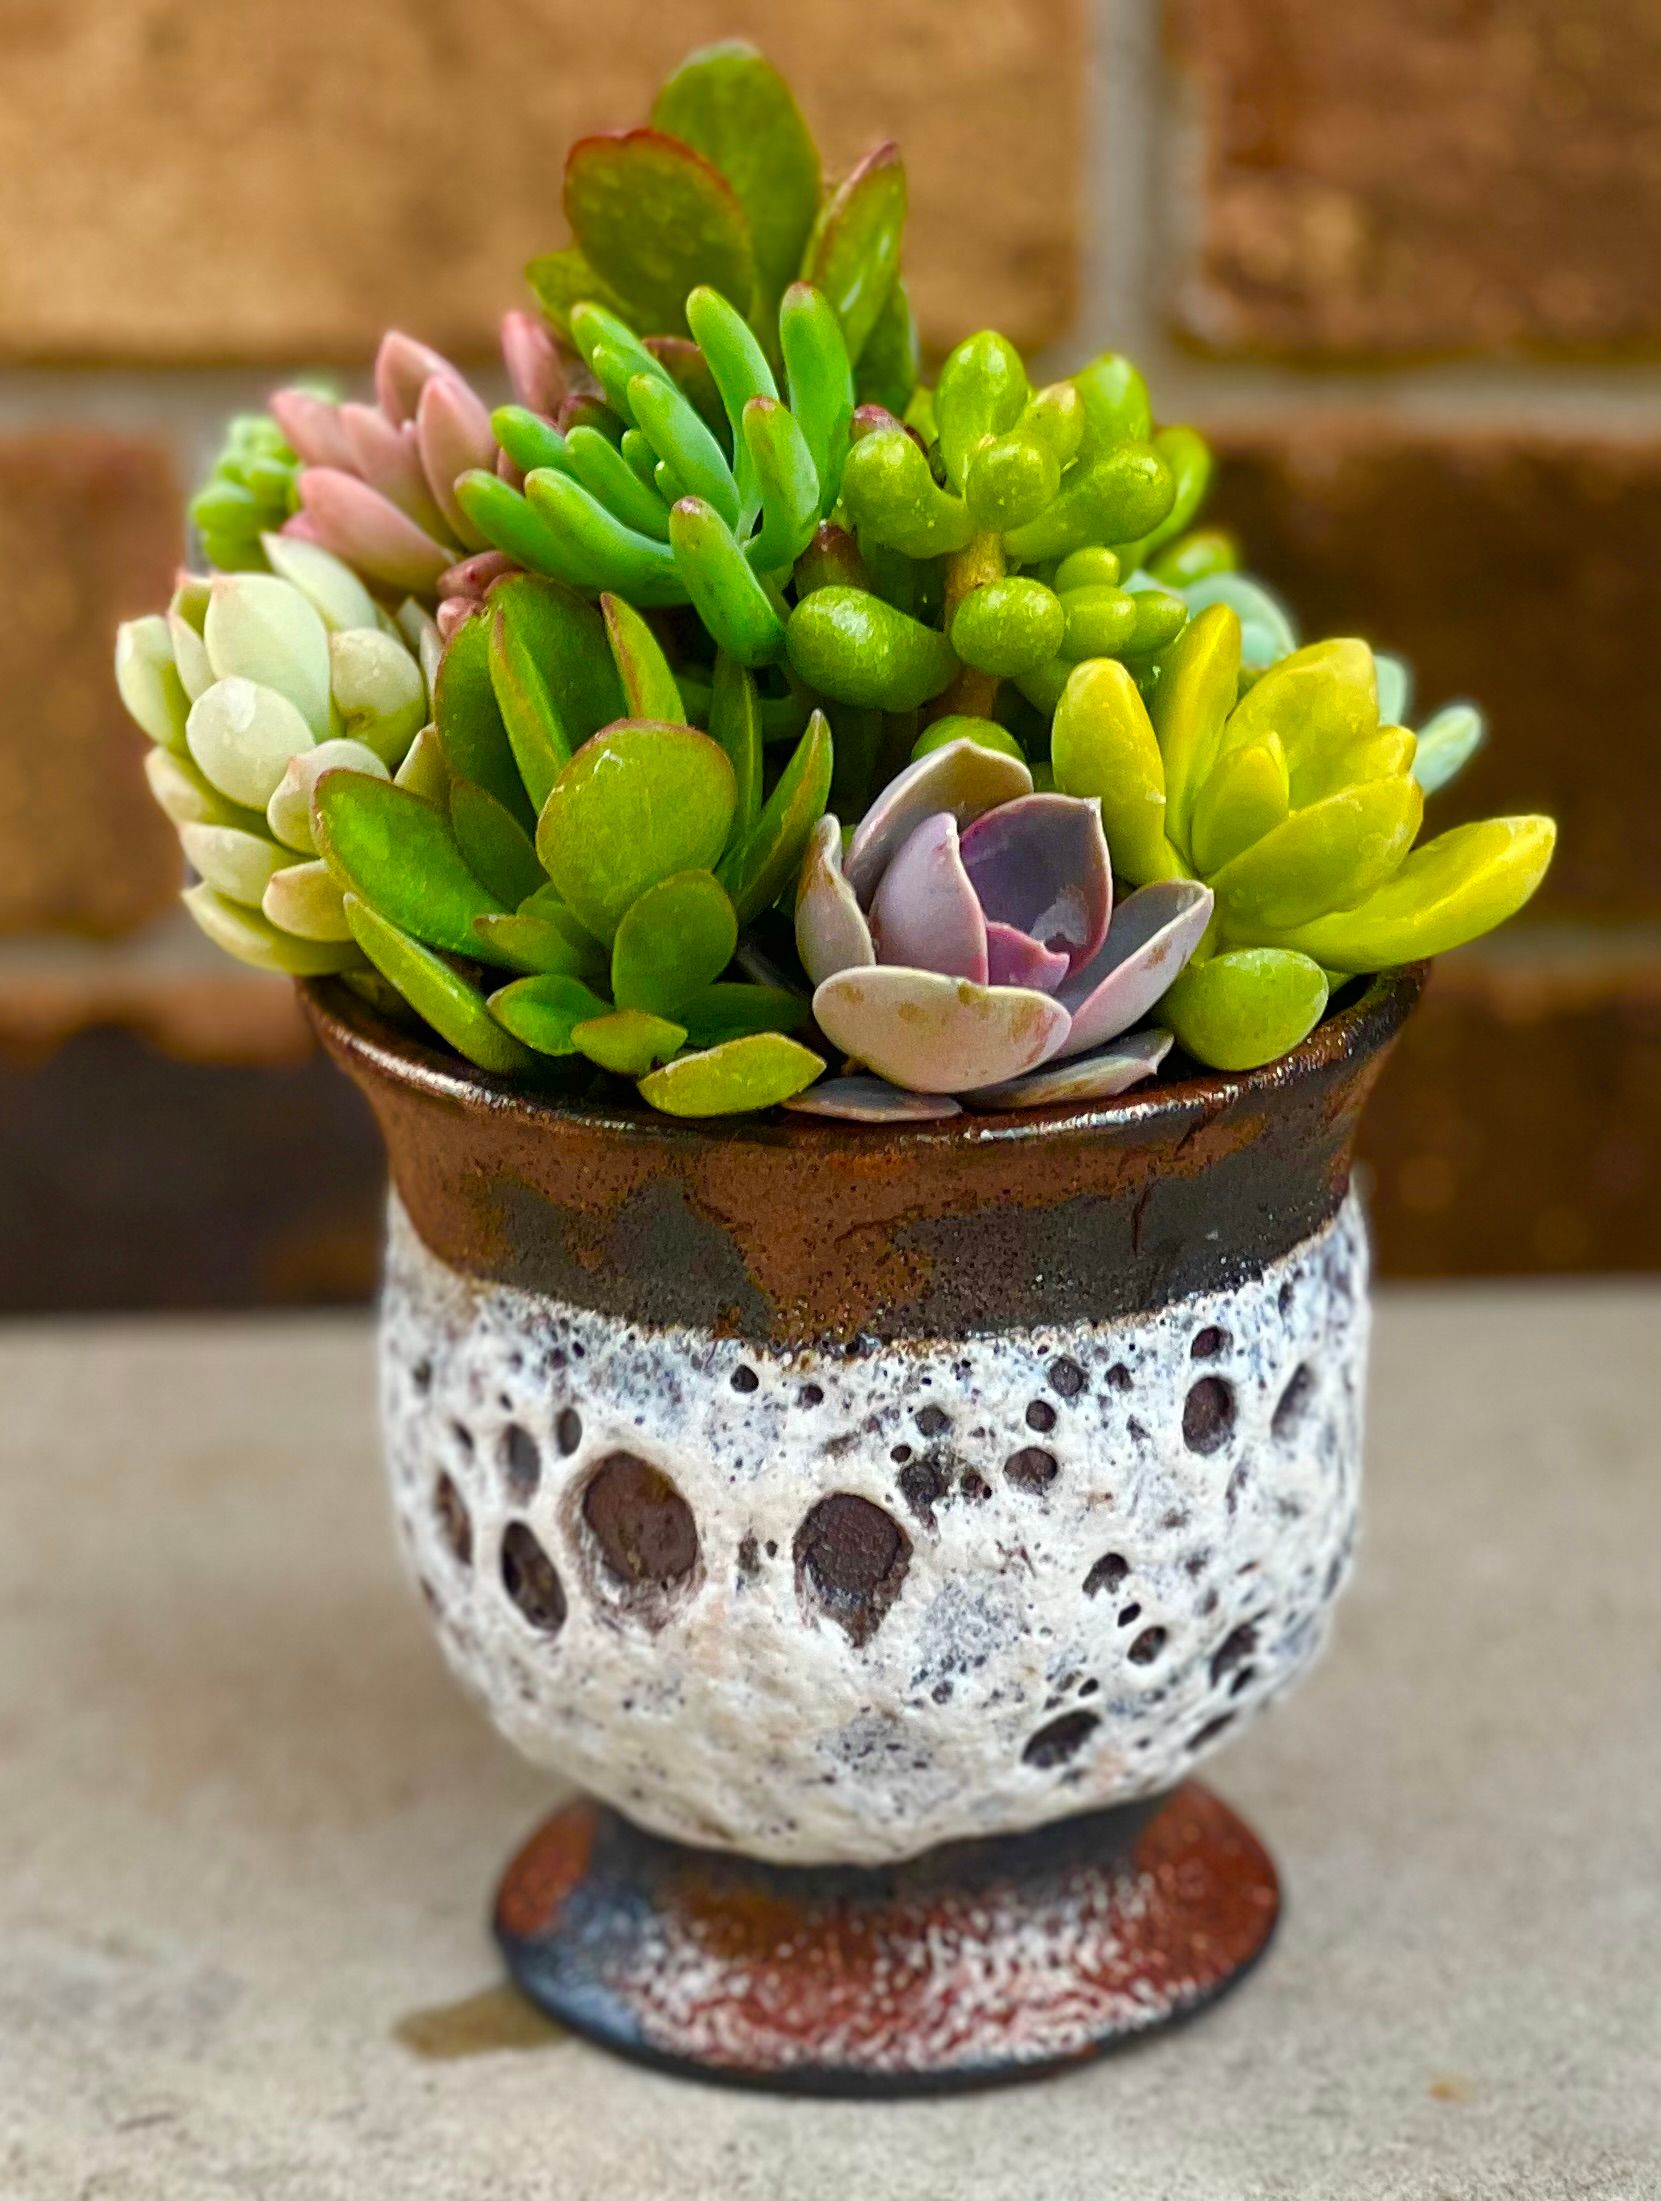
pre-planted succulent arrangements
We always have an ever-changing nice little collection of pre-planted succulent pots. Stop in often to see our latest creations. These little (and big and in-between) pots make great gifts...or maybe even a little something for yourself!
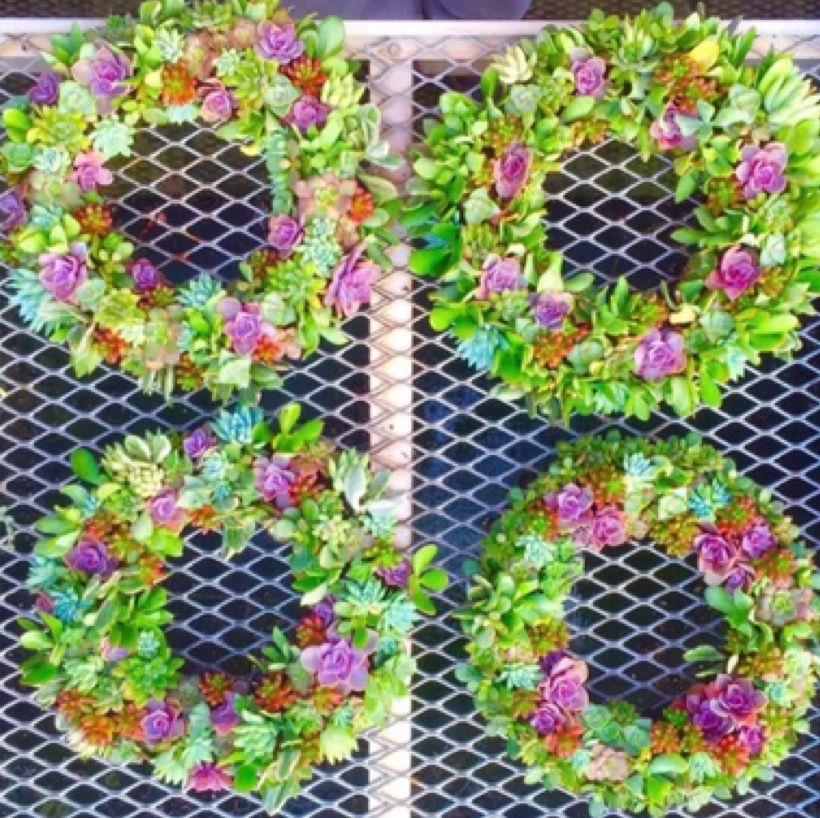
individual succulents
Sometimes you just want to plant up your own pots or just need a few to fill in some spaces in your existing pots. Or sometimes you just need some wedding favours. We've got you covered!
wedding favours
We sell flats of succulent wedding favours in flats (48 plants per flat) which are in a 2 1/4" diameter pot. We always have a good selection on hand with great colour. These come in plastic pots but we can replant them into a fancier pot of your choice. The cost of this depends on the value of the upgraded pot.

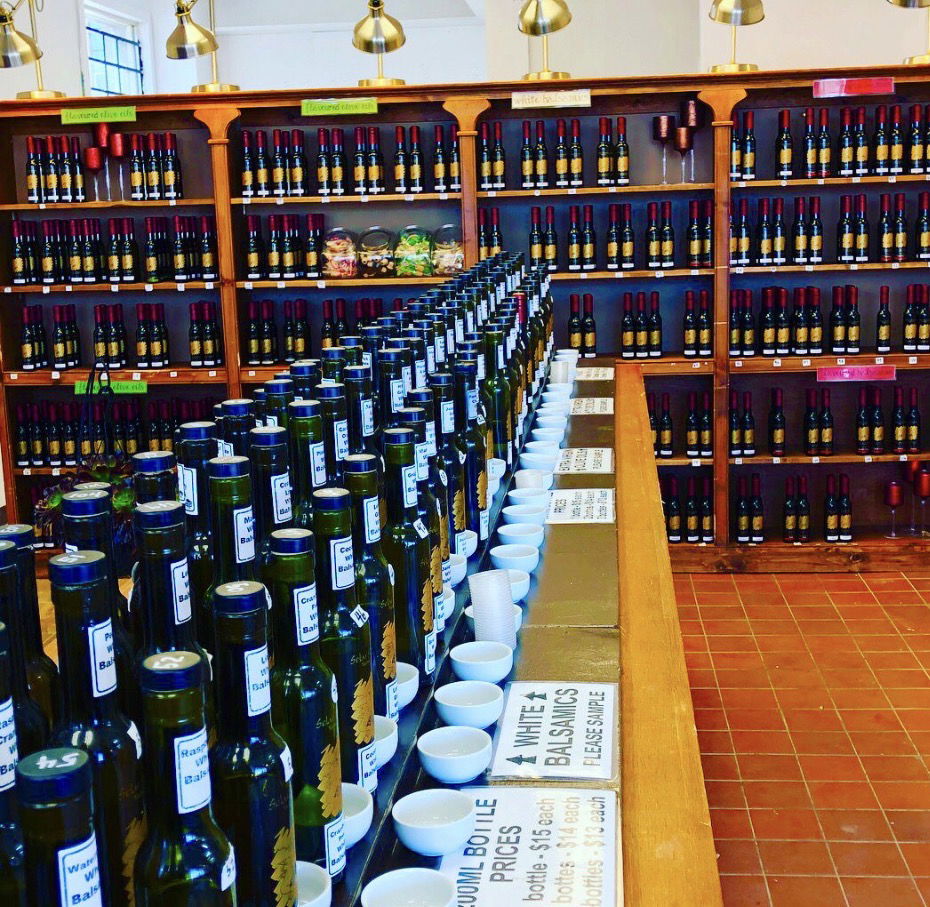
balsamics & extra virgin olive oils
Come taste our large selection of balsamics and oils with our artisan breads. We have about 40 balsamics and 30 olive oils. That's a lot of sampling! Click on MORE in the top menu bar, then click on BALSAMIC VINEGARS AND OILS to view our entire collection.s, links, etc.
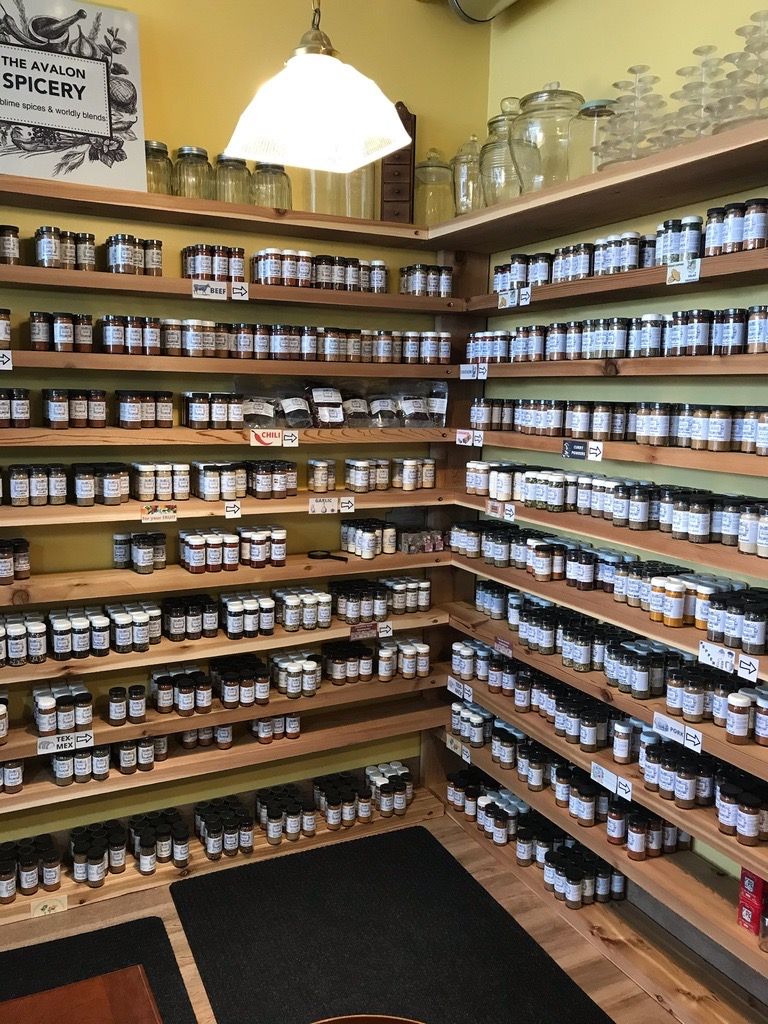
the spicery
pizza dough to bake at home
On busy weekends, pop by and grab a package of 10 hand-made frozen pizza crusts. These very thin-crust 10" pizza crusts are made in our kitchen and are ready to TOP and POP in your oven. .Easy baking instructions right on this website and provided with each box. Once you try them, you will always want to have a box of these crusts in your freezer.
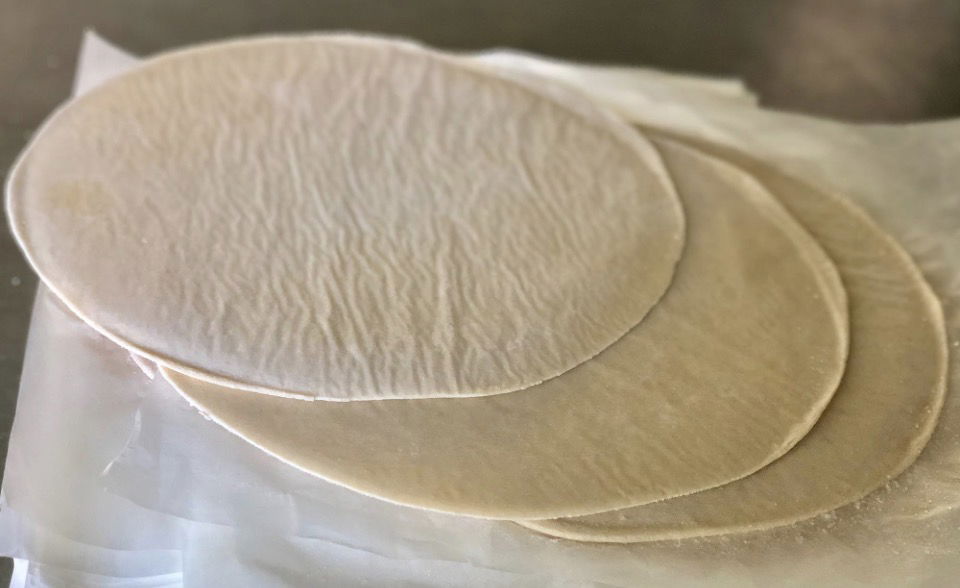
so you've brought home some uncooked thin-crust pizza dough-now what??

THIN-CRUST PIZZA BAKING INSTRUCTIONS
We make all of our pizza dough in the Solar Gardens At Avalon kitchen with just 4 ingredients---wheat flour, yeast and a dash of salt and a tad of extra virgin olive oil.
You will be baking your pizza on a pizza stone or a baking sheet placed on the middle rack of your oven. A pizza stone is ideal for our pizza shells. If you do have a pizza stone, you should put it in the oven while the oven is preheating so that the stone becomes hot before you place the dressed pizza on it. If you don't have a pizza stone, consider buying one. You can usually find them really cheap now in dollar stores. No worries if you don't have a stone, a regular cookie sheet works pretty good too.
Preheat your oven to almost as high as it will go. 500 F is great, and you could even go a bit higher to 550 F if your oven goes that high. Even lower temperatures will work but the baking time will be increased.
You can bake our dough directly from frozen or thawed. If you are using a thick pizza sauce, it is best to spread it on while the pizza shell is still frozen.
We have placed the pizza shell on parchment paper for your convenience. You will keep the pizza shell on the parchment paper while you dress the pizza and for the first few minutes that it is baking in the oven.
Dress your pizza in this order: Spread the sauce on first. Then sprinkle on the cheese. And finally, add any toppings. Remember that this is a thin crust pizza shell that bakes quickly, so try not to stack your pizza too thick with toppings or it will not cook thoroughly. Try to place your toppings so they are evenly spread on the shell. You don't want to pile all of your topping in the centre, as this will prevent the pizza (and shell) from cooking evenly (ie the centre may be raw). Definitely keep your toppings well under 1/2" thick. We've found about 1/4" thickness is ideal to insure proper cooking of the toppings and shell.
The parchment makes transfer of the now-dressed pizza onto your preheated pizza stone (or cookie sheet) easy. Put the parchment and pizza directly onto the stone.
You will allow the pizza to cook on this parchment paper for the first few minutes that the pizza bakes. But as the pizza cooks and the crust begins to bake, the dough will loosen from the parchment. At this point, you will be able to pull and slide the parchment out from under the pizza so that the pizza bottom will now be cooking directly against the stone. (If the parchment paper does not pull out with ease after a few minutes of baking, leave it to bake a little longer and try again.) You may find that the parchment becomes a bit brown/black or possibly breaks apart more easily in this hot oven. (The parchment here will not remain as white as when you bake cookies in a lower temp oven.) Be careful not to burn yourself against the hot stone or rack when you slide the parchment out. Consider using tongs, gloves and/or a spatula as needed to ease the parchment out to continue baking.
Cooking time will vary based on your oven temperature, the thickness of your toppings and whether the pizza stone is sufficiently heated through before baking begins. In our wood-fired oven (which is 700F) the pizzas cook in 3-4 minutes. Your home oven will be cooler, so expect a longer cooking time (perhaps 8-10 minutes). But watch your pizza closely. It may take less time than that.
ALLERGEN ALERT: Please note that our dough is made in the Avalon kitchen which contains tree nuts, peanuts and sesame seeds. We cannot guarantee that cross-contamination has not occurred in our busy kitchen.
If you have any questions, you can text us at 306-280-2761 or email solargardenclasses@gmail.com. We are always interested in what people are making in terms of pizzas, if you’d like to send us a pic of your creations, we would love to see them.
Be creative and happy pizza baking!
candy candy candy
We always have a great selection of hard-to-find candy (with a good variety of really good licorice). This makes our little Tasting Studio very sweet indeed!

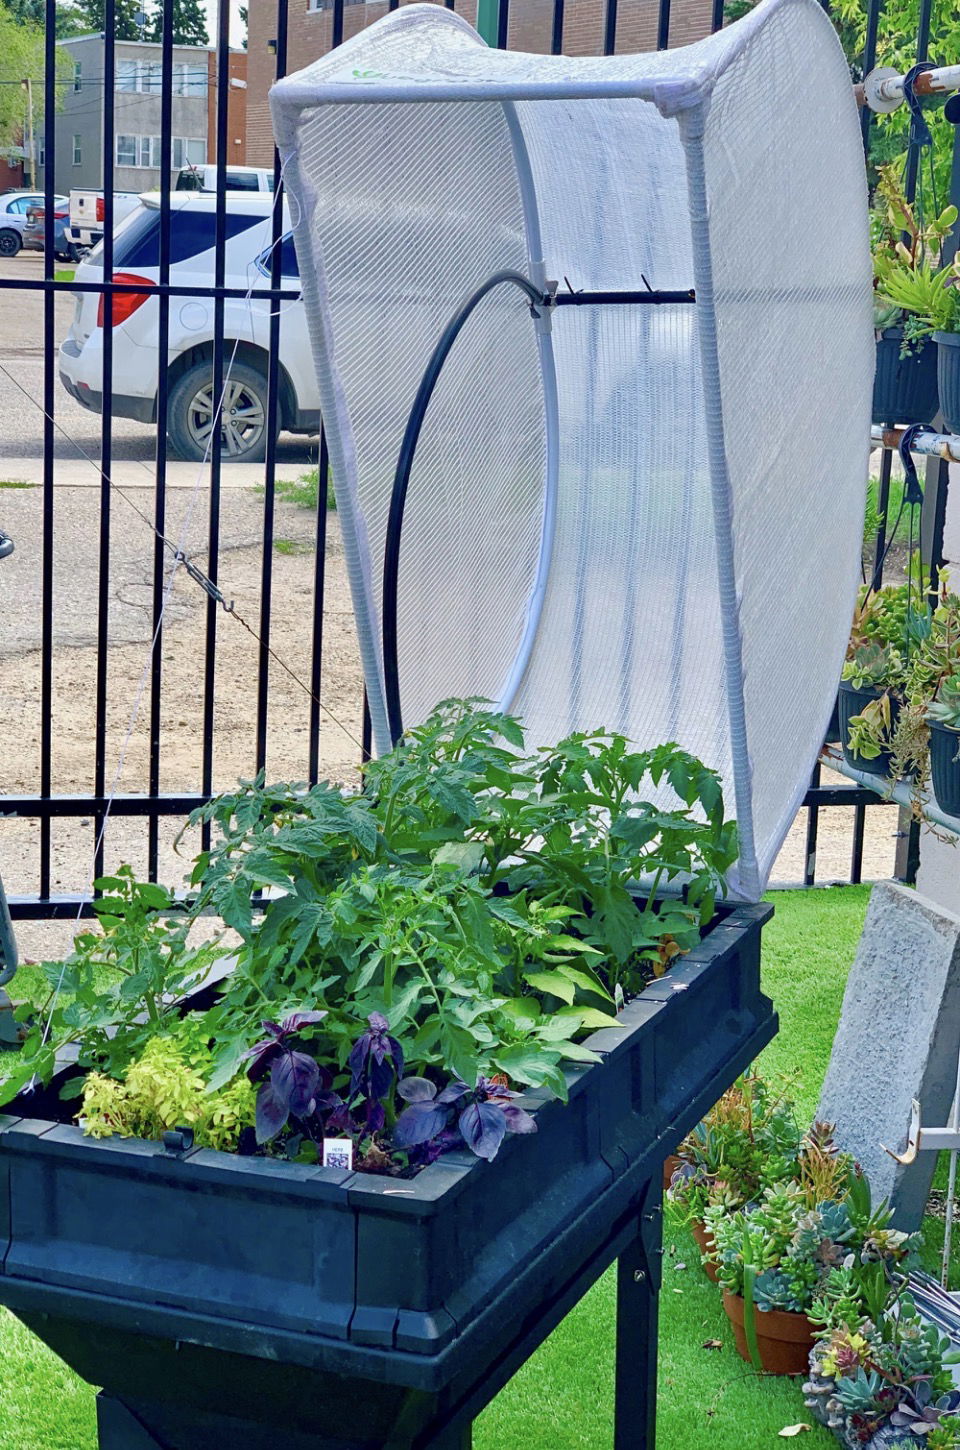
veggie pods
Grow more veggies and herbs and flowers than you can imagine without bending over, or weeding. Lower the cover to protect against bugs, birds, wind, hail and frost. Can also be used indoors under grow lights. 3 sizes available. They're just awesome!

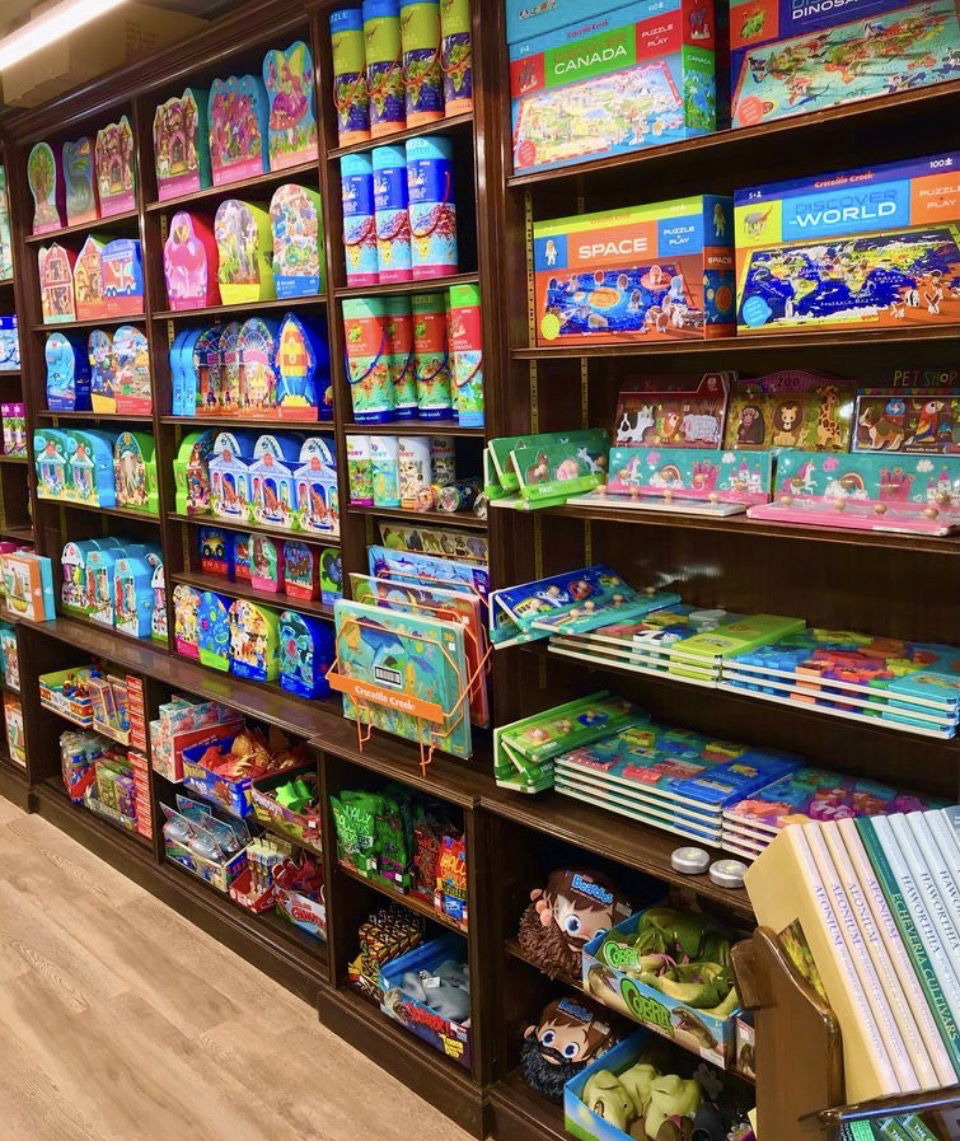
puzzles for all ages
follow us on facebook & instagram and just try to keep up with us
Facebook & Instagram
fundraising
This is a content page where you can freely add any content such as text, images, links, etc. You can edit all of this text and replace it with what you want to write. Use the advanced editor to design this content page.
Edit your content page from the Pages tab by clicking the edit button. This is a content page where you can freely add any content such as text, images, links, etc. You can edit all of this text and replace it with what you want to write. Use the advanced editor to design this content page. Edit your content page from the Pages tab by clicking the edit button.
This is a content page where you can freely add any content such as text, images, links, etc. You can edit all of this text and replace it with what you want to write. Use the advanced editor to design this content page.
Edit your content page from the Pages tab by clicking the edit button.
This is a content page where you can freely add any content such as text, images, links, etc. You can edit all of this text and replace it with what you want to write. Use the advanced editor to design this content page.
Edit your content page from the Pages tab by clicking the edit button.
You can edit all of this text and replace it with what you want to write. Use the advanced editor to design this content page. Edit your content page from the Pages tab by clicking the edit button.
This is a content page where you can freely add any content such as text, images, links, etc.
We are a locally owned and operated Canadian greenhouse business, established in 2005.
We are succulent growers.
We propagate and grow all of our succulents in our acreage greenhouses, and we retail and wholesale to the Canadian and local markets.
Our acreage greenhouses are open to the public on weekends seasonally.
We also have the Slice & Sizzle, an on-site licensed cafe which is open seasonally to the public on weekends May thru October. Our Treats Concession Stand is also open on weekends seasonally and serves soft ice cream, hot dogs and other tasty fare.
Our restaurant can be booked for private functions pizza parties (MYOPs) and private multi-course group dinners any day of the week year-round.
Visit our acreage Tasting Studio which carries our flavoured Extra Virgin Olive OIls and Balsamic Vinegars. The Tasting Studio also has spices from around the world, old style and vintage candy, our artisan breads and pastries baked on site, plus Copper Kettle Fudge created in our Candy Cave.
We always have quality antiques, vintage items and thrifting items for sale.
Solar Gardens is a nursery just 20 minutes southwest of Saskatoon.
content page
This is a content page where you can freely add any content such as text, images, links, etc. You can edit all of this text and replace it with what you want to write. Use the advanced editor to design this content page.
Edit your content page from the Pages tab by clicking the edit button. This is a content page where you can freely add any content such as text, images, links, etc. You can edit all of this text and replace it with what you want to write. Use the advanced editor to design this content page. Edit your content page from the Pages tab by clicking the edit button.
This is a content page where you can freely add any content such as text, images, links, etc. You can edit all of this text and replace it with what you want to write. Use the advanced editor to design this content page.
Edit your content page from the Pages tab by clicking the edit button.
This is a content page where you can freely add any content such as text, images, links, etc. You can edit all of this text and replace it with what you want to write. Use the advanced editor to design this content page.
Edit your content page from the Pages tab by clicking the edit button.
You can edit all of this text and replace it with what you want to write. Use the advanced editor to design this content page. Edit your content page from the Pages tab by clicking the edit button.
This is a content page where you can freely add any content such as text, images, links, etc.